How to install a toilet on a tile: an overview of the best ways and technical nuances
The variety of finishing building materials on the market opens wide horizons for homeowners. This factor has long been the reason for the growing popularity of ceramic tiles. Wall and floor ceramics are used for decoration of toilets and bathrooms.
The result of this finish is impressive, but in this case, every owner inevitably has to decide the question - how to install the toilet on the tile and fix the device without damage to the created interior.
The content of the article:
What is the peculiarity of mounting the toilet on the tile?
The procedure for installing plumbing in itself is no different from standard options. The difficulty lies only in the fact that the installation of any toilet on the tile automatically gives rise to the problem of fasteners.
The natural moment - on a smooth slippery surface it is not easy to “tightly” fix a household appliance weighing more than ten kilograms.
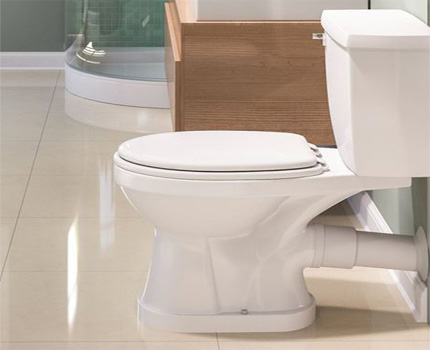
But along with the technologies for the production of ceramic tiles, the technologies for manufacturing fasteners are also being improved. Therefore, a difficult, at first glance, task of installing a toilet on a tile is solved in any case. The main thing is to get acquainted with the installation methodology and correctly apply it in practice.
There are several methods for installing plumbing on a tiled floor with subsequent reliable fastening:
- by tightening with fixing screws;
- using specialized adhesive pastes;
- by traditional cementing the base.
Regardless of the way the toilet is installed on the tiled floor, the main rule always remains relevant - caution and accuracy in the work. The tile does not tolerate rudeness. Any careless movement threatens to turn into trouble.
Method # 1: screw mounting
Design all kinds of toilets (except for exclusive models) provides for the manufacture of holes for fasteners. These holes are located at the bottom of the instrument, just above the plane of the sole.
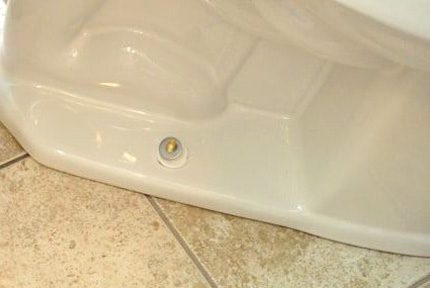
But there is also a considerable proportion of toilets, the design of which is designed for fastening with four screws (2 on each side). Usually these are large models with significant weight.
In order to fix the toilet on the tiled floor with fixing screws, we perform the following steps:
Tile marking and centering
If the task is how to install a toilet bowl of any of the marked configurations on the tile, the main part of the solution is the preparation of holes for dowels (plugs). But how to make holes in a ceramic tile without damaging this fragile material?
A special ceramic drill and Malomalsky experience with a drill will help here. But first, the master needs to mark the installation location and identify the fastener points.
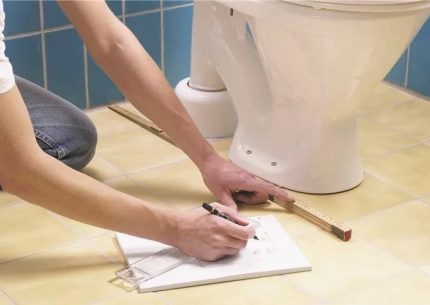
Then, directly on the tile, draw a marker with the border of the sole by contour along its contour. Next, the points of the centers of the mounting holes are marked. After completing the markup, the toilet is removed.
Core and tile drilling
The next step is a small core at points pointing to the centers of future holes. The core is performed by a well-sharpened punch. The point of the punch is directed to a point and inflicted with a light hammer several very weak strokes on the butt plate of the tool.
The goal is to chop off a layer of polished tile and get small holes with a radius of not more than 2 mm. This work must be done with extreme caution.
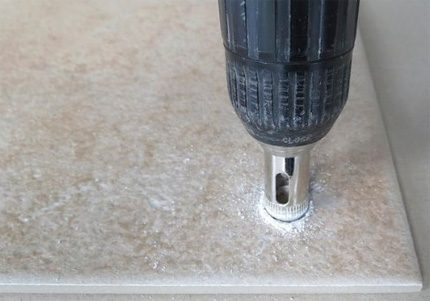
Having received small holes on ceramics, they take a drill, and a special drill for tiles is tucked into the cartridge. You must use a drill with the function of the engine speed controller.
Tile drilling only at low speeds. In the process, it is recommended to periodically water the drilling area with a small amount of water. In this case, we must not forget about the rules of electrical safety.
Drilling holes in the tiles is carried out to the border of the cement screed. Then the drill bit on the tile is changed to a drill bit for concrete, and the electric drill for a punch.
The diameter of the drill should not exceed the size of the diameter of the drill on the tile. Using such tools, drill holes in concrete to the depth of the fixing screws and press in stop plugs (dowels).
Sealing and screwing in screws
At the final stage of installation, the following actions are performed:
- The sole of the toilet is treated with a thin layer of sealant.
- Place the toilet exactly on the previously marked track.
- The fixing screws are equipped with gaskets.
- Insert the screws into the mounting holes.
- Screw in all the way with a tightening 1-2 turns.
Do not overtighten the screws. So you can damage the sanitary ware.
Method # 2: glue mounting
The method of gluing toilets is usually used when there is no possibility for the use of fasteners on screws. For example, the plumbing configuration does not allow or the owner of the home simply does not want to violate the integrity of floor ceramics.
There are various technical brands of glue and paste that can provide quite reliable fastening:
- silicone sealant;
- liquid Nails;
- Pastes of the Fix All series;
- epoxy resin.
How to perform the procedure? The installation method on the adhesive in terms of complexity of execution is significantly simpler than the method of mounting on screws. However, the sequence of the procedure actually repeats the technique with the screws.
Here, the main factor is the preparation of mounting bases directly on the tiles and on the bottom of the toilet.
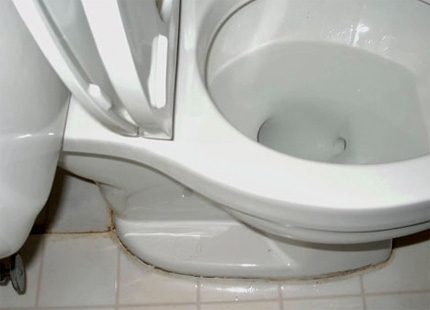
Surface preparation and treatment
Marking of installation boundaries is performed in the same way as in the previous installation scheme. Plumbing is put in the place where it is supposed fix the toilet to the floor, and delineate the interface area.
It is desirable to roughen the surface of the tile area where the sole of the toilet lies. To do this, you can use large sandpaper. Be sure to degrease the surface with white alcohol or similar substances.
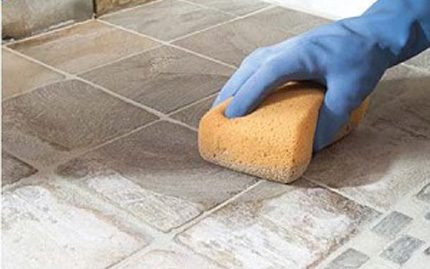
On the outside of the marked border, glue the tile with masking tape (to protect the tile from glue).
Bonding plumbing device
After the working surfaces of the tile and toilet bowl are ready, you must perform the following steps:
- Apply glue in a uniform even layer to the sole of the device.
- Carefully put the toilet in its "native" place.
- With a small periodic force (10-15 seconds), press the plumbing to the floor.
- Remove residual adhesive material along the outsole.
Installed plumbing must be allowed to stand for at least a day without applying any action to it. This time is enough for the adhesive to transition to a state of solid reliable fastening.
All that remains is to remove the protective masking tape and after 3-5 days you can begin to fully operate the plumbing fixture.
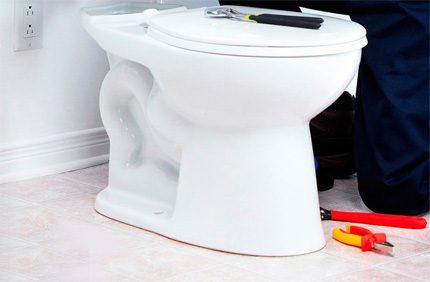
The use of technology with adhesives is not recommended if it is possible to use the standard version fixing the toilet to the floor - mounting on bolts. With all the advantages of adhesives, it is extremely difficult to choose the perfect composition for glossy surfaces.
But if such a method has already been chosen, it is worth paying special attention to the preparation of glued surfaces. In addition, it is recommended to select the optimal glue by the method of trial bonding of test materials.
Method # 3: cement clip
On a tile floor, a plumbing fixture can also be installed in the toilet using cement mortar. Such a technique is practiced in individual cases, and it has shown quite acceptable results.
The technology of "landing" on cement, however, requires careful preparation of the working surface of the tile. In particular, it is necessary on the working area (the landing area of the bottom of the toilet bowl) to make notches, cuts, bully (create a corrugated surface).
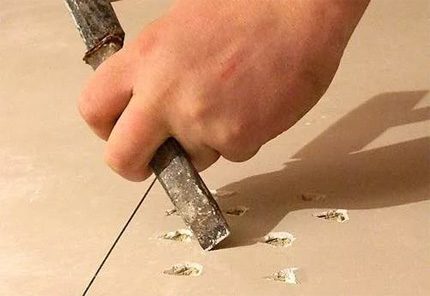
Perform this work with a hand tool (chisel, punch) or power tool (grinder, grinder). The option of drilling shallow holes on the tile throughout the working area is not excluded.
Creating a corrugated surface at the place where the toilet is bonded to the tiled floor will provide better contact between the cement mortar and the tile.Sustainability tile installed plumbingThus, it is reached to the level of fastening with special adhesive compounds.
Preparation of ordinary solution
A cement mortar is usually prepared on the basis of a mixture of cement with quarry sand in a ratio of 1: 2. Initially, being dry, both components are thoroughly mixed.
Then, water is added to the container with the resulting mixture in small portions with constant stirring. In total, the volume of poured water should not exceed one third of the mass of cement in the solution.
So get a cement mortar for fastening the toilet with a tile.
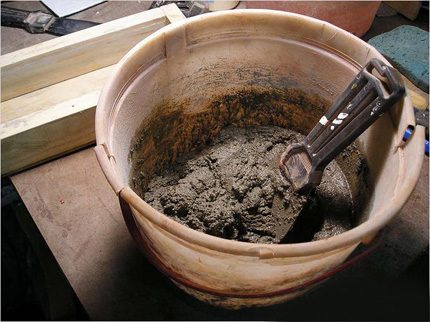
Final installation steps:
- Moisten the work surfaces (floor and sole of the toilet bowl) with water.
- Cover the working area of the floor within the boundaries of the bottom of the device with cement mortar (layer thickness 7-10 mm).
- Put the toilet in the place of dislocation and, with a little effort, briefly press it to the floor.
- Remove excess mortar with a spatula at the borders of the landing.
- Keep the installed device in a calm state for at least 24 hours.
To fully use the toilet should begin no earlier than 3-5 days.
Liquid glass cement mortar
The practice of cementing toilets on tile floors does not preclude the use of upgraded cement mortars.
So, in a plumbing installation, a solution was tested and showed good results, where along with cement and sand there is liquid glass. But various options for obtaining such solutions showed that only with a ratio of cement to water glass of 1:10 it is allowed to use a solution for installing toilets on a tile.

Meanwhile, the technology for the preparation of cement slurry containing liquid glass has its own characteristics. For example, you cannot mix liquid glass with an already prepared cement-sand mortar.
The admixture is previously diluted with water and the dry cement-sand component is diluted with the liquid already obtained. When working with liquid glass, safety precautions must be observed.
Instructions for installing and connecting a toilet with an oblique outlet are given in next article, the content of which we recommend to read.
Conclusions and useful video on the topic
Here you will find everything about installing toilet bowls, including on tiled floors:
Installation of plumbing fixtures in the toilet on the tiled floor is possible. This fact is confirmed by several installation methods, each of which has been tested in practice and successfully applied.
Another question - the choice of a particular technology for installing on a tile must be compared with the load parameters that are supposedly possible during the operation of plumbing fixtures.
Want to share your own experience in installing and connecting a toilet? Do you have useful information on plumbing installation technology that visitors to the site have? Please write comments in the block below, ask questions, publish thematic photographs.

 How to fix the toilet to the floor: an overview of the technical details and the best installation methods
  How to install a toilet on a tile with your own hands: step-by-step instruction + installation features
  How to clean the toilet with a bottle: step-by-step installation + an overview of alternative methods
  Electronic toilet: device, types + overview of the best models on the market
  Fixing the toilet to the floor: an overview of possible methods and step-by-step instructions
  Securing the toilet lid: how to remove the old and install a new seat on the toilet
  How much does it cost to connect gas to a private house: the price of organizing gas supply
  The best washing machines with dryer: model rating and customer tips
  What is the color temperature of light and the nuances of choosing the temperature of the lamps to suit your needs
  Replacement of a geyser in an apartment: replacement paperwork + basic norms and requirements
I had experience installing the toilet on the tile. Screw mounting is by far the most reliable way. Judge for yourself: the weight of the toilet + the weight of the water tank + the weight of the person. The load is severe and unevenly distributed. It is doubtful that the adhesive bond will withstand. And certainly, landing on cement mortar will not help. He does not tolerate vibration and humidity. And in the bathroom, both of them will be mandatory.
It can screw the most reliable way, but underestimate modern adhesives is also not worth it. My toilet is fixed with silicone sealant and there are no problems with it.
I try to do all the plumbing housework on my own, well, at least as far as I have enough tools and skills. I installed the toilet myself, we have a tiled floor, I decided to fix it on liquid nails, and for strength I fixed it on 2 screws and went around the perimeter with sealant, for additional insulation, a fortress. The toilet is tight. So anything is possible.