DIY video surveillance for a private house: design + installation rules
If you are the owner of a private house, then you probably have repeatedly thought about how to protect it from intruders. Is not it? One of the most affordable ways is to install video surveillance on the territory.
You can entrust everything to a security organization, but this is a more expensive option. It is much cheaper to install video surveillance for a private house with your own hands. We will tell you how to properly design such a system and help you choose the right cameras. In the article you will find step-by-step installation instructions.
The content of the article:
Surveillance Design Steps
To personally organize video surveillance on the site is not an easy task, but quite real. Of course, you will have to tinker a bit, but for the sake of maintaining material values and the safety of households, it is worth doing.
Stage # 1 - determine the number of observation zones
In order to determine the number of observation zones, it is worth knowing what this concept implies. In this case, the observation zone means a part of the territory falling under the camera's view.
In addition, the zone can be controlled by one or several cameras, and this issue needs to be decided before the start of installation work. If there is a desire to “see everything”, then it is worth noting that this will be a rather expensive option, in many cases completely unreasonable.
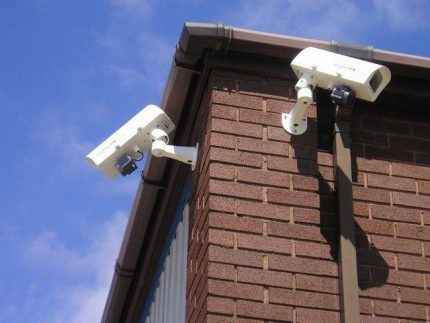
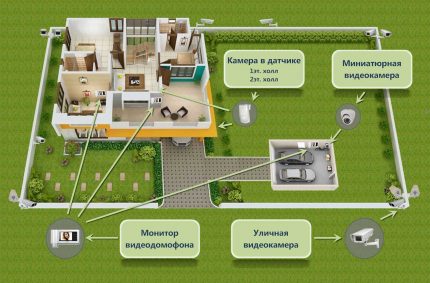
Mandatory places for installing cameras are:
- entrance to the house;
- entrance to the garage;
- wicket and central gate;
- places where it is easiest to enter the site;
- places where the equipment is stored;
- entrances to all buildings available on the site.
To make it easier to navigate, you can use the site plan. So it will be much clearer which zones should be covered by video surveillance.
Stage # 2 - choose the places to install cameras
By equipping a video surveillance system, owners of private houses can limit themselves to camera installation only on the site, but on condition that they will cover all places of possible penetration.
The number of devices is calculated solely from their own needs. If you need to monitor the perimeter, then just install the camera in the corners of the house. And for a general overview of the site, a camera on one of the poles will be enough.
To control the perimeter of the site, as a rule, cameras with a small viewing angle are used. They need to be installed on special supports or poles available on the site. It is also important to consider the presence of objects that can overlap the camera’s field of view (buildings, trees, poles).
To monitor the inputs, front-facing cameras with good resolution are most often installed. For example, for the front door, you can install a peephole camera, and when entering the site - video surveillance is carried out using a video intercom.
In addition, cameras must be placed on the site in such a way as to avoid deliberate damage to the device. Also, equipment should be well protected from adverse environmental influences.
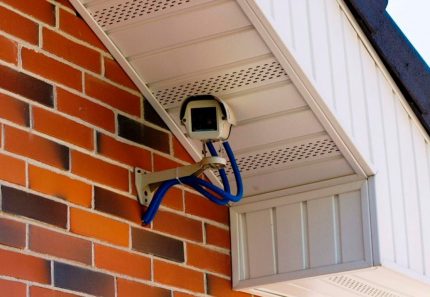
Be sure to include the night function for the selected model. So, contrary to popular belief, the infrared backlight of a device often cannot provide enough lighting for shooting.
Standard Surveillance Methods
The main components of a video surveillance system are cameras. Their selection should be given special attention. Costly systems are generally more complex to install. And cheap, outdated models will produce a blurry image.
To monitor the perimeter of a private home ownership, the number of cameras can vary from 8 to 16 pieces. There are two main types of cameras - IP and analog, below we will talk about them in more detail.
Below are some options for the location of surveillance cameras:
Option number 1 - analog camera
It is a device that can be connected to a computer or TV and see the image. Processing information from such cameras and recording it on a medium requires preliminary conversion to digital form.
For this purpose, a recorder is used, so in practice it makes no sense to use an analog camera without a recorder. It used to be that analogue devices broadcast extremely low-quality images.
Indeed, the previously released PAL standard (720 × 576), corresponded to 0.4 megapixels - certainly not enough to get a high-quality picture.
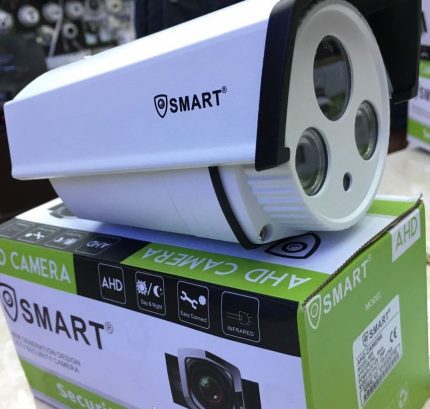
Now there are devices with a resolution of up to 2 megapixels, transmitting a color image. To transmit the signal in analog cameras, a coaxial cable is used. When installing modern AHD equipment, it is worth remembering that the cable length should not exceed 500 meters - compliance with this condition will help to avoid loss of image quality.
The price range of analog CCTV systems is much lower than that of IP systems. Another plus is the ease of installation and configuration of equipment. Among the shortcomings, we note the not too impressive functionality of the devices and their incompatibility with old equipment.
Option number 2 - IP camera
Digital IP cameras are self-contained devices. And to record what is happening on the media, some models can do even without a recorder. Digital devices have several advantages that distinguish them from analog models.
We list the most significant of them:
- High resolution broadcast picture (up to 8 megapixels) and scalability.
- Information is recorded through the cloud service.. To configure the system, you only need to download and install the program.
- Wireless connectivity equipment allows you to view the image from anywhere in the world.
Of course, IP devices are not without drawbacks, the main of which is their cost. Another significant minus is the incompatibility of cameras and DVRs from different manufacturers.
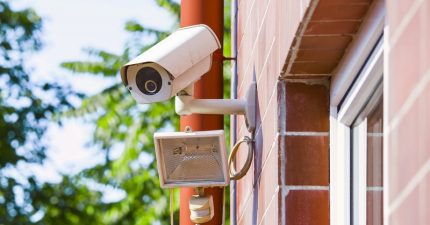
Which option to stop is the choice of the consumer. With a large length of cable lines, it is worthwhile to give preference to analog models, and if you want to install a pair of cameras at a short distance from the DVR, it is better to choose IP devices.
The main stages of system installation
After the cameras have been selected, their number and places for installation are determined, you can proceed to the independent installation of the video surveillance system.
To do this, you will need:
- cameras
- DVR
- Power Supply;
- KVK cables and connectors;
- router
- USB modem.
Next, we will briefly talk about what stages the installation process consists of, and what needs to be done during the work.
Stage # 1 - laying cable routes
To combine all the components of the system, it is necessary to correctly position the tracks in the device of which cable for internet. Coaxial cable is used to lay tracks for analog systems. It does not require the use of additional video adapters, and its shielded coating will protect the system from unwanted interference.
In IP video surveillance systems, twisted pair cable is used to lay cable routes. It is a cable with several pairs of conductors intertwined. Due to this interweaving, the influence of electromagnetic interference is significantly reduced.
As a rule, the laying of the line starts from the farthest points from the DVR, only after that they start connecting nearby objects. But regardless of the location, the cable length must be calculated with a small margin.
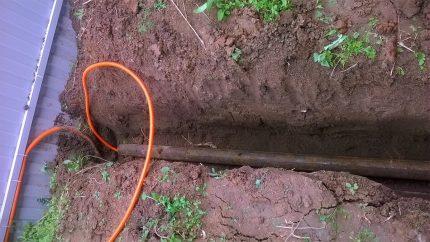
To monitor the perimeter of a private house, it is planned to lay cable lines on the street.
To this end, two methods can be used:
- Open. When laying along the fencing of the object of observation or using additional supports. In this case, it is worth taking care of protecting the lines from adverse conditions. So, it is not necessary to neglect the insulation, and use the "air" lines more than 50 m long.
- Hidden. In this case, the cable is laid underground or inside the walls. For this purpose, special corrugated tubes can be used. But, from the point of view of profitability, it is much more profitable to use ordinary metal-plastic water pipes.
Observing the safety rules, it is worth noting that the lines of video surveillance systems should not be located closer than 40 cm to power cables. This will help prevent broadcasting from cameras from interference.
If such a distance cannot be maintained, they must be placed in a dielectric cable channel or a grounded metal sleeve.
Stage # 2 - mount cameras
When installing cameras, it should be borne in mind that they should not only provide an overview of the protected area, but also be invisible to attackers. In addition, monitoring devices must be installed in such a way that they can be easily reached in the event of a breakdown.
To connect analog models, you need a coaxial cable with a tulip connector:
- red wire - to connect power;
- white and yellow wires - to receive a signal.
Digital video cameras are connected using a twisted pair cable, two RG-45 connectors and a power cable.
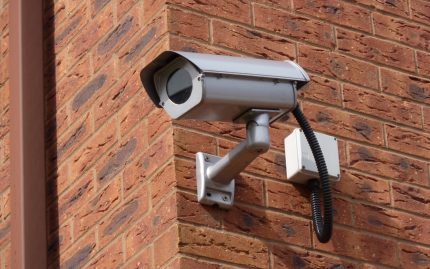
As practice shows, for mounting video cameras on the street, you should not use the fasteners that come with the cameras - often, they turn out to be completely unsuitable for this purpose.
It is best to separately select reliable fasteners - this will avoid camera vibration or its fall, for example, from strong winds. For security reasons, experts recommend that you do not install video cameras on metal holders. In the event of a thunderstorm, the device may turn into a kind of lightning rod.
Stage # 3 - put the DVR and connect the system
Despite the fact that the DVR is one of the main components of the surveillance system, connecting it to the camera system is not difficult. The most important thing is to correctly connect the devices to the connectors intended for them.
It’s better to overpay a bit and purchase DVRs with the PoE function - it provides power to the cameras. If you use other devices, you will have to lay a separate cable to power the surveillance cameras.
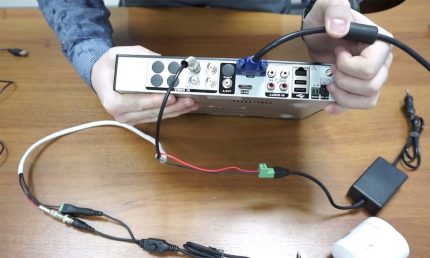
For the correct and uninterrupted operation of the recorder, it is worth placing it in places with good air circulation. Do not allow the device to overheat. By connecting all the components, you can begin to supply power to the devices. The registrar is connected first, and only then the cameras.
If the PoE function is not in the recorder, then be sure to observe the polarity - plus is connected to plus and minus to minus. All connectors and joints must be protected from the influence of the external environment so that their oxidation does not occur. For this purpose, you can use special junction boxes.
Stage # 4 - do the hardware setup
The final stage of installation and connection of a video surveillance system for a private house is the setup of equipment. We can talk about fine-tuning the equipment for a very long time, here we will focus only on what stages it consists of.
So, the standard equipment configuration scheme includes the following:
- Setting the time and date on each of the devices. To do this, in the system settings you need to select the date and time for each camera. To exclude the display of the wrong time, it is necessary that the time zone on the router matches the settings of network devices.
- Formatting drives for storing information. Formatting of hard drives for video surveillance systems can be performed using the web interface, using the recorder itself, using the IVMS program.
- Configure cameras. Setting up recording devices consists in adjusting the angle of inclination and rotation in such a way as to cover the viewing area as much as possible.
- Set up video recording. As a rule, video recording settings are performed in the DVR client application. This program allows you to manage a large number of cameras from one PC, and everyone can easily understand its interface.
- Configure remote access to cameras. It can be carried out using cloud-based video surveillance services or by entering the IP address in the search bar of the browser.
Having completed all these settings, we can assume that you have successfully coped with the arrangement of video surveillance.
Common mistakes in the organization of video surveillance
When connecting a video surveillance system for your home for the first time, it is usually very difficult to avoid mistakes. But worth a try.
Below we will talk about the most common mistakes made by owners of private houses:
- Incorrect calculations. This is the most common mistake made by almost everyone who faces the installation of video surveillance for the first time. In order to avoid it, you need to correctly measure the distance from the cameras to the recorder, and based on this, select the type of cable. Only correct calculations guarantee a high-quality image and high data transfer speed.
- Power shortage. The choice of power source has a significant impact on the smooth operation of recording devices. This especially affects their work at night. And if a DVR without the PoE function is included in the system, special attention should be paid to camera power.
- Information Storage Method. Everything is simple here, the more and longer you want to store information, the larger the hard drive will be needed. Modern devices have a large volume. For example, disks with a capacity of 3000 GB allow you to store video footage captured in 10-45 days.
All these factors are important in the independent arrangement of a video surveillance system.
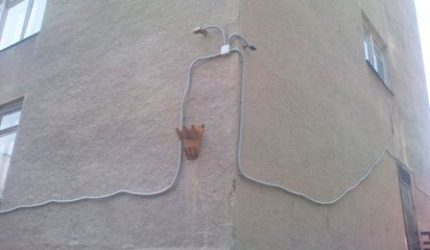
Wrong choice of system components and erroneous calculation of their quantity cannot guarantee the high quality of the work done.
You will learn how to equip private property with all kinds of tracking, control and equipment control devices from next articlededicated to equipping homes with intelligent technical systems.
Conclusions and useful video on the topic
In the above material, we examined the main stages of installation and design of video surveillance systems for a private house.Below we offer you a selection of videos containing recommendations for installation and the intricacies of connecting with your own hands.
The video will demonstrate the difference in the recording quality of the analog and digital models:
And how to independently connect and configure a surveillance camera you will learn from the next video.
From the video you will learn about the independent connection of IP cameras to the DVR and their subsequent configuration.
You can learn about how to gradually connect a video surveillance system for your home from the following video:
In the next video, we will talk about the most common errors when installing video surveillance on your own.
If you wish, you can install the monitoring system and connect the equipment yourself, the main thing is to draw up the correct plan and adhere to it clearly.
But, if you are not confident in your abilities, it is better to overpay a little and entrust this work to professionals. In addition, do not forget that any equipment needs regular maintenance.
To add to the life of the video surveillance system, you need to periodically clean the cases and lenses of cameras from dust, and also inspect them for mechanical damage.
Tell us about your experience in the selection, installation and operation of surveillance systems. Share useful information on the topic of the article. Please leave comments, ask questions and post a photo in the block below.

 Installation of CCTV cameras: types of cameras, selection + installation and connection do-it-yourself
  Remote lighting control: types of systems, equipment selection + installation rules
  Climate control for home and apartment: device and system advantages + subtleties of choice and installation
  Smart home based on Arduino controllers: design and organization of controlled space
  The Smart Home system for a country house: advanced devices for automatic control
  Smart devices for the home: TOP-50 of the best gadgets and technical solutions
  How much does it cost to connect gas to a private house: the price of organizing gas supply
  The best washing machines with dryer: model rating and customer tips
  What is the color temperature of light and the nuances of choosing the temperature of the lamps to suit your needs
  Replacement of a geyser in an apartment: replacement paperwork + basic norms and requirements
Repeatedly convinced that in a private house without video surveillance NI-KU-YES. It is in the apartment to put high-quality entrance doors enough to feel protected. Well, and also the bars on the windows, if the floor of the residence makes you nervous. A private house is a completely different system. Here you are much more vulnerable, and on your own territory.
Typically, a private home includes at least some area around. When installing video surveillance, I highly recommend placing the cameras so that their field of view covers the entire area and there are no “blind spots”. And that is, those who put the camera purely in front of the entrance, as if the owners of bad intentions would not guess to go “from the rear”.
No less strongly advise you not to save on video surveillance. Safety and life are most valuable. In addition, equipment from a more expensive segment has a number of useful options that the cheapest cameras lack. For example, I have cameras with motion sensors installed around the perimeter of the site. They start recording exactly when they spot a moving object. The disadvantages of such cameras are that a large animal or bird also provokes the inclusion of recording, but a huge plus of this option in the absence of terabytes of useless frames with a static picture.
If you add a touch lamp that is turned on by the same principle to a camera with a motion sensor, you get both a guard and a deterrent system. Very good for cottages where the owners do not live all year. By itself, the touch flashlight is already a good repeller, and if the camera comes with a bonus, recording here and now, then this is generally chic) It will not stop only the finished scumbags, which, pah-pah-pah, are still a minority.
A powerful video surveillance system is needed for those who live on the outskirts of the country. If we are talking about the private sector, like mine, then enough pairs of cameras on the front door and back door. I have an extra standing in the yard so that I can see the entire area around the car. By itself, such a system will not save from thieves, but it can become evidence in the investigation, if God forbid they steal it.
As I understand it, analog cameras are more for a situation when a security guard sits in front of the monitor and controls the situation. Well, there’s a question about the quality - I need to be able to read license plate numbers and a person’s face from about 10 meters freely. In general, now I am more inclined to an IP camera. Probably also with a motion detector, to save space.
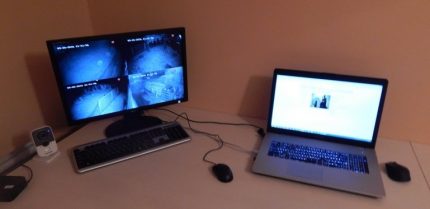
If you need high detail and picture clarity, then analog CCTV cameras may not even be considered. For an illustrative example, I'll throw you a photograph of a video surveillance system that is installed with a friend in the yard. Now I completely abandoned analog cameras, switched exclusively to IP cameras.
Photo from the PC monitor to which video surveillance is connected. The picture quality is not the best, but it is noticeable that the analog camera is losing. I advise you to configure the recording of the image so that the material is stored on a PC and simultaneously downloaded to the cloud.