Drainage in a private house: device methods, schemes + main stages of construction
Properly planned and equipped sanitation in a private house provides a comfortable life for the owners, guarantees a long life of the building. After all, a modern cottage is not just a construction, but a complex of interconnected systems.
Is it possible to imagine such a housing without plumbing and sewage? No. Therefore, a drainage project with a layout of the main components is developed first. Let's look at how the calculation work is done and the installation is carried out together.
The content of the article:
Standard Design Elements
The general principle of creating a wastewater system is based on the acceptance, transportation, treatment of effluents and their removal from the site or accumulation. A number of elements are used to construct the structure. And each of the links in the chain performs its function.
Sink receiver
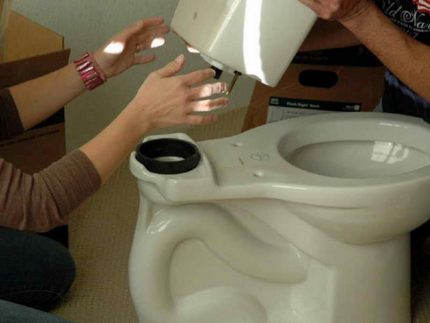
Any hole is meant here, with the help of which the reception and redirection of drains to the right channel is organized. Examples: sinks, toilets, drainage hatches, roof funnels, gratings, drains.
Such devices are made of durable waterproof materials that are chemically resistant to wastewater, such as cast iron, ceramics, sheet steel, non-ferrous metals, and special plastic.
The main task of such devices is to receive and remove fluid into the gutters.
Gutters and sewer pipes
They receive drains from the receivers. The function of this link is to move the contents to a well or a sewage treatment plant.
Pipes and gutters are made from different materials. Asbestos cement is suitable for domestic sewage, provided there is no risk of mechanical damage.
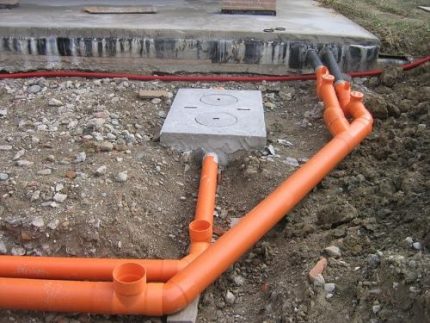
Metal and ceramics are also used. It is permissible to divert from the washbasin, sink, bathtub from un galvanized pipes. The method of laying elements is above ground and underground.
And about how to choose pipes for arranging an external sewage read in this stuff.
Tank for settling or cleaning
To go to the discharge stage, drains from gutters or pipes fall into the “filters”. Storage tanks are made of plastic, concrete or metal.
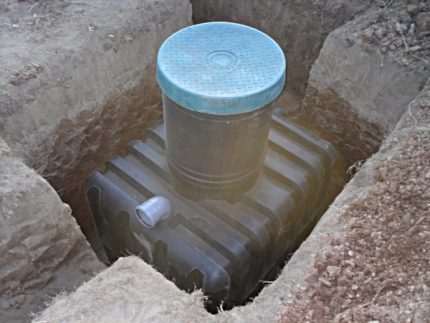
If you choose plastic, lay in the scheme the creation of a special pit or metal casing, so that the walls of the tank do not deform under the pressure of the ground masses.
Concrete drives are suitable for arranging a drainage or storm system, but they are not as durable as PVC.
Metal tanks are necessarily protected by paints, enamels. Their main drawback is the weight, so installation requires assistance.
According to the principle of action, drives are divided into:
- drainage wells;
- sedimentation tanks;
- autonomous cleaning systems.
In tanks, the liquid is cleaned, converted into technical and can be used for watering a personal plot, other domestic needs.
Purified Water Discharge
The choice of the final disposal site depends on the quality of the treatment plant. If you equip a station with mechanical and biological treatment of sewage on the site, the resulting liquid can be displayed on the relief. The best solution for stand-alone circuits is a three-chamber septic tank.
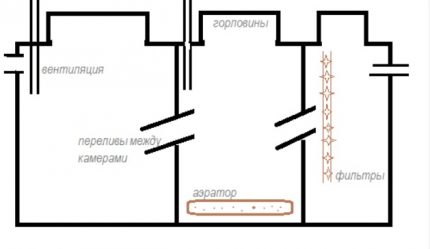
The first chamber is a sedimentation tank with anaerobic bacteria, where large and heavy fractions settle. In the second tank there is a compressor that activates the vital activity of aerobic microorganisms. In the third compartment, the liquid is completely cleaned.
In total, there are three options for discharging effluents:
- river or ground - effective, but environmental pollution is possible;
- infiltrator - in it, the waste fluid is treated with soil and discharged with groundwater;
- storage device - it does not provide for disposal of water.
The general drainage system of the house is divided into internal and external. The first includes communications inside the house: from washbasins, toilets, bathtubs, fluid flows through pipes to one point. And it is already displayed in the external structure to the well.
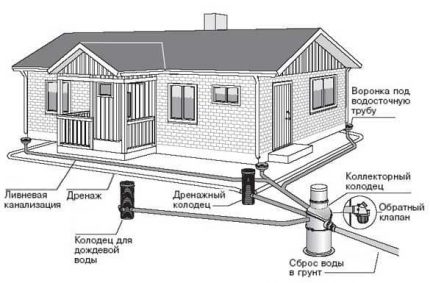
In addition to the household drainage system, it is also necessary to equip storm water so that atmospheric water from the roof is discharged to the surface of the earth or to the external network of drains.
Options and layouts
The scheme can be any, the main thing is that it effectively copes with the discharge of wastewater and does not lead to overflow of pipelines. A high-quality system always involves a simple, understandable construction project and minimal operational risks.
When choosing a scheme, several factors must be taken into account:
- Location of the house on the plot - the drainage system must go under bias and end close to the road.
- Landscape features - flat, lowland, slope.
- Soil type - sandy or clay (any system can be equipped with sand, but clay, includingits varieties, has its own characteristics).
- The number of residents and the area of the house - This factor affects the volume of tanks, pipe diameters.
- Freezing depth and groundwater location - it is important for calculating the laying depth and the need to use insulation.
All these parameters together change the drainage scheme, but the general principle and the required elements are preserved.
The only thing that remains constant is that the toilet always connects to a separate vertical riser to prevent the spread of unpleasant odors in the rooms.
Septic tank for an autonomous system
If the house is located far from the centralized sewage system, you need an autonomous drainage scheme with a septic tank or cesspool. The latter option is suitable if the house is not used for permanent residence.

In most cases, it is advisable to equip a septic tank. Its format is selected depending on the characteristics of the soil on the site. The simplest construction of two wells can be assembled for sandy soils with excellent natural drainage.
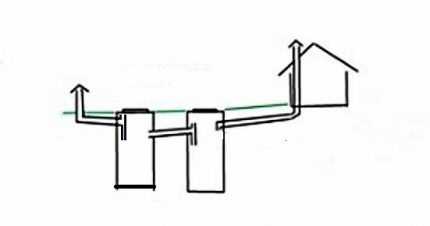
The well closest to the house is deaf. The bottom is concreted or the finished bottom is acquired. The objective of this element is to dissolve large fractions of the received effluents and clean them as much as possible. The extreme well is made without a bottom, but with a drainage field.
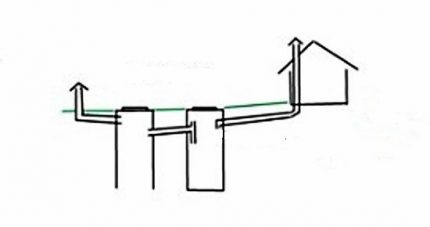
On a clay site, one must also take into account the volume of water that is not absorbed immediately after precipitation, but stands or moves over the terrain.
The septic tank does not settle down in a lowland, but on a flat part or hill. All wells are made closed. Sprinkling around them is done with sand.
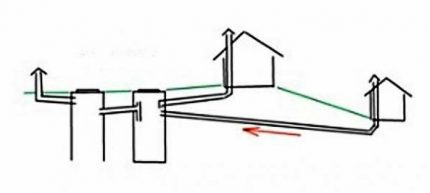
If the site is on a slope of the road and it is planned to build a bath lower down the slope, where to place a septic tank? If you place it near the road, how to raise the contents of the sewer from the bath, which will be below the septic tank?
In this case, the optimal scheme will be with two different septic tanks for the bathhouse and the house.
The volume of a septic tank can be calculated according to building standards. Usually for a family of 4 people a second well of 3-4 m is enough3 subject to continuous use of the system. The first is done a little more in volume.
Read more about the arrangement of the septic tank on the site Further.
Land drainage
Before starting construction, it is imperative to make a vertical layout of the site. This will create and improve conditions for drainage or water drainage from the foundation. The system itself is based on an understanding of the purpose of the individual parts of the drainage.
Depending on the purpose, the drainage can be of several types:
- cutting off the flow of water into the territory;
- partially removing drains or surface flows;
- melt water;
- basement floor;
- individual sewage system.
A different purpose implies a different approach to technical solutions. The second point is the operating conditions. There is drainage of complex areas, which has its own characteristics.
These are clay territories in a lowland or on a slope, with a high level of groundwater (seasonal, permanent).In the latter case, if there is an underground garage in the household, a basement, it makes sense to equip a deep drainage system.

For sections on the slope, a system of trays perpendicular to the slope or a drainage ditch along its upper boundary is provided. In lowlands, you can dig a pond to dispose of excess water.
Design and features of laying stormwater
The design of the stormwater shower includes all the same standard elements: storm water inlets, pipes and gutters, manholes, filters or sand traps. If underground laying is meant, pipes are used.
Ground laying involves the creation of surface ditches and the installation of plastic, concrete or asbestos gutters. The second method - open - is cheaper, less laborious, easier to operate, easier to repair.
There are two types of storms: point and linear. In point storm water inlets, it is located under the gutter of the internal or outside gutter. Further, all structural elements are assembled into a single network.
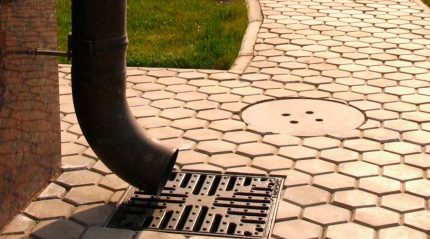
Linear diagrams are made up of pipes laid in the ground or channels. Water is collected and moved through trays equipped with grates or sand traps throughout the chain.
The design differences of the territory, the degree of coverage affect the choice of a particular stormwater scheme. The region of the construction of housing construction also matters.
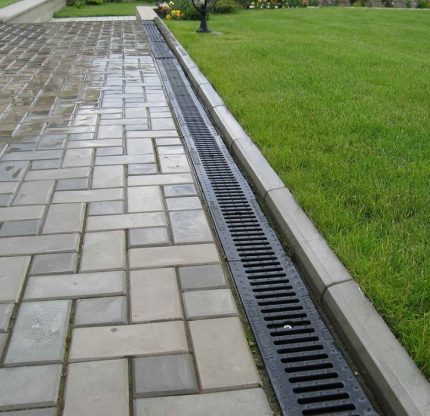
The type and depth of rainwater laying is usually found out by neighbors or in construction organizations that work in a particular area.
For most regions of our state, it is enough to deepen pipes or trays up to 50 cm into the ground, in some cases up to 70 cm.
It makes no sense to go too deep when installing collectors, manholes below the freezing point. It is more profitable to place them higher by laying a layer of heat-insulating materials (geotextiles, gravel).
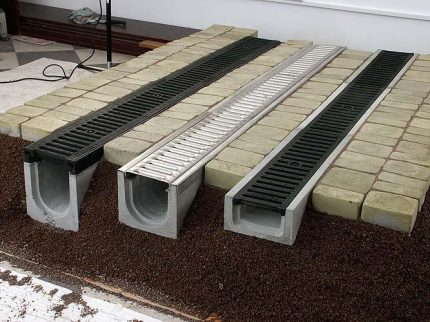
Concrete trays plus cast-iron grates - this combination is considered the “ideal pair” for reliability and durability.
It is especially relevant if a part of the storm is planned to move the car. Such trays are installed along the edge of the blind area, the entrance group. In the latter case, installation in the center is possible if the slope of the site allows.
Installation of a roof drain
Gutters are installed along the edge of the roof so that their edges are at least 3 cm lower than the plane of the roofing. This will prevent the gutter from breaking in the winter when snow masses enter it from the roof.
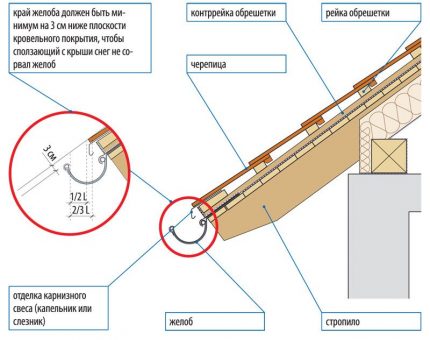
Then there is the assembly and installation of drainpipes, which are displayed in the prepared trays. Connections are mounted using funnels, storm water inlets.
We also recommend reading our article on how to equip storm sewers in the area. More details - go to the link.
Stages of arranging a drainage system
After the most suitable scheme is selected, the pipe diameter and the optimal slope are calculated on each section of the chain. Next, the entire system is assembled according to plan.
Stage # 1 - pipe diameter calculation
To determine the diameters of the pipes, it is necessary to calculate the passage of wastewater that will pass through this network.
First we find out what is the norm of water consumption per day.It differs and depends on the place of residence. In a small city, an adult uses about 200 liters, and in a metropolis - about 700 liters.
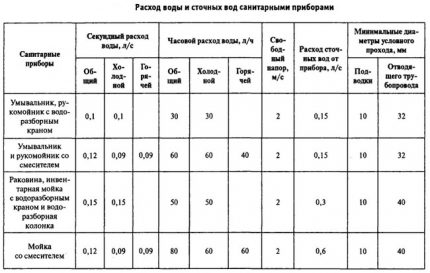
The diameter of the pipes is selected for a specific receiver. If this is a toilet, a large amount of waste is implied, so a pipe with a diameter of at least 85 mm is needed. Pipes with a diameter of 32 mm are usually connected to wash basins, washing machines, dishwashers.
Stage # 2 - determination of the slope for laying
Wastewater flows by gravity, so a slope is needed. With its help, the flow moves at the desired speed. The end point is the lower part of the drainage basin.
The maximum allowable slope for horizontal pipelines is 15 cm per one laid meter of pipe. But categorically it is impossible to make such a bias over the entire extent.

If the relief is favorable, the slope is natural and close to the slope of the earth's surface. If there are watersheds in the network, there is a transfer of drains from the bottom up or the total depth is more than permissible, a pumping device is needed.
Stage # 3 - pipeline installation
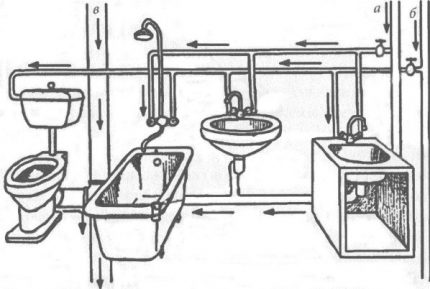
A pipe of the required diameter is connected to each receiver. It is permissible to lay pipes in an external way, it is less time-consuming, but not ergonomic. More often, communications are sewn into walls, for which ditches are made on surfaces.
According to TU, stop valves must be inserted into each branch. A thread is cut in metal pipes, a sleeve is installed in plastic pipes.
All taps are connected in a closed circuit. Here it is necessary to provide for the impossibility of redirecting fluid flows.
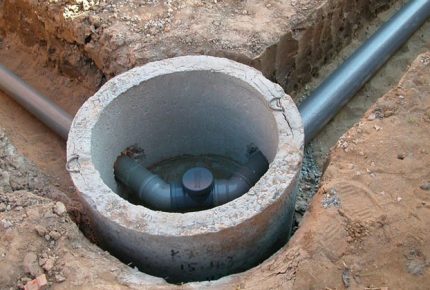
After laying domestic sewage an external one is created: trenches are excavated and a foundation pit is excavated for cleaning. Further, the walls of the trenches are strengthened and, if necessary, insulated with textiles or clay, concrete casing. Then pipes are placed in them.
Now you need to connect external to the external branches. Each joint is necessarily sealed and tested for strength.
At the last stage, a treatment plant is installed and drains are supplied to it, which serve as receivers of roof drainage, drainage installations, and pipes of the internal sewage system. It is recommended to equip special hatches in places of docking for the possibility of prompt repair of breakdowns.
Useful tips for arranging
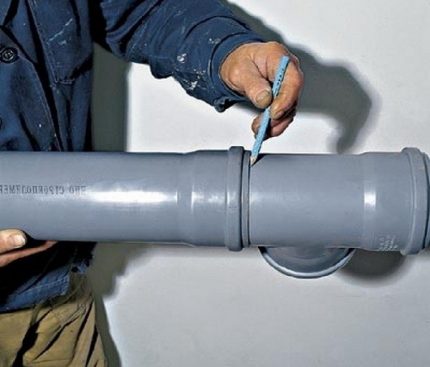
If there is a need to rotate the pipe by 90 degrees, it is better to organize two branches of 45. This will reduce the sharpness of the turn and create minimal resistance in the network.
It is impossible to organize drainage from the roof to the blind area. This will lead to waterlogging of the soil around the building and the loss of its bearing capacity.
The surface water drainage system and foundation drainage should not be combined. Their joint work is dangerous when rainwater enters the drainage and the foundation is flooded.
Do not forget to add cranes to the system that will prevent the redirection of flows in emergency situations or during repairs.
Conclusions and useful video on the topic
How to make a vertical layout of a flat area.
The scheme of drainage of the site from creating trenches and proper excavation to laying pipes and warming them with rubble is shown.
Laying the fan pipe around the house to the septic tank.
Analysis of pipes for external sewage. How they differ in color, how to choose a diameter and calculate the slope, what is a compensation pipe:
The whole process of installing a surface drainage system.
When choosing drainage schemes it is worth giving preference to simple designs that have already established themselves as effective for a particular area. There are many solutions, but options suitable for the southern regions are absolutely not viable in the northern regions.
In the planning process, it is necessary to take into account the future maintainability of the system, the full or partial availability of elements, the possibility of changing the chain if such a need arises.
Still have questions, find bugs or want to add interesting information to our material? Please leave your comments in the box below.

 How to lay sewer pipes in a private house: schemes and rules for laying + installation steps
  How to clean sewer pipes in a private house: varieties of blockages and methods of cleaning
  Sewerage in a private house: an overview of the options for arrangement + a step-by-step guide
  Pipes for domestic sewage in the house: a comparative overview of modern types of pipes
  Filter well: design, purpose, device technology
  How to clean the sewer pipe at home from clogging: solutions + prevention tips
  How much does it cost to connect gas to a private house: the price of organizing gas supply
  The best washing machines with dryer: model rating and customer tips
  What is the color temperature of light and the nuances of choosing the temperature of the lamps to suit your needs
  Replacement of a geyser in an apartment: replacement paperwork + basic norms and requirements
If only one toilet is planned in the house, then everything is not so complicated. The main thing is to dig a deep pit under the drive. Well, of course, put concrete rings, and on top an airtight cover. So no water gets in, and your drive lasts a long time. But to spoil yourself the pleasure of exploitation, if you throw sand and any garbage into the sink and toilet. So you can easily clog the sewer pipeline. In Russia, winters are cold, and the resulting blockage deep in the ground, in a plastic pipe, can destroy it by freezing. They are still flimsy. Warn your child and wife about this. System repair cost me dearly.
And we, as indicated here, made two communicating wells, so that from one when overfilling, it poured into the other. They only made a mistake, and at first they made an overflow pipe in the wrong place. A column of two concrete rings was dug into the ground, they didn’t put anything down, although according to the rules, sand and gravel should be filled up. It was easier for us, because apart from the wash basin and the washing machine, there is nothing in the house. A more complex system with the installation of a sewer station will need to be done next year, because We plan to make a toilet and shower in the house.
Hello. Please tell me, if you distribute this system of water branching into 15 houses with one toilet, bath and sink in each, how much will it cost? At least about?
The task, of course, is not an easy one, to be honest. Firstly, it is necessary to calculate the wiring in each c / a separate house. And then, taking into account consumption and water disposal, install a drainage system for 15 houses that will be connected to a single network. Here it is still important to know - do you have a central sewage system or septic tank? The second option on the budget will be exactly 20% more expensive.
I will provide you with material that will help you calculate the cost of wastewater for your private household for 15 houses. In any case, you will need a collector in the area into which water will be discharged, and from there go into the central sewer. Otherwise, the system simply can not withstand the load and stagnation forms.
So, you need to calculate the wiring for one house, the rest are typical, then the consumption and drainage, on the basis of this, select the pipes. Further, the meterage of the pipeline depends on the remoteness of the houses from each other and the discharge into the central sewer.
Knowing the diameter, footage of pipes, the number of adapters and fittings, you can calculate a more or less accurate project amount. Offhand at least 2 thousand dollars.