Do-it-yourself replacement of sewage in the apartment: detailed instructions for replacing riser and pipes
In older apartment buildings, the number one problem is often a defective sewage system. You must admit that it is unpleasant when the pungent smell of sewage spreads throughout the house, blockages are constantly forming or it is flooding the neighbors due to the old sewer pipes leaking. Remedy can replace the sewer in the apartment.
If you attract specialists, then updating the sewer system can fly into a pretty penny. But you can deal with this issue yourself. And we will tell how to do this in our article - we will talk about how to choose suitable pipes, and we will also give detailed instructions with visual pictures on how to replace the riser and pipes in the apartment.
The content of the article:
Types of pipes and selection tips
Before the dismantling of the old sewer system, it is necessary to calculate all the available points of intake in housing and draw up a diagram new sewage system. Not only plumbing is taken into account, but also appliances to which sewer pipes are connected.
Based on the scheme, they calculate the required number of pipes and additional elements: couplings, adapters, bends, and so on. So that during the installation of the system there are no problems with fitting components, it is better to buy all materials from one manufacturer.
Characteristics of ceramic sewer pipes
Such tubular products are made of high quality refractory clay. Inside, they are covered with a layer of clay glaze, which prevents moisture from absorbing into the material.
Pipes are produced with a diameter of 10-60 cm and a length of 100-150 cm. The overall dimensions and properties make it possible to use them in sewer systems.
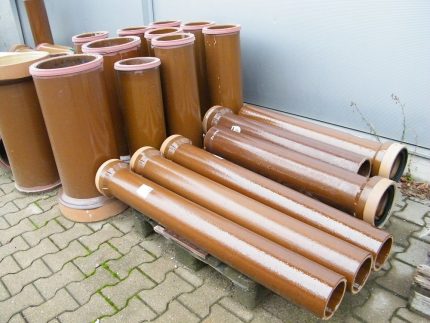
The main advantages of ceramic pipes include resistance to corrosion and aggressive environments.
Among the disadvantages, the possibility of damage due to a strong blow should be noted. In addition, the products are short (maximum 150 cm), during the installation process they will have to be connected more often, and this is more expensive in cost, and more effort will be spent.
Features of steel and cast iron pipes
Pipes made of steel or cast iron are also used for laying sewers. Steel pipe products can transport substances with high temperatures. They are durable and inexpensive. However, they are unsuitable for installation in apartments, as they are prone to corrosion.
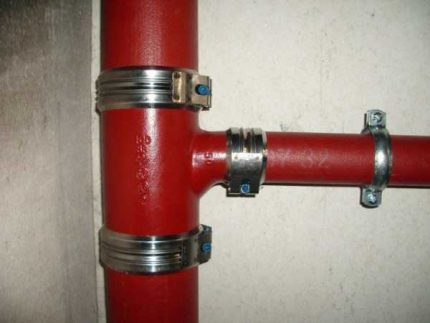
Unlike steel, cast iron pipes more resistant to corrosion processes. Cast iron can be used in the sewage system both outside and inside. The design will be durable and will last a long time.
However, if it becomes necessary to replace such sewer pipes in an apartment, the use of additional installation equipment will be required. The disadvantages of tubular products include high cost and heavy weight.
The main properties of polymer pipes
The best option for indoor sewer systems are polypropylene stabilized pipes. They are available in gray and manufactured by hot extrusion.
Main advantages:
- The walls are completely smooth inside. - waste easily slip into the pipe, without forming deposits on the surface.
- A light weight - It’s easy to work with pipes, even alone. The outflow finished circuit is definitely not able to push through the flooring.
- Corrosion resistance - polymers do not rust, so you can not be afraid that the pipe will “leak over time” and let it leak.
- Can transport waste with high temperature conditions - the material begins to melt at a temperature of +175 ° C.
- Quick installation and easy maintenance - there is no need to paint the pipes; they are simply wiped off from dust. If any part of the pipe fails, it easily changes without dismantling the entire sewer system.
Polyvinyl chloride pipes (PVC) also exist. They are resistant to ultraviolet radiation and have good strength.
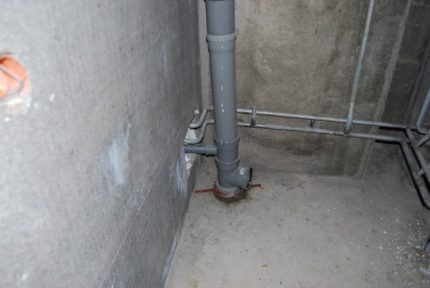
PVC pipes can be used in the sewage system, but when heated, the material emits harmful substances. Therefore, they are more often used for arrangement outdoor sewer system. In addition, such pipes have low resistance to aggressive environments and the wear resistance of the surface is worse than that of polypropylene variants.
Polymer pipes are interconnected by the bell method - the narrow end of one pipe is placed in the bell (extended part) of the other. To seal the pipe connection use sealing material.
More recommendations and features of the choice of pipes for internal sewage we examined in next article.
Step-by-step replacement instructions
Of the tools you will need a drill or punch, an assembly gun, a chisel, a hammer, an adjustable wrench, a grinder, a level and a pencil. The set of necessary fixtures depends on the type of connection and the material of the sewer pipes: ceramics, metal or polymers.
Stage # 1 - dismantle the old sewer
Upper floor housing owners can immediately begin work on replacing the sewer system. The remaining residents of multi-storey buildings, before changing the old sewage system in their apartment, need to warn the neighbors from above so that they do not drain the water.
Prior to dismantling, shut off the water and disconnect all plumbing so as not to damage it during the repair work. Old pipes that are adjacent to the riser must be sawn in a convenient place and removed from the pipeline system. After that, they begin to dismantle the riser. You need to do this all carefully so as not to spoil the pipes that go to the neighbors.
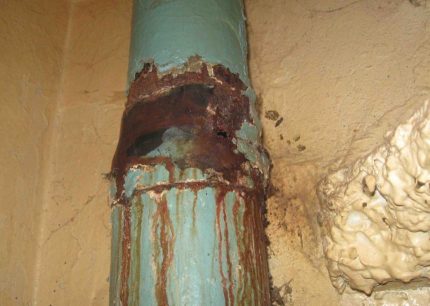
Dismantling algorithm:
- At a slight angle grinder make two horizontal cuts: the first with an indent of 10 cm from the ceiling, the second - 80 cm from the tee. Do not immediately cut the pipe to the end, because you can pinch the disc of the grinder.
- The chisel is applied to the upper file - you need to hit it with a hammer. To carry out the same manipulation with the lower incision. An old cast-iron pipe between cuts should crack and its pieces can be easily removed after that.
- The protruding part of the pipe from the ceiling is covered with a film.
- Disassemble the bottom of the riser with a tee and fittings. You can break the soured fastening of the tee with a crowbar. Cement at the points of connection of the tee is removed using a perforator.
- Dismantle the old tee from the system. If the tee cannot be removed, then the fitting is cut off with a grinder, retreating from the socket 3 cm.
- The pipes that remain are preparing for the installation of a new riser. Remove contamination and grind pipe ends with a grinder.
The quality and speed of installing a new sewage system depends on the correct dismantling of the old sewer system.
Stage # 2 - assembly and installation of the riser
Sewer riser in high-rise buildings is a complex design. To replace it, the apartment will need polypropylene pipes with a diameter of 110 cm, a tee with bends of the same material, clamps or a special mount for the riser.
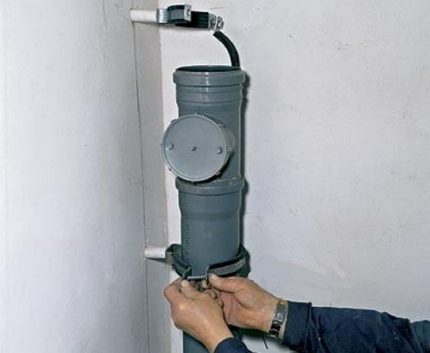
To equip the transition between the remnants of the cast-iron pipe and plastic pipe products, you need to purchase rubber cuffs, as well as a compensation pipe.
It will be required during the installation process and liquid soap. Apply it to the edges of the pipes, thereby facilitating their entry into the connecting elements. You will also need a vertical level.
First, install the tee below. To do this, it is inserted into the socket of the pipe with a rubber cuff and the joint formed is sealed with a winding or sealant. The gap between the vertical pipe and the tee should be minimal - no more than 10 mm.
You should also attach a rubber cuff to the end of the pipe that protrudes from the ceiling. Next, a special adapter is connected from above.
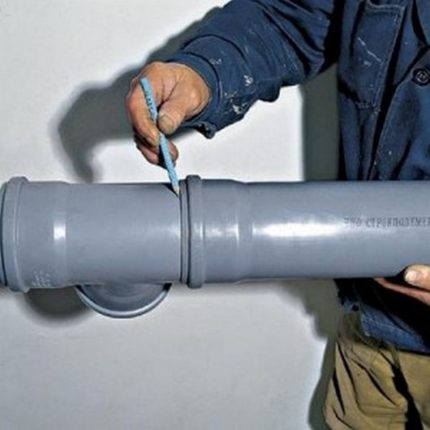
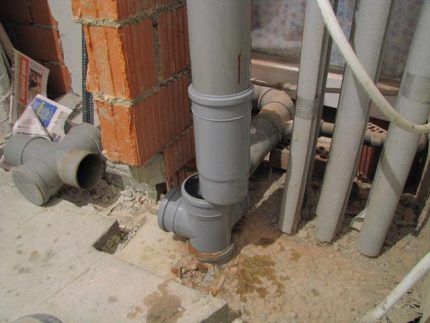
Try on the pipe for the riser and cut the required length. Perform a test fitting of all elements already worn with compensators.
After they make the marking of the mount and install the upper and lower clamps. If there is a small gap between the wall and the future riser (up to 7 cm), the clamps are attached with dowels. In another case, metal corners or a board pre-treated with an antiseptic are first attached to the wall.
Rubber gaskets are inserted into the structure and the riser is mounted in the lower tee. Then connect the upper part and tighten the clamps. In apartments with a standard ceiling height, three clamps are usually used for fixation.
Stage # 3 - Internal Pipe Routing
But the inner pipe routing perform according to a pre-compiled scheme, starting from the riser. After installing and connecting plumbing.
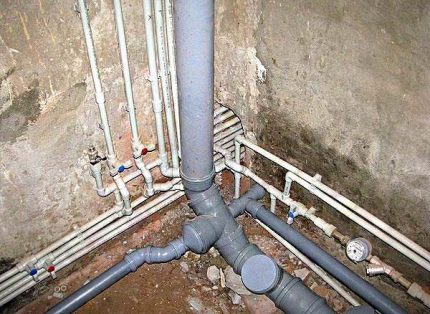
The fastening of the pipes should be combined: rigid and in some places floating. Otherwise, internal stress cannot be avoided.
The nuances of the work:
- in order to prevent the flow of the system, the sockets should be mounted in the direction of the movement of effluents;
- sewer slope is done towards the riser;
- You can not change the shape or dimensions of shaped parts;
- The connection of the riser and the outlet pipe cannot be made at right angles.
When the installation work is completed and all the plumbing is installed, the system needs to be tested. To do this, drain water from all devices, look at the outflow speed and check for leaks.
Conclusions and useful video on the topic
Visual installation instructions for sewer pipes are given below:
Almost everyone can independently change the sewerage in their apartment. Especially if the system will be made of polypropylene pipes. You do not need to use welding to connect them. Pipes are inserted into the socket with rubber gaskets, and achieve perfect sealing due to the sealant. Installation of such a sewer system will cost inexpensively, and it will last longer than a cast-iron one.
Have you recently changed the sewage system in your apartment and want to share your experience with other users? Tell us what difficulties you encountered in the process of replacing the riser - the comment form is located below.
If you have questions about the topic of our publication, do not hesitate to ask our experts for advice - we and other site visitors will try to help you.

 Pipes for domestic sewage in the house: a comparative overview of modern types of pipes
  Insulation for sewer pipes: types, selection rules and overview of laying technology
  Sewer pipes PVC and HDPE for outdoor sewage: types, characteristics, advantages and disadvantages
  Do-it-yourself sewerage for a bath: diagram and step-by-step instruction on the device
  How to make a drainage well with your own hands and bring pipes to it
  How to make a sewer well: do-it-yourself installation and installation
  How much does it cost to connect gas to a private house: the price of organizing gas supply
  The best washing machines with dryer: model rating and customer tips
  What is the color temperature of light and the nuances of choosing the temperature of the lamps to suit your needs
  Replacement of a geyser in an apartment: replacement paperwork + basic norms and requirements