How to install a faucet in the kitchen: step-by-step instruction on the work
A kitchen is one of the rooms in a house or apartment that is operated in an enhanced mode. The kitchen faucet is subjected to significant daily stresses, so it is advisable to choose a quality product.
After the choice is made, you need to figure out how to install the mixer in the kitchen, having fulfilled all the engineering requirements for installation. And how to do it right, read in our material.
The content of the article:
What to consider before starting the installation?
First you need to decide on the installation method: the mixer can be mounted on a countertop, sink body or on a wall. In advance, it is necessary to outline the location of the hot and cold water pipes.
At the same time, the joints should be accessible in case of subsequent repair or maintenance. If you plan to install the filter, then the place for its installation must be provided in advance.
A few recommendations for choosing a mixer
The mixer is always operated in tandem with a sink, so when choosing a product, you need to proceed from its size and depth, as well as:
- the distance between the wall and the hole for the mixer;
- the diameter of the hole for the insert of the mixer;
- drain points.
The mixer should be long enough spout after installation accounted for the center of the sink or sink.
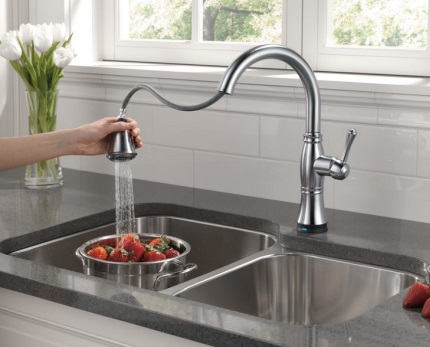
Heights spout should be enough to put a high pot under the tap. But, do not go to extremes and buy too high a mixer. Otherwise, splashes are created that scatter outside the sink.
Another important parameter regarding the geometry of the mixer is the angle of rotation. If the sink is close to the wall, then just install the mixer with an angle of rotation of up to 90 degrees. If you use a sink with two bowls, then you need to pay attention to models with a rotation angle of 180-360 degrees.
A variety of styles of plumbing fixtures
Having finished with the technical part, you need to decide on the appearance. Today, the choice of faucet styles is so huge that even the most spoiled owner can find a model for himself.
Classic, hi-tech, loft, minimalism, chopped and streamlined shapes, chrome, copper or black - you can choose the option for any kitchen.
At the same time, unfortunately, the rule applies: the more expensive, the better - especially true for plumbing and faucets in particular. There is a limit to everything, but high-quality plumbing made in Europe is much more expensive than domestic products.
Determining the optimal design
In the selection you need to take into account the design features of the mixers. The most practical models are single-lever, in which the flow rate and temperature can be adjusted with one handle. Models with two valves are less practical, but go well with the classic interior of the kitchen.
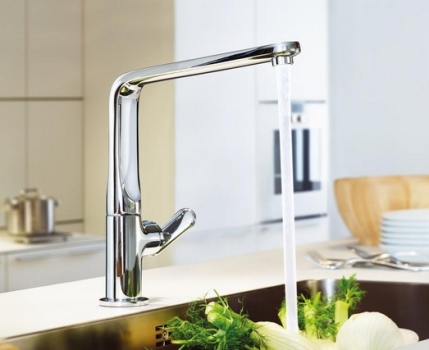
Manufacturers also produce non-contact products that are equipped with a motion sensor. When you bring your hands, the sensor is triggered and the faucet starts to supply water.
For the kitchen, this is also not the most practical option, since often you have to change the temperature and draw water in the tank.
The prices of mixers depend on the type of alloy used and the brand of the manufacturer. The cheapest models are made from silumin, have a beautiful appearance, but quickly wear out and become unusable. Silumin and other cheap alloys crumble and crack rather quickly.
The highest quality products are made of brass. A layer of nickel, aluminum or chromium is applied to the surface to give the mixer a beautiful look. Chrome products are the most wear-resistant. We recommend that you read our other article, in which we described in detail the features of the choice kitchen faucets.
Mixer Installation Instructions
A brief step-by-step instruction will help you quickly and correctly install the plumbing fixture in place and avoid frequent errors.
Preparatory phase
Before starting any work, you need to disconnect the water supply to the house / apartment from the central riser. If this is not done, then water under pressure will create a lot of trouble when loosening the joints. Next, you need to open the mixer so that residual water flows out of the system.
It is also necessary to stock up on all supplies and tools.
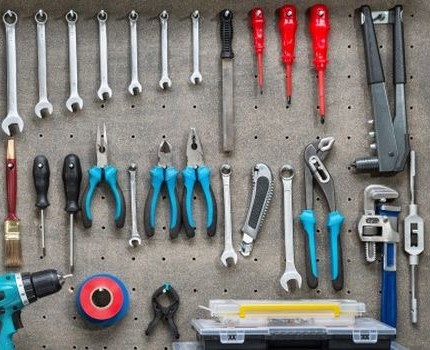
It is advisable to read the instructions for the mixer before starting work. To perform most of the work, you do not need to look for any specialized devices. The following set of materials and tools will be enough:
- Phillips screwdriver
- flat screwdriver;
- adjustable wrench;
- Lantern;
- sandpaper;
- a set of flexible hoses (if they do not come with the mixer);
- water tank;
- aerosol WD-40;
- tow;
- socket wrenches.
The connection to the old mixer is best replaced with a new one. It is inexpensive, in addition - it will be the key to the most tight and durable connections. And about how to choose and install eyeliner, read Further.
Dismantling the old appliance
If you are making repairs, you first need to dismantle the old mixer. So, having completed all the preparatory procedures, it is necessary to find the connection points of the mixer with water pipes. Next, you need to find places in which the mixer is attached to the sink.
Using an adjustable wrench, disconnect the flexible connection of the mixer and the pipe. It is important not to forget to substitute the container in time, as residual water may leak from the water supply.
If the sink is a consignment note, then it must be carefully removed. Before doing this, the bottom of the siphon must be disconnected. Only then can the sink be removed.
The sink should be turned in such a way that it is convenient to unscrew the fixture of the mixer. Rust could accumulate in these places, and the joints could stick to each other, so they should be treated with WD-40.
After waiting 10-15 minutes, you can try to unscrew the nuts of the connections using an adjustable wrench. First you need to slightly loosen the nuts that are on the threaded pin.
Now, using a screwdriver, you need to unscrew the threaded pin. During this operation, hold the mixer with your hand so that it does not fall.
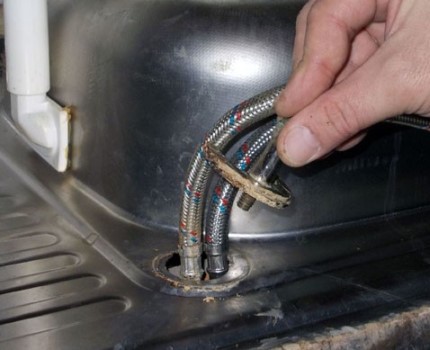
Next, the mixer is removed along with the clamp. If it was decided to replace the old hoses with new ones, then they are freely pulled out together with the mixer through the mounting hole.
The mounting hole itself must be cleaned of accumulated dirt. The old mixer can be disposed of and proceed with installation of a new crane.
Installing a new appliance in the sink
Before Installing single lever mixer in the kitchen, you need to attach eyeliner to it. You need to wrap the tow on all connections - with its help you can seal the system as much as possible.
The tow is wound on the threads of the flexible hoses before connecting them to the mixer. You can add a drop of drying oil to the tow so that when it is twisted it does not stray to the base of the thread.
An annular decorative gasket is included with the mixer. It is made of metal and has a rubber layer. It must be ensured that the rubber insert is installed exactly in the allotted grooves of the ring. Pass the ring through the connector to the base of the mixer.
Now you can install the mixer on the sink by pulling flexible hoses through the mounting hole. Help from someone outside will come in handy so that he holds the faucet while you screw it onto the sink. Through the eyeliner, you need to pass the spacer.
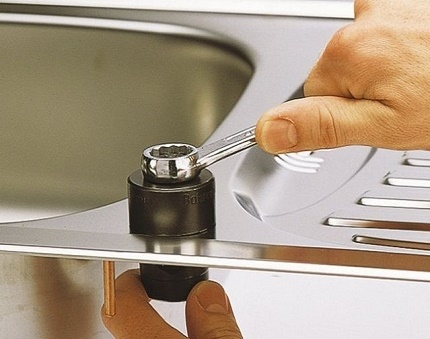
Next screw threaded pins through the spacer (pressure plate) into the base of the mixer, screw on the nuts pins. Now your partner should lock the mixer in the working position so that you can tighten the nuts with the socket wrench (in most cases this is a 11 key).
Now the mixer has adopted the position in which it will be used in the future.Before the final efforts to tighten the nuts, make sure that all the gaskets are not displaced and are in place.
The sink can be reinstalled and then connected to the corresponding fittings of the plumbing system. Pipe nozzles must be cleaned with sandpaper and a layer of winding applied. It can be flaxseed or rolled waterproof sealant in the form of a tape.
If you choose a tape, then it must be wound with an overlap. If you decide to resort to using flaxseed, then you need to grease the thread with a paste-like sealant and only then wind the thread.
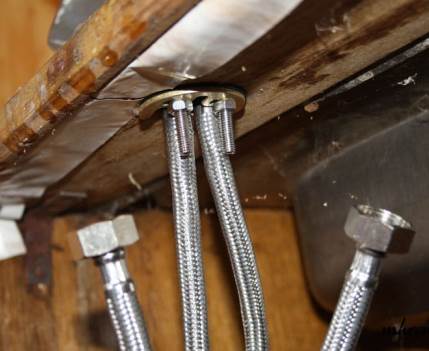
Join sink siphonto start plumbing testing. After that, you can open the water supply from the riser and check all the joints at maximum pressure.
If the water is to be dug, it is necessary to tighten the threaded connections tighter and test everything again.
Accounting for technological nuances
Now you know how to install and connect a mixer in the kitchen, but there are some difficulties that may interfere with a quality installation. There are situations when it is impossible to unscrew the old flexible hoses, because the connection points literally stick to each other.
There are also cases when you need to adjust the diameter of the mortise hole or perform installation on a complex surface, for example, on a countertop.
In such cases, you will need jigsaw, with which you need to cut a hole in the countertop. If the condition of the pipes and their wiring is deplorable, then it is necessary to change and modify the entire water supply. In such cases, you can resort to the help of a specialist or delve into the study of the installation of water supply systems.
Photo guides for independent plumbers
We will analyze two installation options for kitchen faucets with different types of fasteners. In the first case, we will fix the device using a nut, in the second - using two studs.
Since in constructions with a clamping nut, the installation of the mixer is usually hindered by a somewhat longer base, we will start by installing the mixer directly:
The second option involves mounting the device with studs. Such designs do not allow qualitatively tightening flexible hoses after fixing the mixer on the countertop or sink. Therefore, we will screw them first, and then fix the device:
When installing mixers of both designs, it is important to monitor the position of the large and small seals. They should completely fill the space between the parts. Even the smallest gaps are unacceptable.
Installing the mixer in the countertop
For this method, in addition to the devices described above, you will need the following:
- electric jigsaw;
- drill;
- set of drills.
The installation method is practically no different from the previous one. Only in this case you do not need to dismantle the sink. Installing the mixer in the countertop is distinguished by the need to make a hole in the countertop itself.
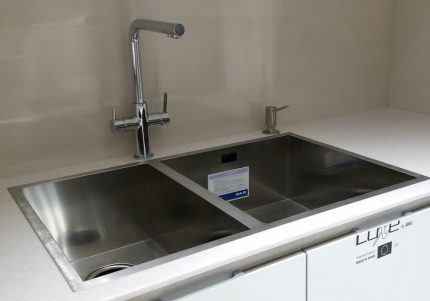
The choice of location for the hole should be based on practical recommendations:
- water should not get on the countertop while using the mixer;
- use valves / levers should be convenient;
- the spout should be positioned relative to the sink according to the recommendations presented at the beginning of the article.
First you need to make markings on the contour of the base of the mixer, using a pencil. Using a drill, drill four holes at the corners of the drawn perimeter.
Then saw a hole with a jigsaw, through which you can stretch the eyeliner and insert the threaded pins. The slice must be cleaned of sawdust and clean the edges with sandpaper.
It is important not to make the hole too large. Otherwise, the size of the clamping ring may not be enough to cover the entire hole. Further, the sequence of actions remains the same as when installing the mixer on the sink.
Wall Mounting
Mounting the mixer in the wall is a rather original solution for the interior of the kitchen. In this case, the crane will occupy a minimum of working space. In the tile or wall, the appropriate cut-outs are preliminarily made through which the connection will be made.
This type of installation looks quite aesthetically pleasing. In some cases, pipes from the wall are brought out, but this option is detrimental to the interior of the kitchen, it is better to hide all pipes behind the wall.
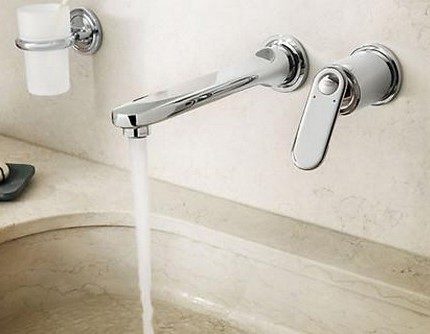
Installation of the mixer on the wall involves the corresponding connection of the water supply with the output of the elements for external connection. The connection method is the same for iron, plastic, copper or metal-plastic pipes except for the use of adapters and fittings.
The type of mixer (valve, cartridge, etc.) also does not affect the connection method. A prerequisite is the selection of a wall mixer, the design of which involves installation in the wall.
For installation to iron pipes tees and corners are used. If the axis of the connectors for connecting the mixer coincide with the axis of the pipes, then just use the couplings. To connect to other types of pipes, special fittingalso called water outlets.
Features of wall mounted faucets
These models can be mounted at any height. Mixers with a flexible and rigid spout are available. In flexible there are many variations of position that allow you to perform any action in the kitchen. Products with a rigid spout require a limited stroke and rotation of the mixer.
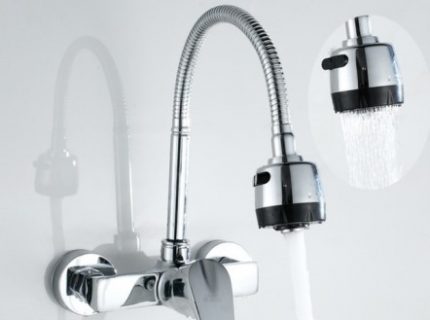
For most kitchens, wall-mounted models are a fairly convenient and practical solution.
Connection Procedure
First you need to screw the cam, with which the mixer is connected to the pipes. To avoid increased condensation, the distance between the pipe axes should be 150 mm.
Most wall faucets are produced with exactly this distance between the clowns. On the threads you need to wind a tow (linen or synthetic).
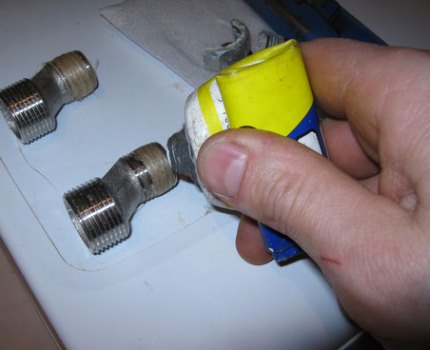
Next, we screw the crane nuts onto the eccentrics and install a decorative screen (trim). He gently screwed his hands, as he should fit snugly against the surface of the wall.
If the gap is not more than 5 mm, then you can disconnect the mixer and trim the eccentrics to the appropriate length. The decorative panel hides all the flaws on the wall.
Next, install gaskets that are included with the mixer and can be made of silicone, paronite, rubber and other polymeric materials.
Gaskets are inserted into the nuts of the housing, ensuring its tight fit to the eccentrics. For maximum density, the eccentric should not have cracks. An uneven cut surface can be sanded with sandpaper.
The last step is to tighten the nuts: first with your hands, and when your own efforts are no longer enough, you need to clamp the connections with an adjustable wrench. The efforts should not be excessive so as not to damage the threads.
Conclusions and useful video on the topic
A few useful video tips will help you quickly and safely install the mixer.
Professional recommendations from GROHE specialists:
Installation and connection of a single lever device:
Now you know how to install a plumbing faucet in the kitchen or bathroom. Regardless of the type of installation, it is not too difficult to do this.
It is enough to have the necessary set of tools, supplies and theoretical knowledge. Of course, the task may be complicated by the old worn pipes or the need to modify the water distribution.
Repeatedly faced with the installation of faucets and can you give valuable advice to help home craftsmen? Or are you going to install a crane, but are not sure that you are doing everything right? Please leave your comments, ask questions on the topic of the article in the block below.

 Thermostatic mixer: how to choose and install a mixer with thermostat
  DIY single lever mixer repair: step-by-step instruction
 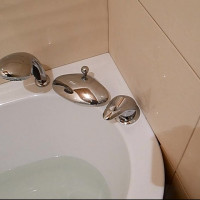 How to install the mixer on board the bath: step-by-step installation instructions
 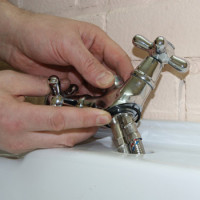 How to install the mixer on the sink: a detailed analysis of installation technology
 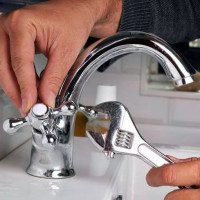 How to change the faucet in the kitchen: remove the old faucet and install a new
 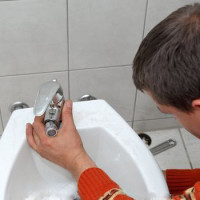 How to Install a Bidet Mixer: Installation and Connection Guide
  How much does it cost to connect gas to a private house: the price of organizing gas supply
  The best washing machines with dryer: model rating and customer tips
  What is the color temperature of light and the nuances of choosing the temperature of the lamps to suit your needs
  Replacement of a geyser in an apartment: replacement paperwork + basic norms and requirements
Do I always have cranes in my house breaking? I’ll only install it, a couple of months will pass, and again you need to dig into it and change something - some gaskets, then the connections begin to fly off. And I can’t understand why this is so: either my hands are in the wrong place, or I just buy faucets that are always of poor quality. So I did not understand how to check the displacement of the sealing gaskets, maybe this is what I have?
Same as yours. I tediously dripped into the sink, changed the gaskets, tightened everything up, less than a month later, yesterday I started to drip again ...
Hello. Not with you alone. This is the problem of inexpensive faucets for everyone. We did not pursue aesthetics at our place, and so far we have made cranes from plastic. She would say that they are practically “eternal”. For 7 years now they have been standing and not a single “cap”.
If the sink and the mixer itself are not very sophisticated, then installation is nothing special. The only difference with the bathroom is that the eyeliner is flexible. Difficulties arise with the removal of the old crane. Sometimes he so sticks that you have to shoot with eyeliner. And if the faucet can still be bought more expensive and better, then the eyeliner is sold absolutely awful, instantly it starts to flow.