How to change the faucet in the kitchen: remove the old faucet and install a new
Damage to the kitchen faucet can occur at the most inopportune moment, when there is simply no time to wait for the arrival of the plumber. Agree, the ability to replace a plumbing fixture will be useful to every home foreman. Moreover, to perform the work, special skills and expensive tools are not needed.
Before changing the faucet in the kitchen, you need to understand its structure and make a clear idea of the procedure. We will help you in these matters.
The article provides detailed instructions for dismantling old appliances and installing new models, taking into account their design features. Having studied the material, you can easily do the job and save the family budget on a plumbing call.
The content of the article:
Types of kitchen mixing devices
The reasons for changing the appliance can be different, ranging from a decrease in its functionality due to the wear of individual parts, and ending with the replacement in order to fit the mixer to the overall interior of the kitchen.
Regardless of the reason for the replacement, the dismantling and subsequent installation process is almost uniform. And the owner of the kitchen, first of all, needs choose the right mixer.
The following parameters should be evaluated:
- design form;
- configuration
- manufacturing material.
The design form is a choice at the personal discretion of the owner of the kitchen, but at the same time, when planning to change the appliance, it is advisable not to depart from the general picture of the kitchen interior. The mixer configuration must match the installation method.
Recall that there are two common ways to install kitchen faucets:
- wall mounted;
- desktop.
Typically, kitchen faucets use tabletop taps designed to be placed on the sink panel or on the rim of the sink.Wall murals gradually go out of fashion or are practiced as part of elite kitchen interiors.
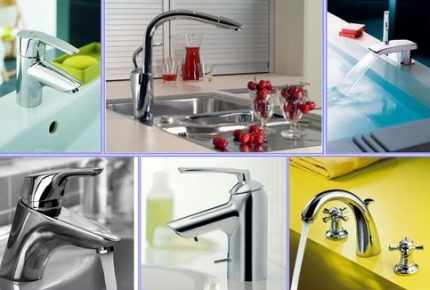
Also, the owner of the kitchen, who decided to change the plumbing, was given the opportunity to choose from two types of appliances according to the method of controlling the water flow. One view - structures with two cranes (herringbone) and another view - single lever structureswhere water mixing is carried out with one lever.
Material for the manufacture of mixing plumbing fixtures is usually silumin, brass, bronze, ceramics. Silumin based devices are less durable than brass and others.
Distinguish silumin mixers are available by weight and market price (they are lighter and cheaper). It is more practical to choose brass, bronze, ceramic products. Their price is more expensive, but they will last much longer, therefore, in the long run, such products look more economical.
Mixer Replacement Instructions
A detailed description of the steps to reinstall the mixing equipment will help to avoid mistakes if you decide to make a replacement for the first time.
Tool and mounting kit
The dismantling and installation of a traditional kitchen sink accessory is carried out using the following plumbing tools:
- adjustable wrench - gas key first number;
- wrenches (10 * 12, 13 * 14);
- socket wrench with a deep stock (10 * 12, 13 * 14);
- wire brush,
- fluoroplastic tape - PTFE.
When solving the problem of how to replace or repair the mixer in the kitchen, the installer must have at hand a complete installation kit. This is a set of all the necessary elements: gaskets, connecting hoses, nuts, screws, washers, etc., which are usually sold with the device.
The manufacturer supplements any set of kitchen faucet with instructions where the sequence of installation of such a device is signed.
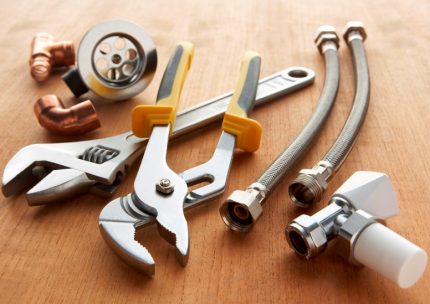
In addition to the installation tool, household accessories will be required: a rag, bucket or basin. Thanks to these objects, it is possible to minimize the spreading of the water remaining in the pipelines when the dismantling process is carried out.
It is advisable to have a miniature flashlight, since usually replacing a tabletop kitchen faucet is accompanied by work in darkened conditions - under the sink, under the sink.
Dismantling the kitchen faucet
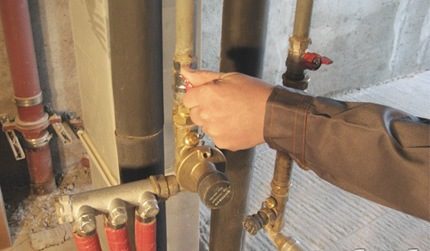
First of all, the supply of water (cold, hot) to the mixer is stopped - the linear valves on the centralized supply pipes are closed. After the mains are blocked, open the mixer valves and make sure that no water flows. If water leakage is observed, this indicates wear stopcock linear valves.
In this case, first you have to replace the taps on the water supply lines and only then continue to work in the kitchen.
In the absence of a water leak, dismantling operations can be continued. Under the sink are connecting flexible hoses (40-60 cm long), which must be removed.
A flexible eyeliner is attached to the central line cape nuts. It is convenient to unscrew them using an adjustable (gas) wrench. Flexible hoses are mounted on the mixer body with tubular fittings. Here, to turn the fittings out, you need a 13 * 14 or 10 * 12 wrench, depending on version.
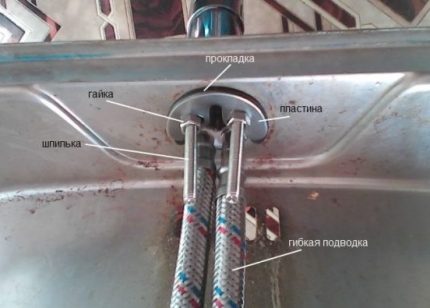
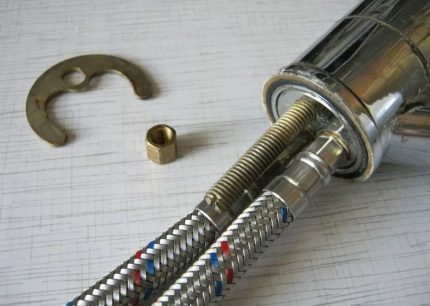
After the flexible hoses are disconnected, it is the turn to dismantle the mixer device directly. It rests on the sink thanks to two hex nuts and a special pressure washer.
Nuts are screwed onto two long studs with a length of about 50-60 mm. Therefore, when replacing it is most convenient to use a socket wrench. The mounting unit is located in the lower area of the mixer, so working under the sink is a common practice in most cases.
When the screws are removed, the support washer is removed from the studs, after which the mixer is easily removed.
Wall-mounted models in kitchens are rarely installed, but this replacement option is also possible. Unlike the desktop method, there is no flexible eyeliner. The device is rigidly mounted directly on the pipe bends from the centralized highway.
The pipes, in turn, are walled up in the wall, and only threaded ends are left for connection. To dismantle and replace the wall-mounted kitchen faucet, you need to unscrew the two nuts, and then remove the appliance.
Checking a new appliance
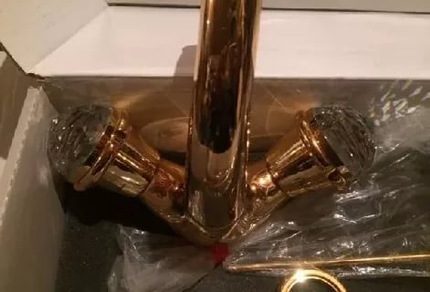
A new appliance purchased to replace an old kitchen faucet is removed from the packaging. It is necessary to carefully inspect the design for defects, damage.
Branded plumbing stores, as a rule, accept and exchange defective goods, repair or return money. The main thing is to have a sales receipt on hand.
The mixer must carefully check the mechanical parts and performance:
- rotation of flow controllers;
- thread integrity at joints;
- quality flexible connecting hoses.
Depending on the model of the device, the rotation of the cranes or the movement of the lever should be accompanied by an easy smooth run. The presence of even small defects in the places of the connecting thread is excluded, otherwise at the time of installation, when tightening the nuts, the risk of damage to the entire connection node increases.
The nickel-plated coating of the mixer should be even, uniform (without swelling), without scratches and dents. The protective metal casing of the flexible hoses must not be damaged.
Crane installation technology
Prior to installation of the mixer, the outlet internal openings of the water pipes must be cleaned of scale and rust, and the threads on the pipes must be cleaned of any residual sealing material.
It is convenient to do such work with a lightweight metal brush. The mixer landing site at the sink should also be cleaned of scale and oxides, but without a brush - using rags. If the sink can be easily removed from the base, it is recommended to remove these kitchen accessories for ease of installation.
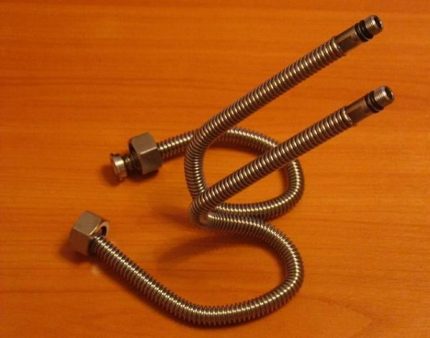
On the faucet you need to screw the two flexible armored hoses included in the kit - one for hot, the other for cold water. Before screwing the hoses onto the tubular fittings, it is necessary to put on rubber gaskets, which are also provided in the delivery set.
The hoses are screwed by hand until they stop, then with a little effort they reach two or three turns with a wrench.
At the next stage, the device equipped with a flexible eyeliner should be installed in the place of its placement on the sink. Insert flexible hoses into the mounting hole of the sink (sink) with a diameter of 34 mm and lower the device onto the canvas.
From the bottom of the washing cloth you need to get to the bottom of the mixer, put a sealing washer on the studs and tighten it with nuts to the washing cloth, but not completely.
It is necessary to leave a slight free play on the mixer body so that it is possible to align the device in the center of the mounting hole. After centering the mixer, the nuts on the studs are pulled all the way.
After mounting the device on the side of the sink, you need to connect the ends of the flexible hoses to the main pipelines. The designs of modern flexible hoses are equipped with union nuts with already installed rubber gaskets.
The installer can only gently, precisely by carving, screw the union nuts on the pipe ends as far as they will go and tighten them with a gas wrench for two to three turns.
Flexible eyeliner for kitchen plumbing is available in different sizes in length. During installation, you should be guided by the rule that states that it is imperative to leave a slack in the hoses. For example, for a distance between connection points of 520 mm, apply an eyeliner with a length of at least 600 mm.
At this stage, you must complete the installation water filterif you plan to use it.
A hairpin mount is commonly used on single lever and touch gauges. Devices with two separate control valves have a slightly modified mounting unit.
Here, a support washer with one tightening nut is used, which is screwed onto the lower part of the mixer body. With this option, small wrenches are no longer required. Instead, when replacing the mixer, an adjustable or gas wrench is used.
A feature of installing a wall-mounted device is the need to use a device of a different configuration, namely with two separate inputs.
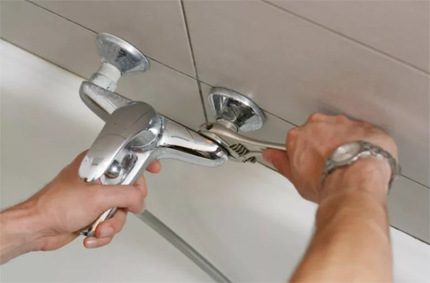
The inlet openings of the wall-mounted kitchen faucet must correspond to the center distance of the pipe ends. If there is no conformity, use the eccentric adapters included in the delivery.
Features of installation of different models
The tactics of actions may vary - the order of the work depends on the design features of the mixer. We will analyze step by step the possible installation options.
Photo-installation manual for a mixer with a clamping nut
For installation on today's popular metal sinks, faucets with a clamping nut screwed down from below are ideal. Before starting work on the sink, it is necessary to select a site without a relief in order to position the base of the device on a completely flat surface.
The mounting technology of this type of mixer has its own specifics:
Quick installation guide for the mixer on the studs
The specificity of plumbing operations with this type of mixer is that flexible eyeliner must be fixed before installing the device in place.
This sequence is due to the inability to tighten them after placement in the landing hole:
Installation of exotic semi-professional models
The designs of plumbing fixtures are constantly being improved. This also applies to faucets that are operated in the kitchen.
Increasingly, there are buyers who want to replace a conventional faucet in the kitchen with a touch-sensitive device or thermostatic mixer. From a mechanical point of view, the installation of electronic structures is almost the same as the installation of traditional models.
However, there are some nuances associated with the electronic control of devices:
- installation of batteries or external power supply;
- setting temperature conditions and storing them in the “memory” of the device;
- regulation of sensitivity of sensors.
Semi-professional appliances with a high spout, a 360 ° turn and with a retractable shower are usually installed in the kitchen, where two sinks or one with two separate sinks are used.
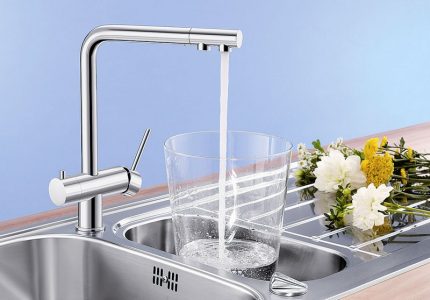
The replacement of such devices is also not particularly different from the standard method, with the exception of some details. For example, the arrangement of fasteners can be changed, and bolts can be used instead of studs.
Modules with crane boxes in designer models can be installed separately from the spout, as, for example, in the mixer version with combined outlet presented below:
Pressure testing and commissioning
It is recommended to pressure test the assembled structure - check for leaks. To do this, the taps on the mixer must be closed (on the lever model, lower the lever all the way). Open alternately linear taps on the hot / cold water lines, and then carefully inspect all places of installation connections, as well as the mixer itself.
If, after 15-20 minutes, no water leak has been detected, the installation is completed with high quality. You can safely begin to operate a new mixer in the kitchen.
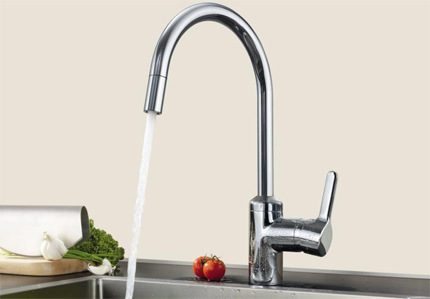
Before starting operation, the aerator must be removed from the gander of the mixer - strainer. In this position, open the taps and let water through for a short time in order to wash out the particles of rust, oxides, scale remaining in the pipelines.
After the procedure, install the aerator in place and test the water flow already in the filtration mode. The jet should exit evenly, without splashing water to the sides.
Typically, well-known manufacturers give a guarantee of at least 5 years on devices. Claims from buyers are accepted during this period. Warranty period provided repair of kitchen faucets at the expense of the manufacturer, if manufacturing defects are detected, the introduction of low-quality materials, etc.
At the same time, repairs are carried out within 20 business days, if there are no justified reasons for extending this period. However, there is one important point in the history of returns - the guarantee remains if the mixer was dismantled only after inspection by a representative of the manufacturer.
Conclusions and useful video on the topic
Visual instructions for replacing an old mixer or installing a new appliance:
Self-replacement of the faucet is possible for any home master. If such work is carried out for the first time, then the main thing is not to rush and carry out all the actions according to the installation instructions. A scrupulous approach will ensure the tightness of the docking elements and the duration of uninterrupted operation of the plumbing fixture.
If you have experience in dismantling and installing a kitchen faucet, please share practical skills with our readers. Leave comments and ask questions on the topic in the form below.

 How to install a faucet in the kitchen: step-by-step instruction on the work
  Thermostatic mixer: how to choose and install a mixer with thermostat
  How to install the mixer on the sink: a detailed analysis of installation technology
  How to Install a Bidet Mixer: Installation and Connection Guide
  How to repair a faucet in the bathroom with a shower: causes and methods of troubleshooting
  How to repair a ball mixer: an overview of popular breakdowns and how to fix them
  How much does it cost to connect gas to a private house: the price of organizing gas supply
  The best washing machines with dryer: model rating and customer tips
  What is the color temperature of light and the nuances of choosing the temperature of the lamps to suit your needs
  Replacement of a geyser in an apartment: replacement paperwork + basic norms and requirements
Dear authors, let me correct you! What is called “silumin” in mixers is not really silumin, but a zinc alloy with a zinc content of approximately 95%. In the everyday life of plumbers, the abbreviation TsAM is still used to designate this material. It is this zinc alloy that is used in cheap mixers, as well as in expensive ones, if their manufacturer is unclean. It is this zinc alloy that is gradually destroyed under the influence of water (especially hot). Cases of mixers from this alloy give cracks, otherwise they even break through. The technical properties of the TsAM alloy are such that products from it should not be in contact with water at all! That's what scary!
And, by the way, TsAM mixers have not been lightweight for a long time. They learned how to weight and tint in the color of brass.
It is not known where this misconception about “silumin” came from, but it has become so popular that manufacturers of goods from real silumin are now trying in every possible way to disguise the material of their products with other names, because the installation “silumin - fig material” has long and firmly been sitting in the subconscious of the layman. But silumin is an alloy of aluminum and silicon (the silicon content can vary from 4% to 22%). Sectional radiators are made from silumin. And they call them aluminum, although in fact they are from silumin. And they are called so, because the Russian consumer can already be intimidated by the word "silumin."
I change faucets almost every two years. So, there is no question of a five year warranty. The store gives a one year warranty. Experience shows that it is more convenient to install and use lever-type mixers with a clamping nut. Using the lever, you can simultaneously control the pressure and temperature of the water, even with the back of your hand. A large nut is more accessible for the tool and fixes the crane body reliably.
I would venture to change, or rather put, a new mixer. I have a nut ... I think there is nothing complicated.