Humidifier Errors: Popular Humidifier Breakdowns and Recommendations for Repairing Them
Uninterrupted operation of the humidifier is ensured by complex mechanisms and electronic programs. And, like any other technique, these devices require proper handling and timely service. But even with all operational requirements, the device may fail.
This article contains information about what are the most common errors of a humidifier and how to fix most of the malfunctions on their own. Recommendations for the repair of steam, ultrasonic and traditional humidifiers of the cold type are given. The material is supplemented by visual photos and thematic videos.
The content of the article:
Signs of damage to humidifiers
Even during the proper operation of the humidifier, various problems can occur. So, users most often may encounter the fact that no steam from a humidifier.
If this is an ultrasonic type device, then in this case, first of all, make sure that the membrane is located under water. Another possible reason for such a breakdown is clogging of the membrane. For prevention, you can wipe the part with a weak solution of vinegar. The efficiency of the turbine and generator is also reflected in the steam flow.
Other popular problems that air humidifier owners encounter include:
- The amount of water in the tank does not decrease in violation of the integrity of the membrane or device responsible for its movement.
- Airflow reduced or completely absent in operation due to clogged intake filters and tubes. Equipment may also fail due to fan failure.
- In a room with a working device, windows fog up, wet pollen appears on the furniture, and the sensor shows a normal value, this indicates a malfunction of the equipment. The optimum level of humidity is not more than 60%.
- The steam has an unpleasant odor.. The reason may be a clogged membrane, the spread of mold and fungus inside the device itself. An urgent filter change may also be required.
- There is no sound signal, idle timer, sensors. All this indicates a failure of the electronics. Also, the liquid crystal screen will not work in this case.
- It becomes harder to breathe indoors when the device has exceeded the permissible humidity value. This means that the humidity sensor does not work.
- The humidifier continues to work with the utmost reduction in water level, although it should automatically shut off. This condition also applies to timer programming if the instrument continues to function after the set time has elapsed. In this case, the equipment must be disconnected from the electrical network.
- Significant increase in case temperature indicates its overheating.
Damage to the motor or ventilation system is indicated by increased noise from the operation of the humidifier.

When a characteristic burning smell immediately turn off the power to the device. Smoke - A sign of a serious malfunction of the electrical appliance, which must be immediately disconnected from the network.
The reasons for the lack of steam and methods of elimination
Lack of steam is one of the most common malfunctions that occurs in all types of humidifiers. Therefore, we will examine in more detail the causes of such a breakdown for each types of devices, and also talk about solutions.
Diagnostics should begin by checking the outlet, indicator of the electrical appliance and the presence of water in the tank. But note that any repair work is carried out only after disconnecting the humidifier from the network.
Cold type devices
So-called traditional humidifiers can stop generating steam for several reasons:
- Worn filters - the parts should then be replaced with new ones.
- Engine malfunction. The assembly is responsible for the operation of the turbine and fan. It cannot be repaired, the motor can only be replaced.
- Raid. If you hear the sound of the engine when you turn on the humidifier, and the turbine impeller and cooler remain stationary, the cause may be limescale, which should be removed. Failure can also be determined in the direction of the steam, which will lie down, and not go vertically up.
Lack of steam can also be triggered wire damage, which often happens when transporting the device.

Ultrasonic Humidifiers
The key element of an ultrasonic humidifier is a membrane or disk (emitter, piezoelectric element) and a low-power fan. The membrane begins to vibrate when an alternating current is applied with an ultrasonic frequency, from which the water breaks into tiny particles, and the built-in fan pushes them into the room.
Often this type of humidifier does not produce enough steam or does not generate it at all due to a malfunction of the electromechanical converter. It will not be possible to fix the failure on its own, the part must be replaced. The malfunction of the membrane can be established by the absence of a characteristic sound of bubbling water.

If the humidifier was put into operation without water, then the membrane fails, and then the transistor. Continuous operation in this mode can damage other elements of the generator board, which will lead to damage to the power supply.
Another reason for the malfunction of an ultrasonic-type humidifier is the contamination or damage of the membrane, as well as the failure of the mechanism that makes it vibrate (ultrasonic oscillation generation boards). You can fix the problem by cleaning the membrane, and you may need to replace the entire device that drives the converter.
It is also worth cleaning the membrane if too little steam is generated from the humidifier. This can be done using any descaler. Acetic solution and citric acid will also help. The product should be poured into a recess with a membrane and wait for the complete dissolution of the scale. Too thick plaque can be removed with an old toothbrush. Using abrasive products or metal objects will damage the membrane.
Steam device failure
These humidifiers often do not generate steam due to a malfunction of the heating element. If the water does not heat up in the switched-on device, it will be necessary to replace the heater.
The absence of steam may be due to damage to the impeller, motor, wiring and fan, as is the case with devices of the cold type.

There is another type of humidifier - spray, but its repair should be carried out exclusively by specialists. Interfering with the operation of an expensive device can harm.
DIY repair instructions
Descaling of the membrane and other parts, filter replacement can be done independently. Repair of nodes, including the system board, is best entrusted to professionals. Interfering with the design can complicate the situation.
To carry out repairs at home, you will need basic knowledge of electricians, a multimeter, a tester and soldering skills.
Next, we consider the step-by-step process of repairing an ultrasonic type household humidifier.
Stage # 1 - disassembling the humidifier
To find out the cause of the breakdown, it is necessary to disassemble the device, having previously de-energized it.
Before removing the tank, prepare a special fluid bowl. Residual moisture in the pallet can be removed with a dry cloth. Under the remaining part of the body there are bolts - from 3 to 5 pieces. Unscrewing them, you can remove the bottom cover.

If a hygrometer is integrated in the humidifier, it is important to avoid sudden movements, as the contacts and wires of the device may be damaged. As a rule, it is mounted near the ventilation grill - on the inside of the bottom cover.
Stage # 2 - device diagnostics
With a disassembled device, you can conduct several simple tests to eliminate possible breakdowns. To do this, connect the humidifier to the network and check the operation of the cooler or fan.
After two minutes of operation and after turning off the outlet, you can touch the temperature of the transistor. If it is cold, then this indicates a malfunction of the generator.

Damage to the emitter can be determined by the absence of sounds from the membrane; in this case, the part must be replaced. It remains to ring all the contacts on the board with a multimeter.
If all the listed malfunctions are not confirmed, the cause of the inoperative humidifier may be in the banal clogging of the cartridge. This can be avoided by timely replacement of filters.
Stage # 3 - Cleaning the structure
In addition to replacing filters, maintenance also includes washing the container with running water and wiping it from the inside with a soft brush or rag.
It is forbidden to use aggressive chemicals, including dishwashing liquid or cleaning gels for toilets. Not only parts of the humidifier may be affected, but all households as well. After all, the remaining particles of the substance on the walls will fall into the air the next time the device is started.

The safe use of the humidifier also involves disinfection; this is no longer just an ordinary cleaning, but getting rid of accumulated microorganisms. Acetic acid, chlorine bleach and hydrogen peroxide are used for this purpose.
The latter substance is used in pure form. The bleach is diluted with water, and the acid is adjusted to a concentration of 10 to 20%. The resulting mixture is poured into a container and incubated for several hours. After the procedure, it is important to rinse the humidifier thoroughly and wipe it with a soft cloth.
Detailed recommendations and the best ways to clean humidifiers are given in this article.
Stage # 4 - troubleshooting electronic parts
It is possible to determine the presence of a breakdown of the board even with its visual inspection.
If it is working, then it should have the following properties:
- evenly colored;
- there are no smudges or spots on the surface;
- without exception, all contacts are soldered and phoned;
- there are no swollen elements;
- there are no darkened resistors (a change in color indicates the burning of the part).
It is also important to check for breakdowns in the board tracks.

A short circuit may damage the fuses; soldering will be necessary. To remove the board from the slot, unscrew the bolts, and then clean the surface with a soft brush with alcohol.
Stage # 5 - Replacing the Ultrasonic Membrane
How to determine the malfunction of the membrane, we reviewed above.
The process of replacing it involves several stages:
- it is necessary to unscrew the fixing bolts;
- then remove the ceramic ring with part of the board;
- a round membrane is attached to the board with a pair of wires that should be carefully removed;
- completes the process of soldering the wires of the new piezoelectric element into the board.
When replacing the membrane, it is advisable to immediately replace the high-frequency transistor, choosing a spare part that meets the factory requirements. A discrepancy in characteristics may impede the process of steam generation.
Device Operation Tips
The following tips will help protect your humidifier from damage:
- Water must be poured directly into the hole provided for this purpose by the manufacturer.
- It is forbidden to use a steam nozzle for inhalation, on some models for these purposes the manufacturer provides a special nozzle.
- Use vinegar to clean equipment should only be in fresh air, otherwise a burn of the mucous membrane of the respiratory tract is possible.
- The device is not recommended to be placed near electrical devices.
- Before disconnecting the humidifier from the mains, you must not disassemble it and touch the internal parts with your hands.
- Do not touch the humidifier body with wet hands.
- Damaged items should be disposed of in a manner declared by the manufacturer in safety regulations.
It is also important to remember that during operation the device must not be covered from above, there must be oxygen access in the lower part where direct air intake takes place.

A few simple recommendations will also help extend the life of the humidifier:
- If a filter is not integrated in the device, it is advisable to use boiled, distilled or pre-filtered water. About what water to fill in a humidifier, we detail told here.
- Twice a month, it is advisable to disinfect the components with acetic solution. Water should be changed daily, this will help prevent mold.
- Modern models are equipped with a warning function about the need to clean and replace filters. Replacement parts must be of the same brand as the device itself. We recommend that you familiarize yourself with rated best models.
- Install the humidifier on a perfectly flat surface. For smooth operation, free air access is also important. It is not recommended to lean the equipment against the wall, leave it near furniture or under the bed.
- It is forbidden to leave the device indoors with small children unattended. There are cases when the humidifier was pushed or covered with a blanket from above, small parts also fell into the air intake slots.
If the equipment is used only during the heating season, then before sending it for storage, it is necessary to treat the tubes and membranes with hydrogen peroxide. Then disassemble and dry all the details. Keep in the original unopened packaging, avoiding direct sunlight.
It is forbidden to add essential oils to a humidifier not intended for aromatherapy. Otherwise, components can quickly fail.
Conclusions and useful video on the topic
The solution to the problem of the lack of steam in the humidifier is described in detail in the plot:
You can see the step-by-step instructions for checking piezoelectric elements for humidifiers in the following video:
How to fix an ultrasonic humidifier at home:
In most cases, you can repair the humidifier with your own hands. It is much more difficult to find the real cause of the malfunction. To do this in some situations without special devices is quite difficult, so it is better to contact specialists. Proper operation of the equipment, timely replacement of filters, cleaning and disinfection will help to avoid serious damage.
If you encounter problems with the humidifier, share your experience. The block for comments and questions is below the text - here you can ask questions to our experts and other users about the poor operation of the device and about possible breakdowns.

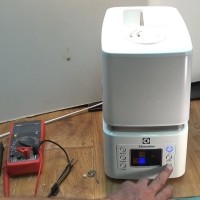 Humidifier repair: typical breakdowns and effective solutions
 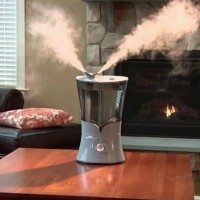 What to do if a humidifier is leaking: find the cause and recommendations for fixing the leak
 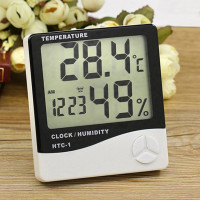 Instruments for measuring indoor air humidity: types + selection recommendations
 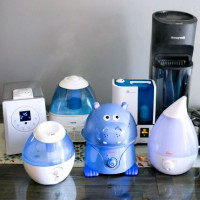 10 best humidifiers: ranking TOP models for apartments and private houses
  Air washing or humidifier - which is better to choose? Comparative overview of devices for humidification of air
  Split systems Rapid: popular models of HVAC equipment and recommendations for customers
  How much does it cost to connect gas to a private house: the price of organizing gas supply
  The best washing machines with dryer: model rating and customer tips
  What is the color temperature of light and the nuances of choosing the temperature of the lamps to suit your needs
  Replacement of a geyser in an apartment: replacement paperwork + basic norms and requirements