How to make a cyclone for a vacuum cleaner with your own hands: device + detailed assembly instructions
Cyclonic designs of household vacuum cleaners are considered one of the most successful technology options in terms of work efficiency. The cyclone system is a relatively simple separation mechanism, which makes it possible to efficiently filter suspended particles present in the air stream.
Based on the theoretical principles of constructing such a system, it is perfectly acceptable to create a cyclone for a vacuum cleaner that acts as an additional tool - for example, a construction separator. Interested in the question, but don’t know how to make a simple cyclone yourself? We will help you in the implementation of your plan.
The article provides detailed information about the device of the cyclone separator, and also provides step-by-step instructions for its assembly and connection to a vacuum cleaner. Description of all stages of the workflow is accompanied by visual photographs.
The content of the article:
How is the cyclone separator arranged?
Externally cyclone separator can be described as a vessel of cylindrical shape, the lower part of which has a cone-shaped design. The upper part of the vessel contains two openings - inlet and outlet, through which, accordingly, air flows in and out.
At the bottom of the vessel - along the edge of the conical part - there is also an opening through which the screened (filtered) debris comes out.
One of the upper holes (inlet) is equipped with a channel, due to which the incoming air stream enters the cyclone along a tangent line.
Given the cylindrical shape of the structure, the incoming stream moves in a circle, creating a swirl effect. The resulting centrifugal force ejects suspended particles contained in the flow to the periphery.
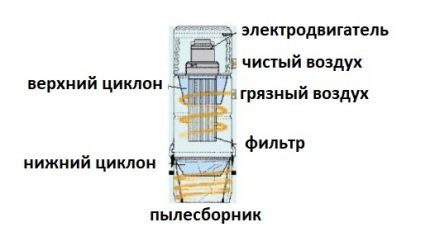
Another hole - the outlet, also has a channel, but located strictly perpendicular to the incoming channel.
Due to this arrangement of the second channel, the air movement changes from a vortex state to a strictly vertical one, which excludes the capture of already weighed suspended particles.
In turn, the screened debris particles, being at the periphery, are displaced down the walls of the vessel, reach the conical part and through the outlet open into the garbage collection. Here, in fact, the whole simple principle of operation of a cyclone separator.
Step-by-Step Cyclone Assembly Instructions
On sale a lot cyclone type vacuum cleaners. Units differ in power, purpose and cost. If you want to save money, you can try to assemble the separator yourself, using inexpensive materials.
Such a single filter can be successfully used as an addition to a construction tool:
- jigsaw;
- punch;
- electric drills, etc.
The work of such a construction tool is often accompanied by a significant release of dust and small particles of various nature.
Meanwhile, modern construction tool designs are equipped with a special channel for removing working waste directly in the process.
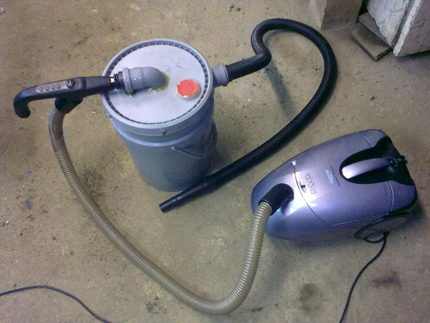
But in order to use this channel, you need a cyclone or, in extreme cases, a vacuum cleaner specially designed for construction purposes.
Options for making a homemade cyclone may be different. It all depends on the material base used and the vision of the project by the contractor.
However, in any case, it is necessary to adhere to the technological criteria that determine the correct operation of the separator:
- Body shape.
- Location of input and output channels.
- The proportions in the size of the components.
That is, the design of the cyclone should provide both the effect of swirling the flow and the efficient separation of debris. Consider the step-by-step do-it-yourself execution of one of the possible projects.
Step 1 - Tools and Basic Materials
Of the materials required for the production of cyclone, you will need:
- plumbing plastic pipe with a length of 125-150 mm, a diameter of 50 mm;
- plastic sanitary corner 30 °;
- two plastic buckets of 10 and 5 liters;
- sheet plywood;
- standard vacuum cleaner hose.
A set of tools for the manufacture of a cyclone for a vacuum cleaner and its assembly with your own hands includes: an electric drill with a set of drills (including a 50 mm crown); electric jigsaw; measuring and drawing instrument; screwdrivers, knife, clamp.
Step 2 - making the case and other parts
The first step is to make the cylindrical part. To do this, use a small (five-liter) plastic bucket. The upper part of the bucket, made in the form of a side, is trimmed taking into account the remainder of the smooth edges along the trim line.
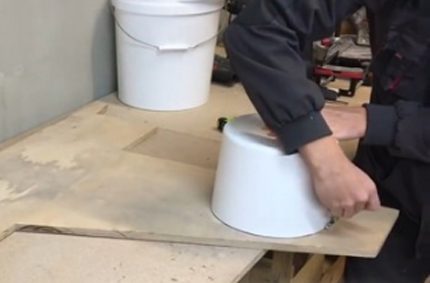
The resulting cylindrical container, resembling a small cone, is turned upside down, installed on a plywood sheet and outlined in diameter.
Having departed from the marked circle of 30 mm to the periphery, one more circle is noted. Then, according to the marking, a ring is cut out.
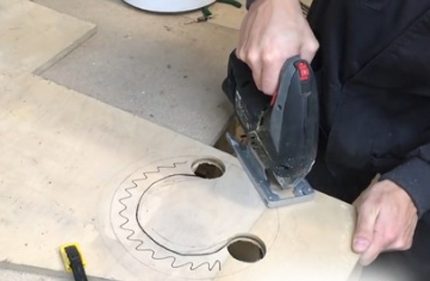
Next, you need to cut a curly element, for which a cutting crown on a tree with a diameter of 50 mm and an electric jigsaw are used.The outer diameter of the hub of the figured element is equal to the inner diameter of the previously cut ring.
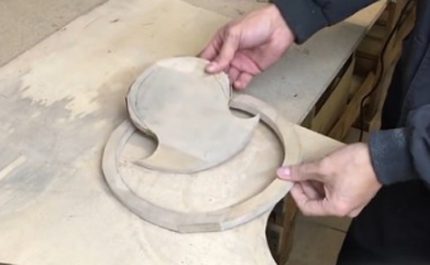
As a result of the work carried out, two parts (as in the picture above) of the future cyclone separator made of sheet plywood are obtained.
Step 3 - connecting the blanks to the cylinder
At this stage, a ring cut out of plywood is put on and fixed along the line of the upper edge on a cylindrical vessel prepared earlier from a small bucket.
Fastening is carried out by self-tapping screws evenly around the entire circumference. The interface between the ring and the bucket in a circle is carefully sealed.
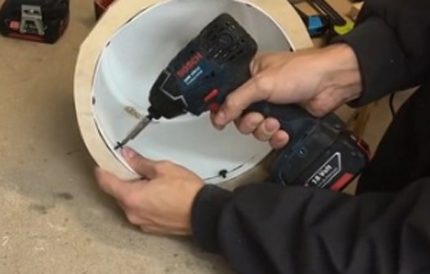
The installed plywood ring must be supplemented from the side of the open part of the cylinder with a cover from a large plastic bucket.
But first, the cover should be marked and cut strictly in the center of the hole, equal in diameter to the inner diameter of the plywood ring. Place the cut out part of the cap on the ring and fasten.
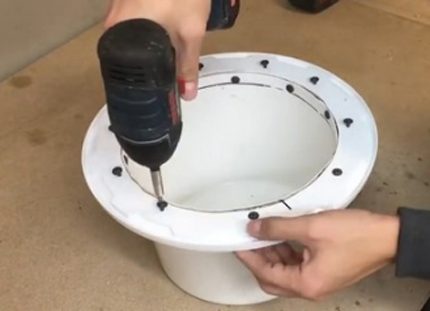
Step 4 - Mounting the Inlet
The inlet pipe is mounted in the area of the bottom of the prepared cylinder. Given that in a state of complete assembly, the small cylinder will stand upside down, the nozzle will be at the top of the cyclone.
Having departed from the bottom plane by about 10 mm, a hole of 50 mm is cut out with the help of a crown. To plumbing corner tightly "sat down", the shape of the hole is adjusted under the "drop".
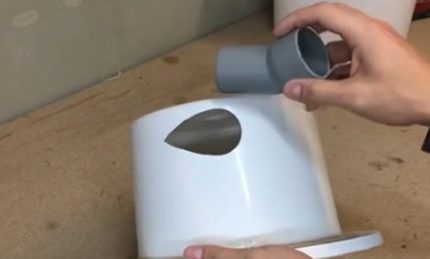
The plumbing corner is treated with sealant, installed in the hole and fixed with screws.
A similar operation is carried out to install the second - output pipe. This is a piece of plumbing pipe 100-150 mm, which is installed directly in the center of the bottom of the small cylinder.
As a result, after the measures taken, the design should turn out, as in the picture below:
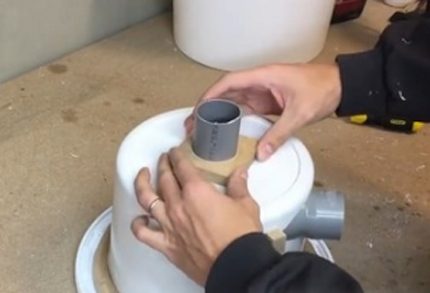
For durability, the plumbing pipe is additionally equipped with a shell made of plywood. It is desirable to make two such elements and install on both sides of the bottom. After installation, tighten the dies with screws. Of course, do not forget to apply sealant at the joints.
Step 5 - mounting the curly element
One of the important aspects of assembling a cyclone with your own hands is the installation of a figured element, previously made from a sheet of plywood. It is thanks to this element that a medium is formed inside the small cylinder of the cyclone that promotes efficient separation.
The shaped element is mounted at a distance of about 10 mm from the edge of the open area of the cylinder. In this case, the plane of the figured plate directed into the cylinder should not be in contact with the outlet pipe.
The distance between the end edge of the nozzle and the plane of the figure is 25-30 mm, but it is permissible to experimentally select the optimal distance.
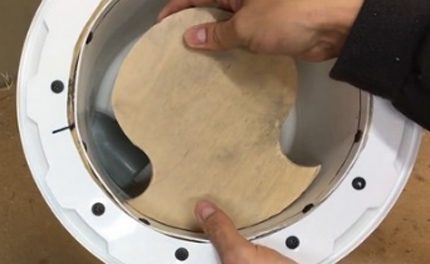
After installing the plate strictly parallel to the bottom of the small cylinder, the fastening is carried out all the same screws from the outer part of the cylinder, screwing the screws into the area that fits snugly against the inner wall.
Three to four screws are sufficient for fixing; sealant is optional here.
Step 6 - complete assembly of the cyclone separator
Actually, after the installation of the figured plate is completed, the cyclone design is actually assembled. It remains only to "plant" the completed assembly of the small cylinder on the top of a large bucket of plastic.
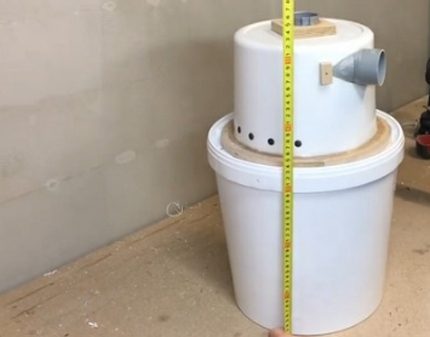
A tight fit in this case is provided by a part of the lid area of the large bucket, which was previously mounted on the lower plane of the plywood ring of the small cylinder.
As can be seen from the measuring tape, the total height of the structure is slightly more than 50 cm. In this case, the garbage collection (lower part) is quite voluminous.
The intricacies of connecting a homemade cyclone
A self-assembled cyclone (filter for construction purposes) is connected to work in a simple way.
The inlet (side) channel is connected by a corrugated flexible hose or other similar accessory with a working tool, for example, with an electric jigsaw channel.
The output channel (upper pipe) is connected directly to the input socket of the vacuum cleaner instead of the working nozzle.
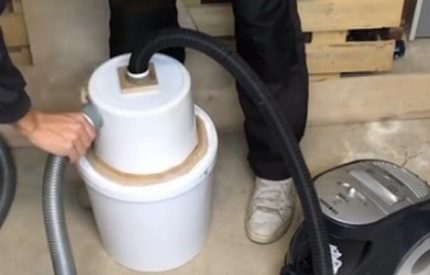
First, a vacuum cleaner is turned on, then a construction tool is used for the necessary purposes. As a result, the performed action, for example, sawing a board with an electric jigsaw, passes without ejection of chips and fine dust into the environment.
The by-product of the operation is completely sent to the cyclone separator, where it is filtered properly.
Lovers of homemade products can try to completely assemble a vacuum cleaner that can be used in the workshop or in the house. A step-by-step instruction on the manufacture of a practical unit is presented in this article.
Conclusions and useful video on the topic
The video below shows how to build another, more simple cyclone design, with your own hands.
The author uses this home-made system in domestic practice and is extremely pleased. A cyclone separator made of a conventional bucket helps to work in clean conditions during the production of construction works:
Self-assembly of a cyclone for a vacuum cleaner is permissible and quite possible. Moreover, there are projects of such “self-made” systems that are actually done, if not in 2 minutes, then in a couple of hours. Such a cyclone is really worth it to spend some time making it. Costs are fully offset.
Have experience manufacturing a cyclone filter for a vacuum cleaner? Please tell readers about your way to assemble the separator. Comment on the publication, participate in discussions and add photos of your homemade products. The feedback block is located below.

 How to make a vacuum cleaner with your own hands: detailed instructions for assembling a homemade appliance
  What is a cyclone filter for a vacuum cleaner: types, structure and operation, pros and cons
  How to disassemble a Samsung vacuum cleaner: typical breakdowns + detailed instructions on how to disassemble a vacuum cleaner
  Overview of the vacuum cleaner with a dust collector Bosch GL30 BGL32003: a reliable unit in the basic assembly
  Do-it-yourself Samsung vacuum cleaner repair: common causes of malfunctions + troubleshooting procedure
  How to fix a vacuum cleaner with your own hands: the most common breakdowns and their repair
  How much does it cost to connect gas to a private house: the price of organizing gas supply
  The best washing machines with dryer: model rating and customer tips
  What is the color temperature of light and the nuances of choosing the temperature of the lamps to suit your needs
  Replacement of a geyser in an apartment: replacement paperwork + basic norms and requirements
Interestingly, the assembly of such a cyclone looks quite simple. I would use such a device for cleaning the workshop. Finding an old vacuum cleaner is not a big problem, all the more details.