Do-it-yourself Samsung vacuum cleaner repair: common causes of malfunctions + troubleshooting procedure
Thanks to household appliances, homeowners find complete comfort. The use of the same vacuum cleaners significantly reduces the physical load spent on cleaning. Meanwhile, even super-reliable equipment, for example from Samsung, is not eternal, which indicates one thing: once the time comes for repair or replacement.
However, convenient and practical units quickly make users get used to working with them. Therefore, most of their owners prefer to restore the functionality of devices rather than buying new ones. We will tell you about the repair of Samsung vacuum cleaners that you can successfully do with your own hands.
The content of the article:
Can I fix a vacuum cleaner myself?
Most of the models of cleaning household appliances of the Korean company are represented by designs that are relatively simple in technical terms. Accordingly, in most cases, the repair of such products is also quite simple.
Obviously, the complexity of the repair work is fully correlated with a particular unit or part. So, eliminating a small breakthrough on a corrugated hose is much easier than replacing a broken motor bearing.
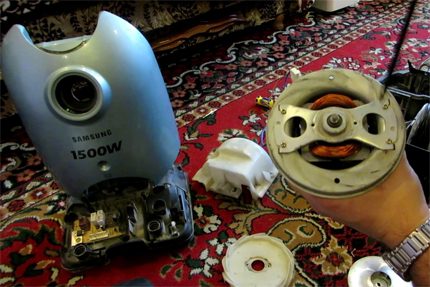
Consider the often manifested malfunctions of Korean-made household vacuum cleaners and possible ways to eliminate such defects at home. It is logical to note: with all due respect to the service workshops, the amount of payment for repair services in the service often approaches the cost of a new vacuum cleaner.
Minor defects in vacuum cleaners
Minor defects usually do not cause a global machine malfunction.The Samsung vacuum cleaner continues to work, but the technical parameters no longer correspond to the exemplary values.
As a result, the traction force decreases and the power consumption of the equipment increases at the same time. Accordingly, the quality of cleaning is reduced, but most importantly, the risks of more serious defects are increasing.
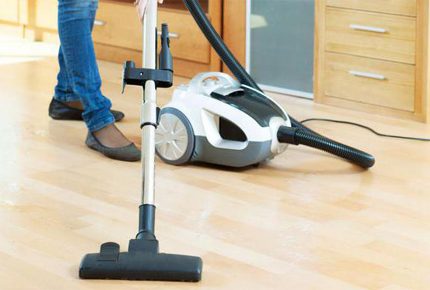
Therefore, minor faults should not be ignored. On the contrary, they should be eliminated as soon as possible.
Classic defects of this kind for Samsung vacuum cleaners:
- decreased efficiency of the HEPA filter;
- clogged cyclone filter mesh;
- blocking the brush turbine with foreign objects;
- blocking wheel rotation with foreign elements;
- tube clogging;
- rupture of a corrugated hose.
We consider each individual group of defects in more detail.
Problem # 1 - Filter Efficiency Decrease
As a rule, all existing harvesting models Samsung technology equipped with multi-service filtering components. That is, after each cleaning, the owner of the apparatus removes the filters, rinses, blows and returns to the place. Multiple cycles.
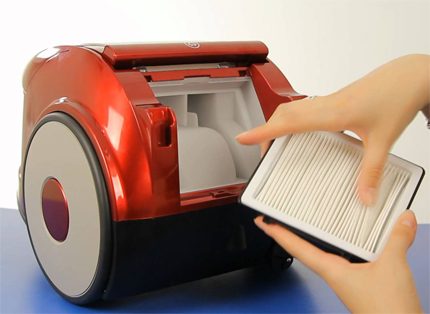
However, the filter material cannot be thoroughly cleaned. With each cleaning, the pores of the material become clogged with microscopic particles more and more. Finally, the moment comes when the filter loses the transmission efficiency of air up to 50% and lower. This is the limit that violates the technological principle of the functioning of the vacuum cleaner.
The motor continues to work at full power, but the resistance on the suction and discharge sides increases the load. The currents increase, the winding and, accordingly, the details of the electric motor become very hot. If you continue to operate the equipment in this condition, the day is not far off when the motor simply jams or burns out.
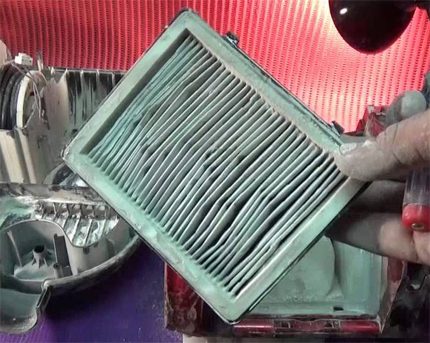
Which exit? Of course, a complete replacement of filter elements at all stages, including the HEPA filter. Typically, any type of filter media (foam, porous sponge, sipron) is commercially available.
Problem # 2 - your spent HEPA filter
A little more complicated with the HEPA material, but here you can find a way out. That is, it is enough for the user to buy the right material, cut out the elements of the right size and apply them instead of material that has lost operational quality.
Putting a self-made version of the HEPA filter is somewhat more difficult. It will be necessary to carefully open the frame double mesh, usually the frame is made of plastic) in order to remove the filter material for replacement.
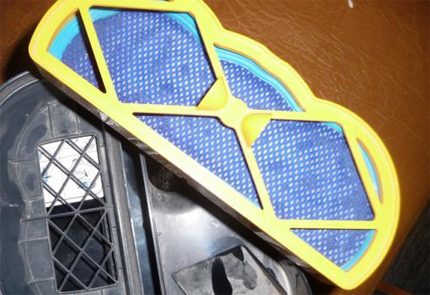
It is necessary to cut along the perimeter with a sharp clerical knife the area of conjugation of two plates, after which, with a small effort, divide the frame into two parts. Then replace the HEPA blade with a new one and glue the holder frame again.
The same applies to the mesh filter and the motor protection filter, which are used in cyclone models.
Both the first and the second filters are tightly clogged with dirt, by the way, due to the fault of users who violate the mode of filling the container above the specified label. There are cases of clogging of the tube-rod.Cleansing blockages are eliminated.
Problem # 3 - rupture of a corrugated hose
The accessory connecting the inlet of the vacuum cleaner and the tube-rod with the working nozzle is a corrugated soft hose that is damaged at the points of soft folds due to wear of the material or as a result of the loads applied to this point.
The traditional points of damage are the joints of the hose with the nozzle-lock or with the nozzle of the tube-rod.
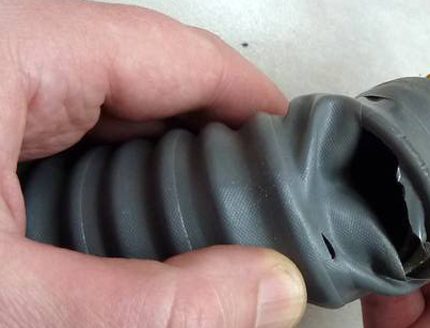
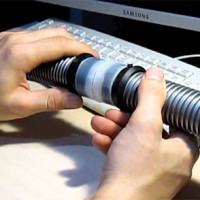
The repair process in such cases is not particularly difficult. It is enough to cut the hose a little further from the rush and gently remove the residues from the inside of the nozzle (factory mounting is glued).
The inner part of the nozzle usually has a thread exactly under the winding of the hose. On this thread, the cut off hose is simply screwed into the nozzle and this repair can be considered completed. Practice has shown that there is no need for any additional fixings with glue.
If a rush has formed in the central part of the corrugated hose (or, for example, you need to extend the accessory), in such cases it is convenient to use a piece of the rubber chamber from the bicycle tire.
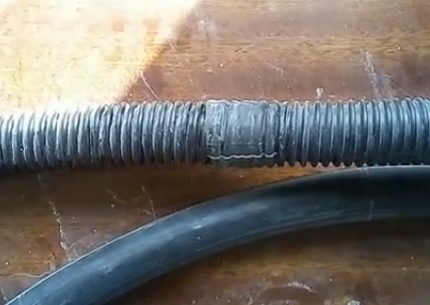
In terms of size and taking into account the tight fit, this material is ideal. Previously, the parts of the hose are cut and glued, and then a rubber coupling from a bicycle tire is pulled over the created joint. The coupling with a width of 30-40 mm also "sits" on the glue.
Process detail vacuum cleaner replacement described in the article, in which each step is thoroughly analyzed and recommendations are given.
Problem # 4 - blocking movement of mechanisms
These malfunctions are inherent in such mechanisms as the brush turbine, as well as (occasionally) the chassis of the wheels. Both nodes have rotating parts - shafts, gears, rings. During cleaning, hair, threads and even thin small metal wires inevitably fall into the area of these nodes.
These garbage particles are wound on the shafts of gears, rings, wheels and, over time, accumulate in such a large amount that they completely block the rotational movement.

Such moments also affect the operation of the vacuum cleaner, contribute to an increase in the load on the engine, and force the user to increase traction on the corrugated hose, which is damaged in the creases.
In this condition, the first thing to do is unlock the movement of nodes. The turbo brush needs to be disassembled (the manufacturer provides for disassembly) and carefully clean the inner area.
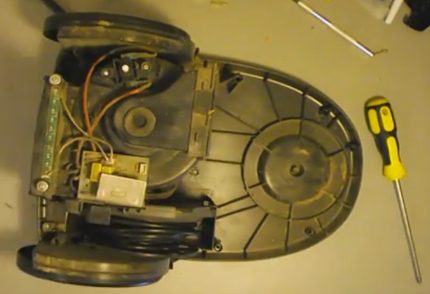
To access the inner area of the large wheels of the vacuum cleaner, you will have to remove the case by unscrewing a few screws from the bottom. Both actions are quite accessible to do it yourself.
Serious damage to Samsung vacuum cleaners
Repairing serious defects usually requires the intervention of certified craftsmen. However, here some of the malfunctions are available for DIY repair. For example, the owner may well replace the damaged mains switch himself.
No. 1 - power button and power cable
A malfunction of the power switch does not allow the device to be turned on or when it is turned on there is no fixation of the operating mode.In the first case, the reaction when the button is activated is zero.
In the second case, the vacuum cleaner starts when the button is pressed, but immediately turns off, the user should release the button.
The performance of the mains switch can easily be checked by a tester - an electromechanical device. A non-working button does not create contact between the terminals in any position.
A push button creates contact only when pressed. By connecting the tester probes to the button terminals, you can check the operability of all positions.
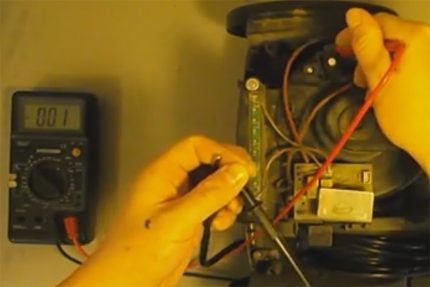
Along with switching the network, the supply cable for the vacuum cleaner may also be faulty. The power cord is checked by the same tester.
Checking the power cord also involves power outlet testingthat the owner uses, including the vacuum cleaner in the work.
No. 2 - air intake power regulator
Many Samsung models are equipped with a suction power control module. In fact, this module is a regulator of the rotational speed of the shaft of the electric motor installed inside the vacuum cleaner. The module is an electronic circuit (relatively simple) based on thyristors.
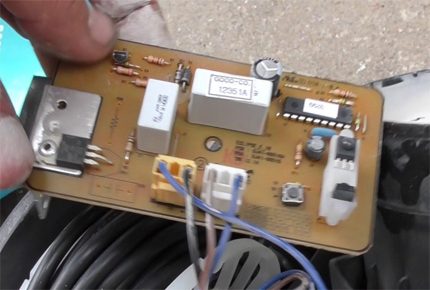
A module malfunction - usually a thyristor malfunction - entails either the inability to start the vacuum cleaner, or the complete inability to regulate the performance of the device. Anyway required vacuum cleaner disassembly, dismantling the regulatory module and replacing failed components.
It is quite problematic to do it yourself without certain skills, for example, the ability to distinguish a resistor from a capacitor or the ability to hold a soldering iron in your hands. However, if you wish, these qualities of an electronic engineer are not difficult to master.
No. 3 - electric motor of a household vacuum cleaner
A complex malfunction, of course, is the failure of the vacuum cleaner motor. As a rule, in the structure of modern household appliances manufactured under the Samsung brand, axial-type engines are used, the rotation speed of which reaches 20,000 rpm.
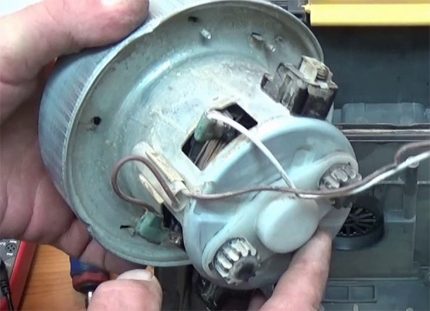
Rotation with such a high frequency is accompanied by significant loads on the thrust bearings. Therefore, one of the most common malfunctions of Samsung vacuum cleaners is a bearing defect. Which is usually accompanied by increased noise of the device, sometimes very strong.
The work of replacing the vacuum cleaner bearings with your own hands is difficult, but quite feasible. However, initially you will have to disassemble the entire contents of the construction of the cleaning equipment in order to get to the motor.
Of course, in the process of disassembling the vacuum cleaner, it is recommended to fix the sequence of installation of parts, writing on paper, or you can take pictures on a smartphone.
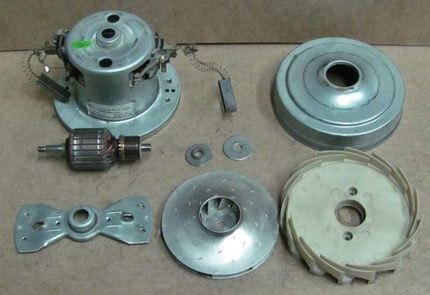
On a dismantled engine, it will be necessary to remove the contact brushes and the impeller cover. This process is relatively straightforward.
Contact brushes, as a rule, are fastened with one screw and are easily removed from installation niches.On the casing of the impeller (outer half), it is necessary to carefully bend the four points of the rolling and applying some force to pull off the casing.
The most difficult process is unscrewing the nut on which the impeller is mounted on the motor shaft.
Craftsmen with experience in performing vacuum cleaner repair, apply for these purposes different ways:
- clamp the engine manifold with wooden chocks;
- wound an insulated wire onto the collector;
- Saw a groove along the shaft end.
As a result, the impeller can be removed. Further - “a matter of technology” - the shaft is removed by pulling force, and defective bearings change. Then build in the reverse order.
Electrical defects of engines - open circuit, interturn circuit of a winding, burn-through of a collector - phenomena are relatively rare, but they also occur. In such cases, usually the electric motor changes to another (new) instance.
Conclusions and useful video on the topic
On the topic of repairing the corrugated hose, you can watch a video where the author talks about all the nuances of this operation, which is simple for a home master:
The method of cutting a groove along the shaft end when disassembling the engine from a vacuum cleaner is described in detail in the following video:
As it turned out, it is not difficult to eliminate minor breakdowns at home. Moreover, it is not necessary for this to have knowledge of electromechanics and the experience of repair work - most problems disappear after cleaning or replacing individual elements and accessories, such as filters, brushes, pipes.
If your vacuum cleaner has a more serious problem with the engine or microcircuit, and you are completely unaware of these issues, it will be easier to contact the after-sales service to provide qualified services.
Moreover, Samsung brand equipment provides free maintenance during the warranty period.
Want to talk about how to restore the Samsung vacuum cleaner with your own hands? Do you have valuable information on the topic of the article, which is worth sharing with visitors to the site? Please write comments in the block form below, ask questions and post a photo.

 Rating of vacuum cleaners Samsung 1600W: an overview of the best models + recommendations for choosing
  TOP-8 robots of vacuum cleaners “Samsung” (Samsung): an overview of options + pros and cons of models
  How to fix a vacuum cleaner with your own hands: the most common breakdowns and their repair
  How to disassemble a Samsung vacuum cleaner: typical breakdowns + detailed instructions on how to disassemble a vacuum cleaner
  How to fix a hose for a vacuum cleaner: causes of damage + self-repair methods
  Samsung 2000w vacuum cleaners: TOP-7 best models + recommendations for customers
  How much does it cost to connect gas to a private house: the price of organizing gas supply
  The best washing machines with dryer: model rating and customer tips
  What is the color temperature of light and the nuances of choosing the temperature of the lamps to suit your needs
  Replacement of a geyser in an apartment: replacement paperwork + basic norms and requirements
I had it this way: a corrugated hose was torn off at the vacuum cleaner right at the handle itself. I did not close the hole, but simply shortened the hose by ten centimeters, removing the damaged area. It becomes simple - you push the plug with a screwdriver, unscrew the sleeve from the hose and cut off the damaged piece. For reliability, you can anoint with glue and in the reverse order - tighten the coupling and attach to the handle. As a result, a whole hose, even ten centimeters shorter.
But what should I do if the hose compresses when the vacuum cleaner starts up? Filters in order, hose not clogged.
Hello. If the hose is compressed, then theoretically the suction draft is good. Try disconnecting the hose. Does a vacuum cleaner suck in dirt without a hose? If yes, nevertheless clean the tube again, inspect it, the hose, the place where it is connected to the device. Also test how the vacuum cleaner works with open / close the vacuum damper on the hose.
By the way, the nozzle of a vacuum cleaner could also clog.
And how to repair cordless vacuum cleaners? Google is silent about this ...
Hello) Why do not you ask Yandex ... or YouTube))
Is it a malfunction, is everything described above? Quite already, the torn hose is discussed as a malfunction.
Here is a riddle for all of you: the vacuum cleaner switches off during operation and after a while it starts to work on itself. Cords, current collector on the drum ... everything is working, greased. The adjustment board is soldered and serviceable. This behavior when plugged into any outlet.
I wildly apologize for the T9 mode - in the error type text. I hope everyone understood the point.