How to make a roof ventilation duct: a detailed construction guide
It is very comfortable to live in a house where the temperature, humidity and oxygen concentration meet established standards. To do this, you need to make a high-quality air exchange system. One of the conditions for its trouble-free operation is a properly assembled and installed ventilation duct on the roof, in which there are channels for air outflow.
The task of organizing air exchange is not new, therefore, there are time-tested solutions, following which you can perform all the work of installing the box yourself. To do this, you need to read the instructions written by us, prepare the tool and material, gather your courage and start.
We paid attention to some theoretical aspects of the placement of ventilation outlets and provided illustrated instruction on how to create a duct. All stages are designed for a person who has initial skills in working with a conventional building tool. No specific knowledge or skills will be needed.
The content of the article:
Rules for placing ventilation outlets
There are two standard ways of venting pipes outside the house: through the wall and through the roof. In the second case, pipe fragments located above the roof level are often placed inside a special box.
The ventilation duct has two functions:
- Warming. When cooling the air leaving the room, condensation forms. It begins to seep back through the ventilation system, and can also narrow or completely close the section of the channel.
- Waterproofing. Violation of the integrity of the roof can lead to water entering the attic space. It is also necessary to protect the ventilation duct from direct ingress of precipitation in the form of rain or snow.
And also the box will serve as an excellent supporting structure for fastening the facing material and to provide an indent from unstable building structures made of lumber.
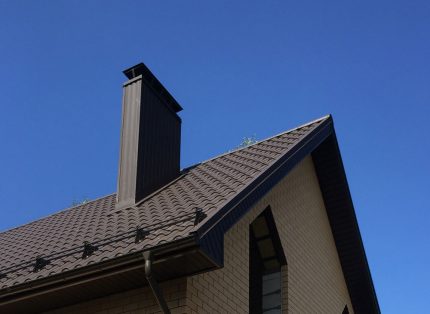
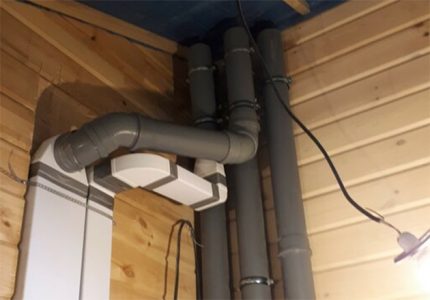
If the house has planned or already implemented several attic vents, then there are 3 options for how to bring them to the roof:
- For each channel, you can make your own box. This is the most costly method, however, in this case, pipes can be bent without bending, which with natural ventilation increases traction.
- To bring all the pipes together and bring them to the roof in one box. This reduces the amount of work on the roof, but increases the workload of the attic.
- Make a single system ventilation ducts with one exit. This minimizes the size of the duct, which greatly simplifies work on the roof, but can lead to problems characteristic of branched air exchange systems.
The use of a channel system with several places of air intake and one point of its removal should be well calculated beforehand. It is necessary to properly build the ventilation and install check valves, otherwise reverse air flow is possible.
The hole in the roof should not damage the rafters, otherwise it will lead to the risk of redistributing the load of the supporting structures. The crate does not play such an important role, since it only holds the coating.
You also need to carefully approach the issue of determining the location of the ventilation outlet so that it does not appear in the zone of wind backwater.
Failure to comply with the rules of the position of the pipes relative to the roof elements prescribed in clause 6.6.12 of SNiP 41-01-2003 “Heating, ventilation and air conditioning” may lead to a decrease in draft or its rollover, which immediately negatively affects the air exchange.
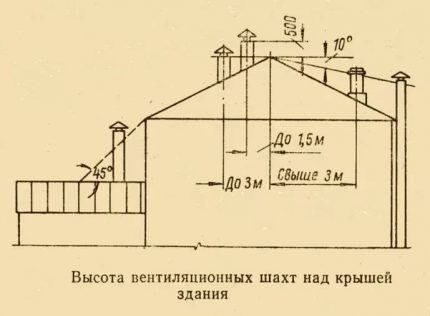
Therefore, for a pitched roof, it is better to plan a place for the box closer to the ridge. This will reduce the height of the structure, which will simplify the work on its construction.
Steps for installing the box
Once a place has been selected for passage of ventilation pipes through the roof, it is necessary to perform all the work in the attic (to bring a pipe or pipes) and only then proceed with the construction of the box. This procedure is typical for private houses, so the different options are well researched and you can offer a standard solution suitable for almost any situation.
Necessary materials and tools
Before deciding on their own to make a ventilation duct on the roof, it is necessary to understand that this event will last at least one daylight. Therefore, you need to know the weather forecast to be sure that there is no rain or wind.
Any work on the pitched roof must be carried out in accordance with safety requirements. To do this, you must:
- have a safety rope tied to a belt;
- wear the right shoes, which does not slip and does not fly off the leg;
- install two stairs on the roof slope on the sides of the place where the box will eventually stand.
Neglect of safety regulations may lead to the absence of a roof box in the near future, due to the installer getting into the trauma department of the hospital.
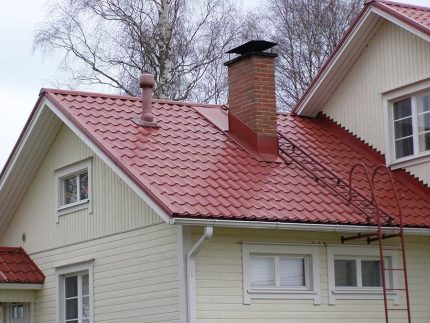
During the work, the following tools will definitely be required:
- heavy hammer;
- screwdriver;
- saw on wood;
- scissors for metal;
- knife and scissors for soft materials and films;
- level;
- grinder (in the case of covering the roof with galvanization or metal).
It is also necessary to take care in advance of a sufficient number of wood screws, scotch tape, small nails and other consumables.
Roof Hole Cutting
To accurately determine the position of the hole, it is necessary to drill 4 holes from the inside at the corners of the future box. Then, using a ruler, you need to draw a contour and begin to cut it.
If the coating is metal, then you need to use a grinder or scissors for metal. You can remove roofing material or other “soft” material with any suitable tool: a knife, scissors, jigsaw.
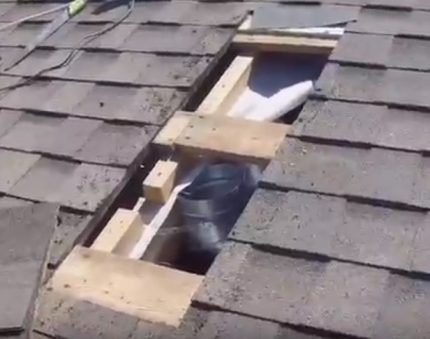
It is easier to remove a continuous crate with an electric jigsaw, but you can also use an ordinary saw. Before doing this, it is better to determine the inside of the place of attachment of nails and screws, so as not to “catch” them.
Wood frame formation
The frame can be made of edged boards with a thickness of 35 mm (there is no sense in a larger thickness) or a bar 50 × 100 mm. Vertical racks should rest on the floor of the attic, and not be attached to the crate or rafters, since the box will have a lot of windage and can be demolished by the force of the wind.
Above the roof, the frame is tied at the top and an additional stiffening belt is additionally installed at the level of the roof. It will also serve as the basis for fastening the skin.
After the construction of the frame, the pipes are extended from the attic to the top of the constructed box. If the ventilation system is made of branded elements, then there is nothing complicated in this procedure.
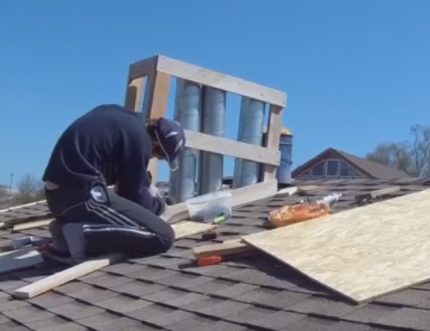
It is imperative to expose the pipes exactly vertically, as well as to monitor their symmetrical location inside the box. It is necessary to comply with the condition that from the pipe to the edge of the box there should be at least 5 cm of space that will be filled with insulation. And the top should be set exactly, for which you will need to use the level.
Thermal insulation
Before laying the insulation material, you need to hem the boards that cover the box from below at the level of the attic ceiling. This must be done so that the insulation does not fall down.
Since it is impossible to lay solid material in the box, two options remain:
- freely deformable material such as mineral wool;
- loose material such as perlite sand fraction 0.16 - 1.25 mm
Expanded clay (insufficiently low thermal conductivity), polystyrene crumb (coarse-grained), sawdust (can rot) are not suitable for this purpose.
Mineral wool must be laid very tightly so that there are no cold bridges. Therefore, in units of volume, its consumption will be almost two times more than the space of the box filled with insulation.
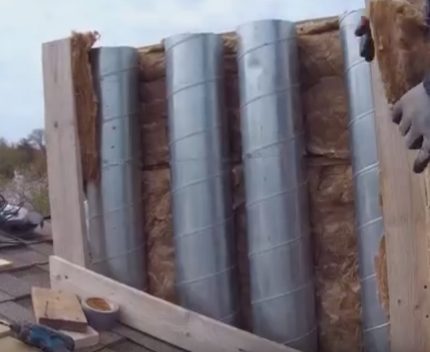
Perlite is very “fluid”, so it perfectly fills all the voids. But so that it does not leak out, inside the box will need to be laid with a dense fabric such as geotextiles. You need to work with perlite in goggles and a mask, especially if there is wind on the roof. After backfilling, it is better to immediately put a layer of mineral wool or polystyrene with holes under the pipes, as perlite can inflate.
It is necessary to sheathe the frame with an OSB-plate or board, thickness 1.0-1.5 mm. To save time, you may want to cut the side walls in advance according to the dimensions calculated for the box. However, practice shows that this is not worth doing. When installing the frame, unforeseen deviations often occur, which will slightly change its dimensions.
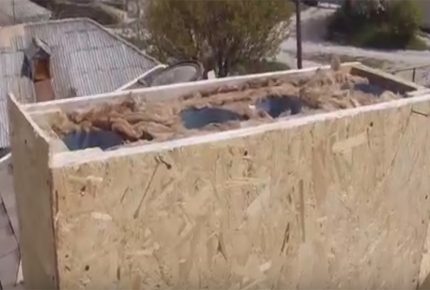
If the walls of the ventilation duct will be assembled from several elements, then you need to remember that there is no special need for a snug fit of joints. Therefore, time does not need to be spent on fitting.
Waterproofing the ventilation duct
One of the dangers for a type of mineral wool insulation is the ingress of water into it and its subsequent freezing. Therefore, it is necessary to perform vapor barrier.
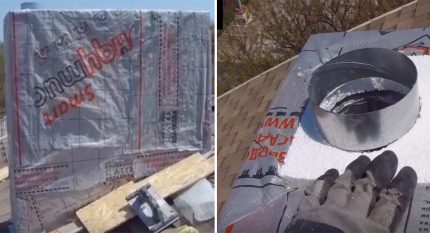
In the center of the piece of waterproofing material, you need to cut a hole 2 cm smaller than the diameter of the pipe. Then, along the inner edge, it is necessary to make incisions with a depth of not more than 1 cm. When putting on a pipe, such an element will tightly close the gap between it and the ramp plane.
On top of the film, you can crush the foam, cutting holes for pipe outlets. After that, the upper part of the box must be reinforced with a mesh and cement.
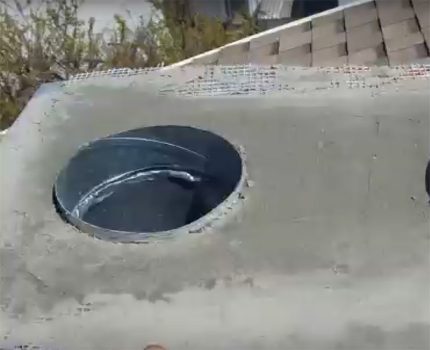
If the pipes are below the level of cement, then you need to add inserts. In order to prevent this situation from happening, it is better to immediately set the ventilation outputs with a margin of height (10-20 cm), since it is easier to cut off the excess than to deliver additional fragments.
Providing waterproofing of the base and sides
When it rains or snow melts, streams of water flow on the roof. With great care, it is necessary to carry out work to prevent them from falling under the ventilation duct.
There is a rule that ensures that water does not fall, when it flows freely along an inclined surface: the upper waterproof element must be pulled over the lower one. According to this postulate, the design of the waterproofing of the ventilation duct located on the roof is arranged.
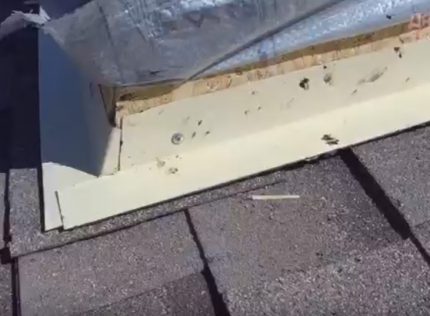
First, you need to nail the abutment strips to the base of the box. They have the appearance of corners with a face width of 5-7 cm. It is better to fix them not on nails or screws, but on bitumen mastic or liquid roofing material.
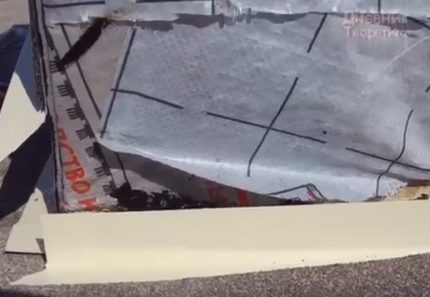
As a waterproofing, protecting the sides of the ventilation duct, there can be roofing, soft tiles, rolled bitumen and bitumen-polymer roofs, polymer membranes, galvanization or any other durable material with water-repellent properties.
If it is not solid, then it should be fastened from the bottom so that the upper parts are layered on the lower.
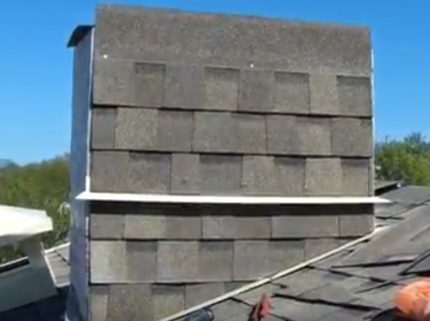
If desired, you can install an additional visor in the middle, although if vent pipe deflector, grouped in one shaft, will have large ledges, then there will be no sense in it.
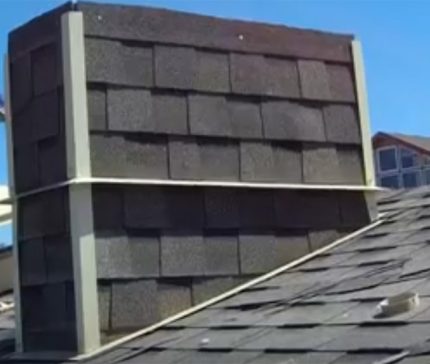
If a soft material was used for cladding, then it is advisable to coat its joints with some adhesive. A liquid roofing material is suitable for this. This is necessary so that a strong wind does not disrupt the waterproofing over time.
Umbrella installation and fixation
There are 2 options: order a visor from manufacturers or make it yourself. As in the case of sidewalls, you do not need to make an umbrella deflector for the duct in advance, since the dimensions of the constructed object may differ from the calculated ones, which will lead to the problem of matching parts.
You can order a visor from companies engaged in the creation of metal products. It is necessary to measure the external perimeter of the upper part of the ventilation duct, select the color and shape of the cover. Usually the production time takes 1-2 days. For this period, you need to cover the ventilation with a temporary cap, for example, from plywood with a roofing material nailed on top of it.
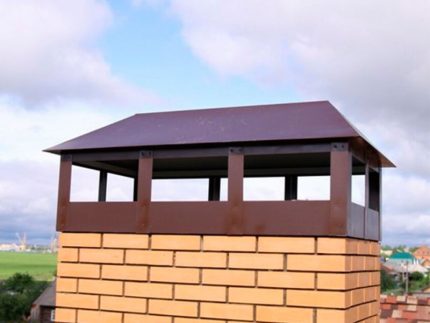
Also, the cap can be fixed on the vertical bars that make up the frame of the entire ventilation duct. In this case, they initially should be 20-30 cm higher than the pipe outlet. The deflector can be made single-piece from a wooden shield, coated on top with a galvanized sheet. With this solution, it is not necessary to have a welding machine and the ability to work with it.
All wooden parts of the lid must be coated with anti-fungal impregnation or weather-resistant paint for external work, for example, PF-115. At the end of the installation, you need to check that the installed visor does not stagger, otherwise the wind will gradually loosen the mounts.
Related videos and conclusions
How to sheathe a brick chimney or ventilation duct. Part 1 - setting profiles:
Continuation of the previous video. Part 2 - insulation, metal sheathing and water drainage:
Two technical solutions for waterproofing the box, depending on its proximity to the ridge or cornice:
The main stages of installing the ventilation duct are the same for any conditions: creating a hole, installing a reliable frame, insulation, waterproofing, lining, manufacturing and fixing of the deflector.
The nuances of the job are to cover the roof, as well as the type of material from which the entire structure will be assembled. In most cases, you can do everything yourself, having initial skills in construction or repair.
Do you have useful information on the topic of the article, which is worth sharing with site visitors? Do you want to tell how the ventilation shaft was equipped with a duct in your own cottage or in a country house? Write comments, please, in the block form below, ask questions, post pictures on the topic of the article.

 How to arrange ventilation ducts in a private house: design rules and construction manual
 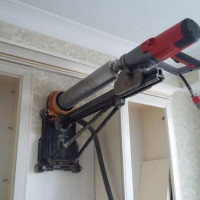 Is it possible to drill the ventilation duct and make changes to the design of the ventilation shaft?
 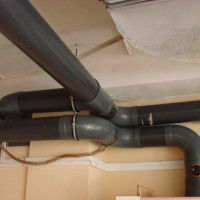 Installation of plastic ventilation ducts: a guide to the construction of a system of polymer pipes
 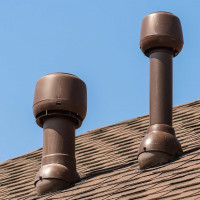 Ventilation pipes on the roof of the house: arrangement of the exhaust outlet through the roof
 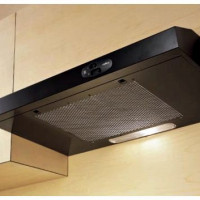 Installing the built-in hood: location options and installation instructions
  How to make a node of the passage of ventilation through the roof: arrangement of roofing penetration
  How much does it cost to connect gas to a private house: the price of organizing gas supply
  The best washing machines with dryer: model rating and customer tips
  What is the color temperature of light and the nuances of choosing the temperature of the lamps to suit your needs
  Replacement of a geyser in an apartment: replacement paperwork + basic norms and requirements