Digging a well with your own hands: types of well structures + an overview of the best digging technologies
In areas where there is no centralized water supply, it is necessary to build wells or boreholes. The type of source depends on the hydrogeological conditions of the area, the needs and personal preferences of the owner.
Digging wells is a time-consuming and expensive process, but it can be cheapened by doing it yourself. Therefore, we suggest you figure out how to make a well with your own hands and what it will take.
The content of the article:
On which horizon to dig a well?
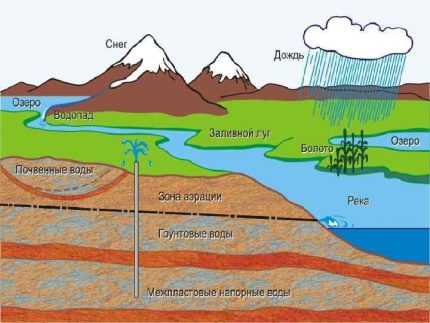
Aquifers can occur at several levels. The uppermost is usually located close to the surface of the earth. This layer is called the tip. It may be contaminated with chemicals used in agriculture, fecal bacteria from sewage, etc.
The vovkhodok is not suitable for feeding a well, unless it is planned to use water exclusively for technical purposes or for watering garden plants. It should also be borne in mind that during seasonal changes, the amount of water can significantly decrease or increase.
Wells digging into the horizon of groundwater. This aquifer lies beneath the high water. The water in it is often pressureless, so their level in the well is the same as in the aquifer. During the construction of hydraulic structures, groundwater is cut off from the upper layers to protect against pollution.

Artesian ones lie below groundwater. Wells do not dig to this horizon, and well construction is very expensive. In addition, it is necessary to draw up a permit for the use of water resources.
Artesian waters are pressurized, so the water level in the well is higher than in the horizon, even gushing is possible.
Finding a place under the water source
When constructing a well, it is important to correctly determine the depth of the horizon of pure drinking water, to calculate and purchase the right amount of concrete rings, equipment for arranging the hydraulic structure itself and the water distribution system. It is also important to choose the right place and time of digging the well.
Choosing the right place for a well depends on several factors:
- Exploration data. There are many ways to search for water on a site, but nothing more reliable than geological exploration of the area has not yet been invented.
- Information about nearby sources. It would not be superfluous to inquire from the nearest neighbors at what depth the wells were built for them, and what quality of water.
- Suitability of water for drinking. Be sure to take a water sample for chemical and microbiological analysis in the nearest sanitation. Specialists will determine the concentration of chemicals and the presence of pathogenic bacteria.
- Type of soil. The complexity of digging wells, the need to use special equipment, etc. depends on this. Ultimately, all this affects cost of the finished well. The hardest thing to build a well on rocky soils.
- The terrain. The greatest difficulties arise in the construction of a well on a hillside. The ideal option is a flat area.
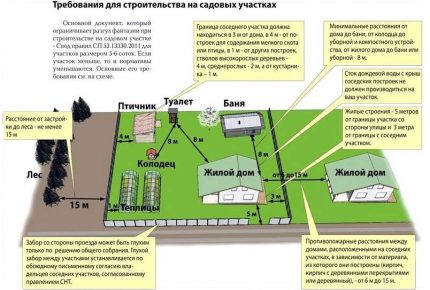
- Distance from pollution sources. Wells digging at a considerable distance from cesspools, septic tanks, compost heaps, stables. It is undesirable to place them in a lowland where rain, melt water, as well as water mixed with agricultural fertilizers flows.
- The degree of remoteness from home. The closer the water source to the house, the more convenient.
In this case, the mine should be placed so that it does not interfere with the passage, does not block access to outbuildings, utility rooms.
Optimum distances are shown below in the diagram.
Features of wells of different designs
There are two types of structures - mine and tubular. The first option is much more widespread, because the construction of such a well is usually cheaper, and it is more convenient to use it. The mine structure is universal, and you can raise water with buckets, manual and electric pumps.
Another advantage of the shaft structure over the tubular is the convenience of construction. How to dig a mine well with your own hands, you can find out by reading the specialized literature and articles.
If you wish, everyone can take their advice, independently dig and equip a quality source of water.
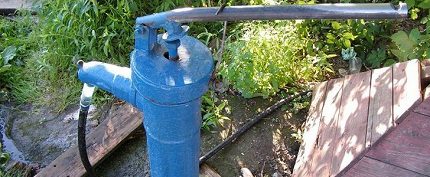
A tubular well is built if the aquifer is not deep, and the owner can use drilling equipment. The advantage of the tubular design is in faster construction. Due to the small diameter, the tubular structures are less polluted. They can be built next to residential and farm buildings.
Both types of wells have their own advantages and disadvantages. When choosing a suitable design should take into account all the nuances. Since a mine well is easier to build without the use of special equipment, in the future we will consider the issues of digging just such a source.
The best time to start construction
When is it better to dig a well? If you start work in the spring, after floods, you can make a mistake with the depth of the mine. Groundwater rises, and until their level drops, digging is undesirable. Otherwise, it may be necessary to deepen the structure, as in summer and winter there will not be enough water.
The autumn rainy season is also not the most favorable time for the construction of a well. But in the summer heat or winter it is quite possible to start work. During these periods, the water leaves. If you manage to build a workable well, it is guaranteed to maintain productivity in other seasons.
Winter construction is complicated due to freezing of the soil, but in summer or early autumn, nothing prevents the start of excavation. However, there is one exception. If the well is built on a quicksand, it is better to dig it in the winter.
Two main ways to dig a mine
Before you dig a well at home or in the country, you need to determine the type of soil and choose the appropriate method for building the mine. There are only two methods - open and closed. They differ significantly, each of them has its own characteristics.
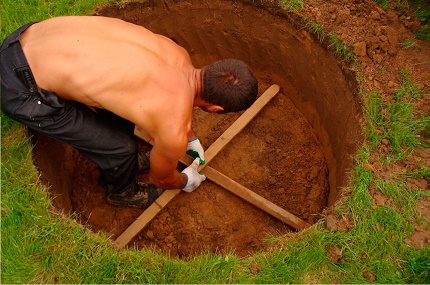
Method # 1 - open digging technique
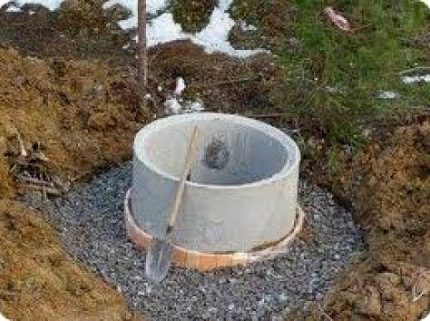
An open way to dig a well is convenient and simple. Its essence is that first you need to dig a shaft to the desired depth, and then install concrete rings. This method is suitable for areas with dense soil that is not prone to shedding.
A mine is being dug up to an aquifer. If necessary, the walls are strengthened as they are deepened into the ground. The diameter of the pit should be slightly larger than the calculated dimensions of the finished structure. When the mine is dug, equip its walls, the bottom, and fill the remaining gap with a layer of sand or gravel.
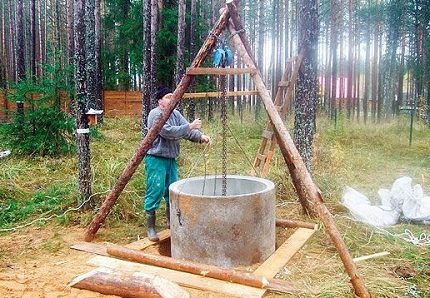
Method # 2 - features of the private method
If the soil on the site is sandy, then the open digging method is not suitable, because the risk of shedding the walls of the shaft is too great. This makes work difficult and can be potentially dangerous for builders. Then use the method of digging a well "in the ring." The technology itself is more complex than the open method, but safer.
Choosing a place for the well, you should dig a shallow hole for the first ring. The recess can be from 20 cm to 2 m. The diameter should correspond to the size of the rings. Having installed the first ring, they begin to choose the soil from within the structure. A heavy concrete ring will drop under its own weight.
Gradually, the first ring will lower so that you can install the second. It is placed exactly on the previous one, fastened with metal staples and a solution. It is important to avoid distortions, otherwise in the future this will lead to loss of tightness of seams and joints. So gradually install all the rings.
When the walls of the shaft are ready, it remains to waterproof them, to equip the bottom and top. These steps are the same regardless of which digging method was selected.
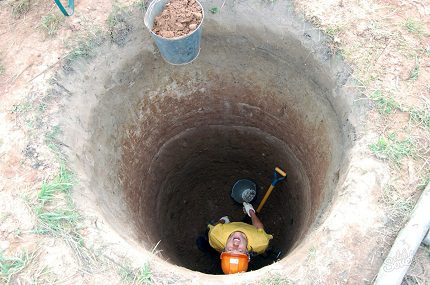
When choosing a method of digging, one must take into account that during excavation there are many nuances. Sometimes you need to get a big boulder, which prevents deepening into the ground, or you can stumble upon a quicksand. It is much easier to deal with these problems if you have chosen the technique of open digging.
The disadvantage of the closed method can be considered that in the well appears the overhead. It contains more unnecessary impurities than groundwater, and can contaminate a well. Get rid of the tip is not always possible.
An open digging method is not ideal either. We have to dig a hole more than the well itself. This involves a lot of labor.
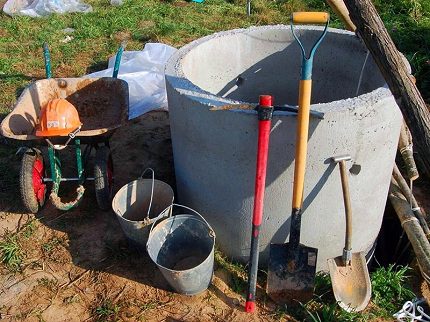
Construction and arrangement of a mine well
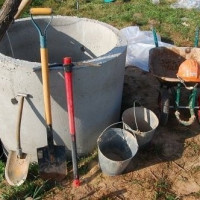
Most often, mine wells are built from finished concrete rings. This is the most convenient option. The design is solid, reliable and capable of lasting several decades. Work on the construction of a well is best done by two or three.
Lift mechanisms will be required. You need to install a tripod with a winch or winch. With its help, buckets with excavated earth are lifted up and the concrete rings are lowered into the pit. Strong ropes, cables or chains are also needed.
First of all, you need to calculate the desired diameter of the well. The best option is 1 m. For this design, standard rings are used. It is better to choose products of small height. So it will be easier to install them on one another. At the same time, you will have to spend more time sealing the joints, because there will be more of them.
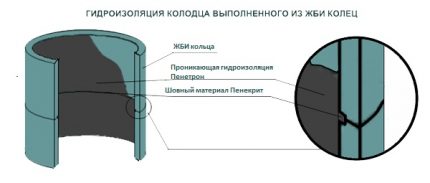
How to make the walls and bottom of the structure?
To equip the walls and the bottom of the structure, you must adhere to the following instructions, in which there is nothing complicated:
- Dig a hole 0.5–1 m deep. Shallow or greater depths will be inconvenient for work.
- Install the first ring. Ideal - installation on a cutting shoe.
- Dig the bottom of the pit, evenly taking out the soil over the entire area of the shaft.
- When the ring deepens, install the following, fasten.
- Continue to work until you reach the aquifer. This usually takes several days.
- The signal that you have reached the aquifer is water at the bottom of the mine. She is dirty and muddy. To clean it, you will need to pump out water and install bottom filter.
- When the mine is ready, remove water and dirt with buckets or a pump, go deep another 10-15 cm, level the bottom.
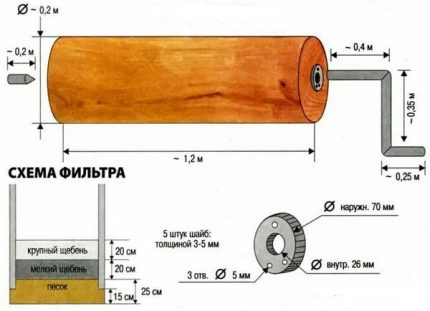
- The bottom of the well should be covered with a 25-cm layer of sand.It is best to choose a river, coarse-grained. The next layer is small gravel. Its thickness should be at least 15-20 cm. The last layer is large gravel. The thickness is the same.
Before laying, crushed stone should be disinfected with a weak solution of lime. It is not always convenient to lay the bottom filter directly on the bottom of the pit. It happens that the soil is too thin due to the large amount of water. In this case, first lay a boardwalk with gaps, on top of which a bottom filter is poured.
When the design is ready, water is pumped out. After that, you need to wait until it is typed, and pump out again. This procedure is done several times until the water is purified. Now it will be possible to take a sample for laboratory analysis.
We also recommend that you read the article on causes of turbidity in the well and how to eliminate it.
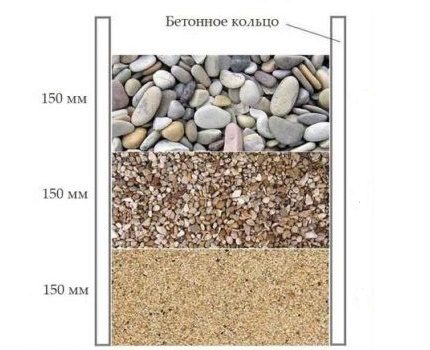
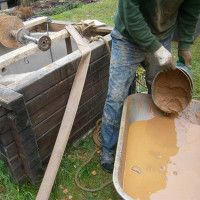
External waterproofing - clay castle
As an external protection against water, the so-called clay castle. It is necessary to cut off the overhead water, to prevent rain and melt water from entering the well. A clay castle is hardly an impeccable structure. It can contribute to deformation of the well structure, as varies in volume.
To achieve good external waterproofing, roll materials are often laid, surfaces are treated with liquid glass, and after that a clay castle is made. It turns out double protection against moisture. This leads to an increase in the cost of construction, but helps to maintain water quality.
For the castle choose clay with a small sand content - up to 15%. It is frozen, leaving it outdoors during the winter. Then the material is mixed with lime (4 parts of clay and 1 part of lime), thoroughly mixed to a uniform plastic mass.
“Correct” clay does not crack, if you make a lump out of it, it does not spread, it holds its shape perfectly. It is laid in a trench dug around a well. The width of the trench should be at least 0.5 m, and the depth - 1 m. The walls of the trench are reinforced with formwork.
The clay castle is laid in layers of 15-20 cm. Each layer is well tamped. When the clay castle is ready, it is covered with geotextile, and paving slabs are concreted or laid on top. Exterior finish is needed so that the clay does not become sour during rains and does not turn into a dirty mess.
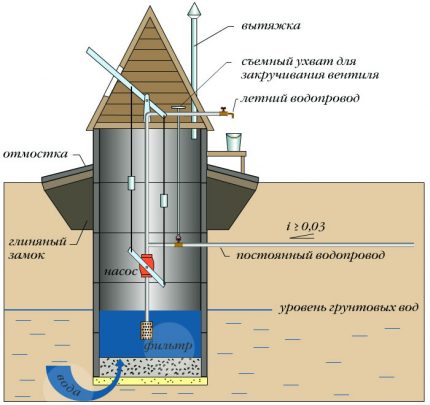
Well head arrangement
The aboveground part of the structure should rise by 0.7-1 m. The easiest way to equip it is to install an additional concrete ring. The junction of the underground and aboveground parts is well sealed.
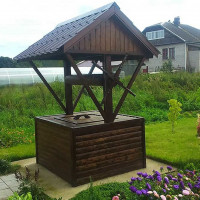
The concrete ring does not look very aesthetically pleasing. Therefore, to improve the appearance of the head, they often finish with wood, stone, build houses that completely or partially cover the aboveground part of the structure.
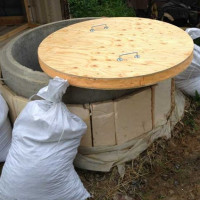
Be sure to equip the cover and canopy above the well. This is necessary to protect water from rain, snow, debris, insects. The tighter the lid closes, the better.Otherwise, the water can quickly become contaminated and rot, becoming dangerous to human health. Also, to avoid interruptions with water in the cold season, a well needs insulate for the winter.
The canopy is often made in the form of a gable roof from boards, lining, sheet metal or roof tiles. There is huge scope for imagination. The upper part of the well can be decorated so that the design turns into a spectacular landscape decoration.
Even if water from the well will be pumped into the house, it is advisable to install a mechanical device to raise it. This will help provide the house with water in case of prolonged power outages.
Classic options - crane and gate. The design of the first type will look perfect on the site, decorated in a "rustic" style. The gate is universal. It can be built from an ordinary log and decorated as you like.
Conclusions and useful video on the topic
All stages of well construction are described in the video below:
Internal waterproofing of the joints between the rings is a mandatory procedure. How to do it, see the video tutorial:
We offer the option of arranging the aboveground part of the well:
The construction technology of the well is simple, but its implementation requires serious labor costs. During operation, you must adhere to safety regulations. Be sure to wear a work helmet, take care of the ventilation of the mine, so as not to get poisoned by gases, and duplicate the main cables with safety belts. Your life may depend on this!
Trying to dig yourself well in the country or suburban area? Or maybe they have already done this work several times and can you give practical advice to our readers? Please leave your comments, share your experience, ask questions in the block below.

 Do-it-yourself well cleaning: a review of the best preventative and capital methods
  Do-it-yourself deepening of the well: a review of the best methods to get to the aquifer
  Do-it-yourself well warming for the winter: an overview of the best materials and methods of warming
  Do-it-yourself well in the country: a review of technology and tools for manual drilling
  Do-it-yourself well arrangement at the cottage: step-by-step instruction + advice from experienced craftsmen
  Do-it-yourself well cleaning: a review of common clogging causes and best cleaning methods
  How much does it cost to connect gas to a private house: the price of organizing gas supply
  The best washing machines with dryer: model rating and customer tips
  What is the color temperature of light and the nuances of choosing the temperature of the lamps to suit your needs
  Replacement of a geyser in an apartment: replacement paperwork + basic norms and requirements
I learned that work on digging a well is very expensive when it was necessary to build it in a summer cottage.
I decided to try to do it myself with the help of friends, especially since I calculated the depth of water in it from neighboring wells in advance and from them I found out the average number of rings needed. The most difficult was their delivery and the alternate installation in an already formed foundation pit.
Well, it’s quite possible to dig a normal well without hiring excavators, and the result is no worse. I’m also planning to organize a water supply from the well to the house, but so far I have not completely thought out such a system.