How to make a bio fireplace with your own hands: device, diagrams and step-by-step assembly instructions
The contemplation of a living fire is bewitching. A well-known proverb claims that this can be done endlessly. The flame dance calms and pacifies, helps to gather thoughts. Unfortunately, living in apartment buildings, such a luxury is practically unavailable.
Arrangement of a wood fireplace not everyone can afford. A good solution is to assemble a bio fireplace with your own hands, while saving on the purchase of a finished design. If you have never done such a job, our article will be a good help - here we examined the device and the principle of the biofireplace, the main types of design, which will help determine the optimal scheme for assembling homemade products.
And they also gave detailed instructions on how to make a fireplace with your own hands, illustrating it with step-by-step photos and adding useful video recommendations. Thanks to a step-by-step analysis of each stage, even a novice master can collect a biofireplace.
The content of the article:
What is a biofireplace?
The biofireplace that comes into fashion is a decorative open-fire source that runs on so-called biofuels. For safe operation, the device is framed by a portal that holds the flame inside.
Structurally, a biofireplace is an alcohol-fired burner. A mandatory element of the device is a fuel tank, which contains a sufficient supply of flammable liquid for operation.
A wick is inserted into the tank, through the fibers of which the fuel rises to the combustion site. Actually burning is carried out in a special bowl, which can have a very different shape. The sizes of biofireplaces vary considerably.
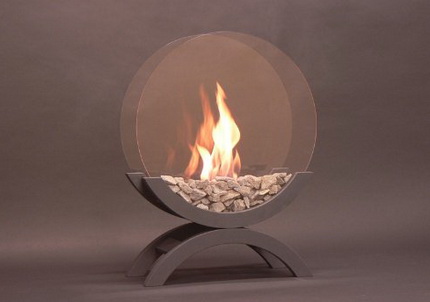
To extinguish the flame, just cover the burner with a special shutter.It will block the access of oxygen, without which the combustion process is impossible. A damper must be available for each device. The appliance may have several burners.
In addition, some burners are equipped with nozzles. This makes the tongues of flame as similar to those that are formed during the burning of firewood in a bonfire or fireplace.
Devices are very convenient to use. First of all, they do not need a chimney. During combustion, biofuels are oxidized to carbon dioxide and water vapor. The absence of heavy impurities in the flammable liquid allows it to burn completely, without the formation of soot, soot and volatile toxic substances.
Therefore, smoke removal (and it does not form) is not required. Thanks to this, a biofireplace can be installed anywhere in the room.
He does not need heat-resistant flooring or a separate foundation. Special permission for its installation is also not required. The only thing to consider when choosing a place for installing a biofireplace is the possibility of airing the room or the presence of efficient ventilation. This is necessary because oxygen is used during combustion, the amount of which must be constantly replenished.
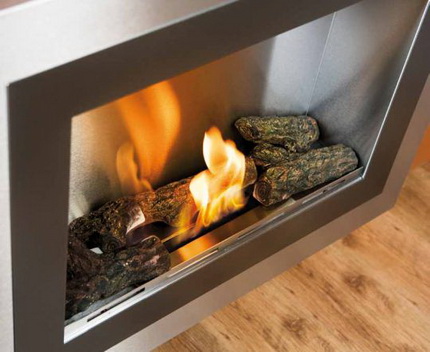
Biofireplaces are not only decorative, but also functional. Unlike traditional fireplaces, where most of the heat "goes" into the chimney, the devices completely give up their heat to the room. Of course, it will not work to use such a device as a heating device, but it will be able to heat some zone in the room. Biofireplaces are completely safe subject to competent operation.
The industry produces the most comfortable to use models equipped with electronic control. They can be controlled by remote control or via Wi-Fi. In the latter case, it is possible to integrate the device into the Smart Home system, and remotely control it from a phone or tablet. It is clear that the cost of automatic biofireplaces is an order of magnitude higher than that of conventional ones.
At the same time, standard models can be considered “eternal”, because they are structurally extremely simple and there is nothing to break into them, while the devices stuffed with electronics may well fail.
The main disadvantage of biofireplaces is their high cost. The operation of the devices will also be quite expensive, since their operation requires only special fuel. Replace it with a cheap analogue does not work.
The composition and characteristics of biofuels
The “bio” part in the word “biofuel” explains that only natural renewable raw materials are used to make this substance. Therefore, it is completely environmentally friendly and biodegradable.
The main components used to produce such fuels are grassy and cereal crops containing large amounts of starch and sugar. So, corn and cane are considered the best raw materials.
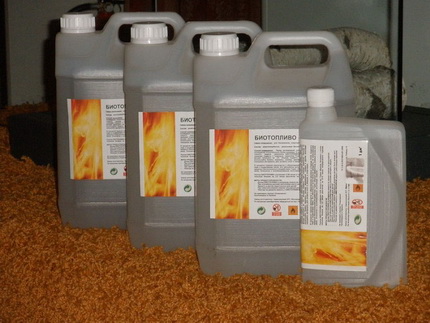
Bioethanol or a type of alcohol is produced from them. It is a colorless liquid; it has no smell. If necessary, they can replace gasoline, however, the cost of such a substitute is much higher. When burned, pure bioethanol decomposes into water in the form of vapors and carbon dioxide.
Thus, it is possible to even moisten the air in the room where the biofireplace is installed. The substance burns with the formation of a blue "gas" flame.
This is a purely aesthetic flaw that prevents one from enjoying the view of open fire. The traditional fireplace gives a yellow-orange flame, which is a kind of standard. To eliminate this drawback, additives that change the color of the flame are introduced into biofuel.
Thus, the traditional composition of a combustible liquid is:
- bioethanol - about 95%;
- methyl ethyl ketone, denaturing substance - about 1%;
- distilled water - about 4%.
In addition, crystalline bitrex is added to the fuel. This powder has an extremely bitter taste and is designed to prevent the use of alcohol biofuels as alcohol. Biofuels of various brands are produced, its composition may vary somewhat, but in general it does not change. It is clear that the cost of such fuel is quite high.

Fuel consumption depends on the number of burners and the power of the biofireplace. An average of 2-3 hours of operation of the heating unit with a capacity of about 4 kW per hour takes about a liter of flammable liquid. In general, the operation of a biofireplace is quite expensive, so home craftsmen try to find a cheaper analogue of fuel. There is such an option and it is viable.
To avoid trouble, you need to purchase only high-quality components for homemade fuel. Do not forget that the biofireplace does not have a chimney, and all combustion products immediately go directly into the room.
If toxic substances are present in the fuel composition, and this is not uncommon for low-quality alcohol-containing compounds, they will be in the room. This faces the most unpleasant consequences. We recommend that you familiarize yourself with top brands of biofuels.
Therefore, it is not recommended to produce fuel for a biofireplace yourself. However, if you really want to experiment, the safest recipe is this. Pure medical alcohol is taken. It must be purchased at a pharmacy.
For coloring the flame, gasoline of the highest degree of purification, which is used to refuel lighters ("Kalosha"), is added to it.
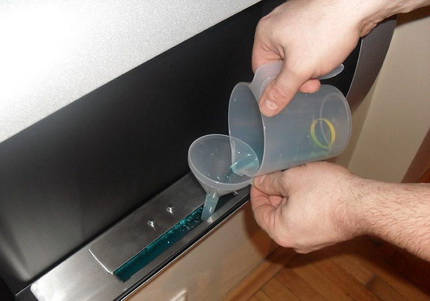
Liquids are measured and mixed. Alcohol must be present in a volume of 90 to 94% of the total amount of fuel, gasoline may account for 6 to 10%. The optimal proportion is determined empirically, but you should not go beyond the recommended values. Detailed instructions for the manufacture and use of biofuels given here.
It is important to remember that the resulting fuel cannot be stored, as the mixture of gasoline and alcohol will delaminate. It should be cooked before use and shaken well for better mixing.
What are biofireplaces?
Biofireplaces are available in a variety of options. Depending on the installation site, there are four main varieties of the device.
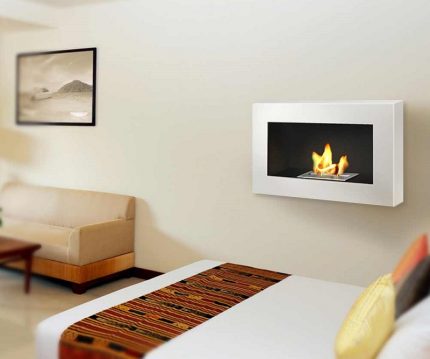
View # 1 - wall mounted devices
Such biofireplaces are a flat elongated structure that is fixed to the wall. For safety reasons, the front of the device is covered with transparent glass. The side walls are also designed. The back wall is made of refractory material (usually metal) and decorated.
The design is easy to install. It is hung on the fasteners installed in the wall. The device is completely safe to use, since during combustion the back wall and the bottom of the body are slightly heated. They cannot cause a fire or cause burns to a person who accidentally touches them.
View # 2 - outdoor biofireplaces
The design is installed on the floor or a small podium. Its bottom does not heat up much, so you can put such a device on any suitable flat surface. Shape and size can be very different.
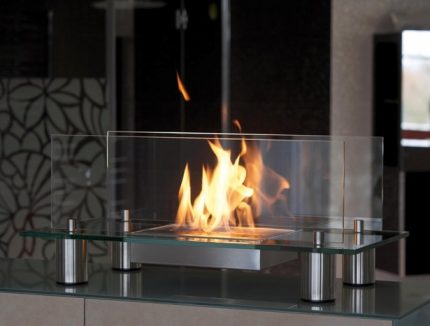
The main advantage of the device is mobility. If desired, it can be easily rearranged to another place. With the help of floor standing appliances, it is possible to heat part of the room for a short time.
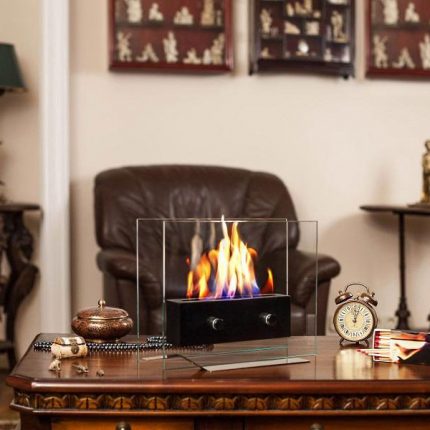
View # 3 - desktop devices
They are compact varieties of floor models. They are placed on shelves, tables or special supports, therefore they are small in size.
Perhaps they are difficult to consider full-fledged fireplaces, because they are compact enough, but the devices are mobile. They are easy to carry from place to place. They are functional and very convenient to use.
View # 4 - recessed structures
Built-in biofireplaces look very organic. Such devices are mounted in a niche specially prepared for this in the wall. There are devices whose front wall looks like a continuation of the wall. They are available for review on one side only.
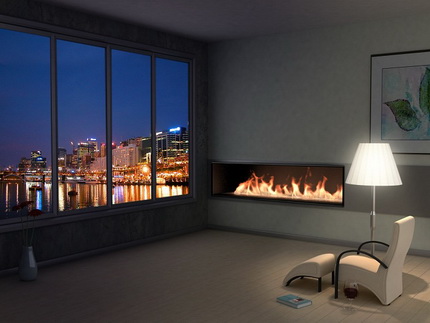
Biofireplaces - "small lamps" are issued. They have a convex or multifaceted front wall. Such devices “protrude” a little from the wall, which makes them very unusual and attractive. Installing a built-in biofireplace is much more difficult than wall-mounted.
You need to choose a place for it very carefully, moving the device will be very troublesome and time-consuming.
We have another article on the site, which is considered in more detail varieties of biofuel fireplaces and the principle of their action.
Compact Model Manufacturing Instructions
Given that the cost of such devices is quite high, many craftsmen are interested in how to make a bio fireplace for a room on your own.
This is a fairly simple task, especially if you make a compact desktop or floor model. It can conditionally be divided into two components: a fuel tank and a glass case. As a second, you can use the old aquarium without a bottom.
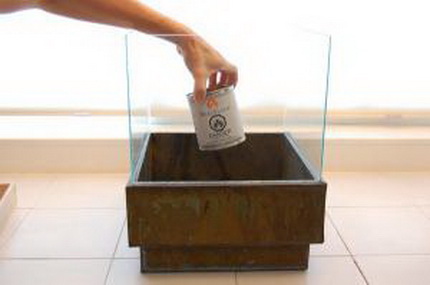
For work, we need the following materials:
- metal box to be used as the base;
- metal tank for fuel tank;
- lace for wick;
- a sheet of glass if there is no aquarium;
- silicone sealant;
- metal grid;
- medium-sized pebbles.
Of the tools you need to prepare a glass cutter, scissors.
Getting started and starting from the hull. It will be a box or cube without a lid and bottom. We determine the dimensions of the future structure and, accordingly, the length and width of its walls. We lay a glass sheet on a flat horizontal surface, wash and degrease it.
We apply a ruler to the line of the future cut and press it to the sheet. To prevent the ruler from slipping, you can stick an adhesive plaster on it.
We take a diamond glass cutter, put it on a sheet and drive it away from us without strong pressure. The cut line should be colorless and thin. If for some reason we did not like the received line, it is absolutely impossible to trace it. Step back 1 mm and draw a new line. After cutting, we shift the glass to the edge of the base so that it coincides with the cut line.
Carefully tap the cutting line with the head of the tool, then gently, but with a precise movement, break off the glass remaining on the weight. In this way, we cut out all four parts of the desired size.
Now they need to be glued together with silicone sealant. To do this, generously coat the side edges of the parts and connect them. Let the sealant dry.To do this, we fix the resulting design between any fixed objects and leave it for a day in this position.
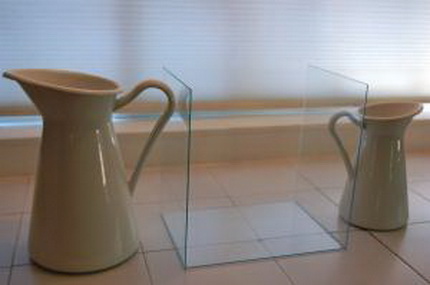
The dried-out case is cleaned of excess sealant. It will be convenient to make a blade. We proceed to the manufacture of the base of the fireplace. It should be a metal box, corresponding in size to the glass case.
The latter should be easily and reliably mounted on a metal base. A metal can should also be installed inside the base, which will act as a fuel tank.
It is desirable that the volume of the tank be large enough so that you do not have to refuel the biofireplace too often. The can is installed in the center of the structure. A part is cut out of a strong metal mesh, the size of which coincides with the base. It is stacked on top of the fuel tank and secured along the edges of the base.
From the prepared cord we make a wick and lower it into the tank with fuel. Views homemade burners for biofireplace and instructions for their manufacture are discussed in our other article.
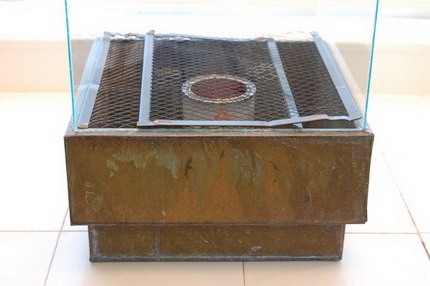
We place pebbles or any other stones on top of the grid so that they completely cover it. Stones will perform not only a decorative function. They partially remove the heat that will be transferred from the burner to the metal mesh.
In this way, glass can be protected from cracking. Now you can put the glass case in place. The compact bio fireplace is ready to use.
Assembly instruction for a large bio-fireplace
If you need to make a large biofireplace, the most difficult will be the manufacture of a fuel tank. The easiest way to purchase a finished item in a specialized store.
If you plan to make the tank yourself, you need to take a sheet of metal with a thickness of more than 3 mm. It should be stainless steel, otherwise, during combustion, possible undesirable chemical reactions and even the appearance of toxic fumes.
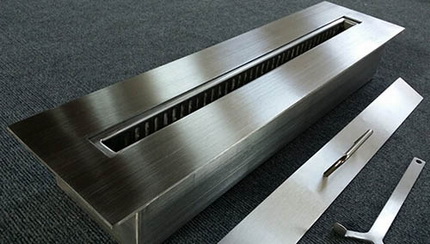
Actually the tank should consist of two compartments. The bottom is for fueling. Vapors of flammable liquid burn in the upper compartment. Between these compartments there should be a separating plate with holes, due to which the fumes fall into the combustion zone. The shape of the tank may be different, it depends on the model of the fireplace.
The most popular option is a parallelepiped-shaped fuel tank with a narrow upper compartment.
It is easier to make a cylindrical tank. To do this, you can take a regular mug and cover it with a cut-out lid from a fine-mesh metal mesh. Through the grid it will be possible to fill fuel, which is quite convenient.

Having decided on the fuel tank, you can begin to manufacture a biofireplace. We carry out the floor model with two glass screens. To work, you need to prepare fire-resistant glass for screens, a parallelepiped-shaped fuel tank, washers, bolts and silicone gaskets for glass, plastic or metal legs.
In addition, for the manufacture of the base, we need thick plywood or drywall, self-tapping screws and whetstones from wood 40x30 mm.
We start from the bottom. We mark the plywood sheet and carefully cut out the side parts of the base box and the top panel from it. We will not do the bottom of the box.
Firstly, its presence will significantly complicate the design. Secondly, without it, it will be much more convenient to fix glass sheets. We are preparing two pieces of wooden block, on which plywood will be fixed.
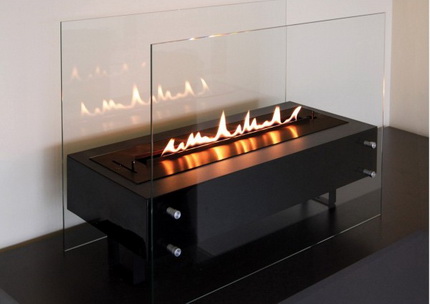
On a panel cut from plywood, we outline the place where the fuel tank will be fixed. Cut out the required landing hole for the tank. Now we assemble the frame and fix the top panel on it. The edges of the structure are well processed.
If we did not use plywood, but drywall, its edges must be processed with putty. We decorate the resulting base in any suitable way: paint, varnish, etc.
Cooking glass panels. First, cut out two parts of the right size. In each of them, you need to drill holes for decorative fasteners. This is quite difficult, because at the slightest error the glass can crack. If there is no experience in such work, it is better to entrust the process to an experienced master with a set of special tools. Holes for fasteners are also drilled on the side walls of the base.
Now we fix the glass screen on the base. To do this, we pass a bolt through the glass, do not forget to put on a silicone gasket so as not to damage the glass. Pass the bolt through the base, put on the washer and tighten the nut. This should be done with extreme caution, without exerting excessive force, otherwise the glass may crack. Thus, we install both glass screens.
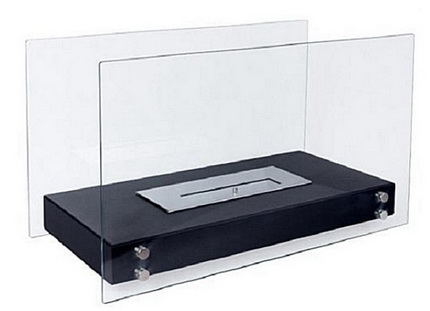
On the bottom of the glass sheet you need to put the legs. To do this, put rubber gaskets in the parts and put them in place. We check the correct installation of the legs. Biofireplace should be level, not swing.
Using the prepared hole, mount the fuel tank and securely fasten it. The design is almost ready. It remains to decorate it with stones or ceramic logs, if necessary.
Conclusions and useful video on the topic
We make a miniature desktop biofireplace:
Automatic biofireplace - what is it:
The process of making a biofireplace:
Biofireplace will give your home a special atmosphere. To enjoy the dance of live fire at any time, just put together a simple design.
It is important not to forget about safety rules: do not use fuel of unknown origin, do not leave fire unattended, do not pour fuel into an unheated device, and do not forget to regularly ventilate the room in which the biofireplace works.
Have you completed the interior with your own biofireplace? Maybe you have add-ons or useful assembly tips? Or did you notice inaccuracies in the material we proposed? Write to us about it, share photos of your homemade work - your experience will inspire the creativity of other users.

 DIY bio-fireplace burner: instructions and manufacturing tips
  Biofuel for the fireplace: types of biofuel, its properties + how to choose and how to do it yourself
  How to make biofuel with your own hands from manure at home
  How to make a hydrogen generator for your home with your own hands: practical tips for manufacturing and installing
  Fireplaces on biofuel: device, types and principle of action of bio-fireplaces
  How to choose fuel for a biofireplace: a comparative overview of the types of fuel + analysis of popular brands
  How much does it cost to connect gas to a private house: the price of organizing gas supply
  The best washing machines with dryer: model rating and customer tips
  What is the color temperature of light and the nuances of choosing the temperature of the lamps to suit your needs
  Replacement of a geyser in an apartment: replacement paperwork + basic norms and requirements
Wow, it still didn’t occur to me that a bio-fireplace can be done on its own. Honestly, I didn’t even try to figure out his device.But nothing complicated, as it turns out, is elementary physics. The main thing is that it is safe for health and does not require compliance with any special TB. I'll try to do it soon, especially since I have an aquarium.
I think this will be a great idea, especially if you live in a private house. If you know how to cook, then this is even better. You can give free rein to imagination and assemble a truly worthwhile and original bio fireplace with your own hands. I am glad that it is safe, but you still need to adhere to some rules. But the question is: does it produce heat or is it only for the species?
A bit of a strange question. As if the answer to both is yes. Naturally, a biofireplace generates heat. And the amount of this heat depends solely on the size of the fireplace itself. However, in any case, it is not enough to heat an apartment or room from scratch. In the place where it is installed it will be warmer than at the other end of the room, but no more. All the same, it is more aesthetics than an alternative to appliances specially created for heating.
I think that it is possible to use not only sheet glass, but also finished products - there are glass containers made of laboratory glass, glass pipes, and some kind of protective glass cases.
Hello. Could you tell if it is possible to use something else instead of ceramic filler and honeycomb filler? Tell me, what can you notice? Thank.