Sink above the washing machine: design features + mounting nuances
Standard bathrooms, as well as combined bathrooms, as a rule, cannot boast of a large amount of free space. For such rooms you have to select only compact models of plumbing and household appliances, but in this case, not everything you need can fit.
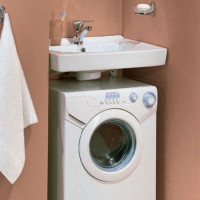
A good solution to the problem is to install a sink over the washing machine, which makes it possible to correctly dispose of the useful space. We will talk about what types of plumbing are suitable for such solutions. The article we presented describes in detail the technology of their installation.
The content of the article:
Washing under the sink: pros and cons of the solution
For owners of small bathrooms, it might seem that installing a washbasin over a washer is an absolutely win-win solution. Indeed, there are a lot of advantages to this option. First of all, this is an opportunity to organize space extremely efficiently by combining the layout of the upper and lower tiers of the room.
If you place a few more shelves or a cabinet over the sink, the space will be fully utilized. Thus, even in a small room it will be possible to place the necessary household appliances.
In addition, on sale you can find a variety of washing machines and sinks, which will decorate the interior of the bathroom.
However, along with the advantages of this solution, there are also disadvantages. And quite significant. First of all, this is insufficient electrical safety.
The washing machine is one of the electrical appliances for which contact with water is not permitted. The sink located above the equipment is connected to the water supply, which is a potential threat to electrical safety.
Even slight leakage can cause moisture to enter the machine and damage it. Therefore, for installation above the washing machine, you should choose special sinks with a siphon located in the back of the bowl.
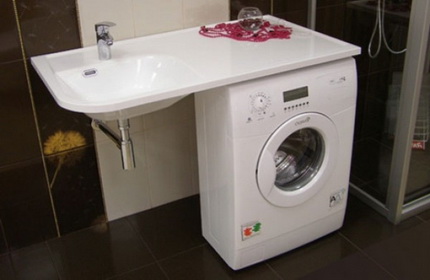
Their design is made in such a way that even with a leak, water from the bowl does not fall on the electrical equipment. Such shells are called "water lilies", they are sold in hardware stores.
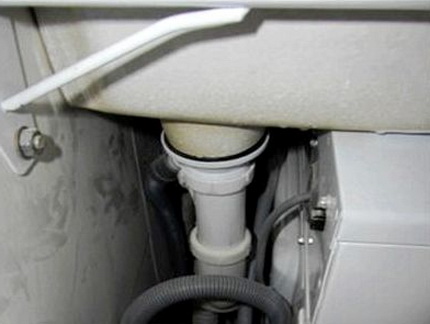
Using water lilies is safe, but may not be very convenient. This is due to a non-standard siphon. Its design is such that the likelihood of blockages increases, since the water does not drain vertically, but horizontally. In addition, replacement parts for siphons of this type cannot always be found on sale.
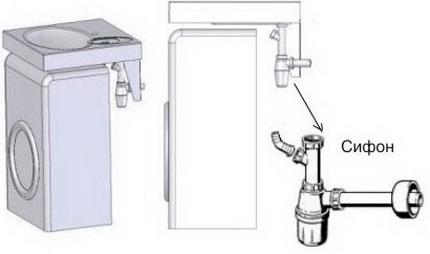
If a special sink could not be purchased or for some reason it cannot be used, there is another solution. The washing machine is installed under the counter top with the sink.
It looks like this: table top is set of sufficient length, on one side of it there is an electrical appliance under the base, and on the other - a built-in sink. This solution is safer in terms of the use of electricity, but requires a sufficient amount of free space. Another unpleasant moment is connected with the height of the washer.
Standard models have a height of about 85 cm, if you install a sink above such a device, using the latter will be extremely inconvenient. You can, of course, build a semblance of a podium, but for small bathrooms this is not always possible.
Practice shows that the height of equipment located under the sink should not exceed 60 cm. Thus, you will have to buy a special model.
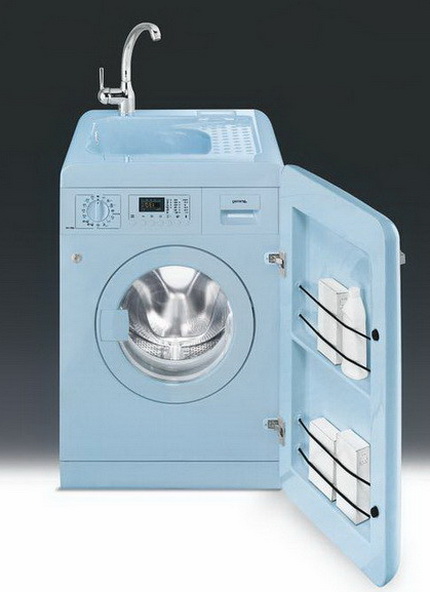
They can be found in the lines of well-known manufacturers. Very often, sinks are also included with such devices, which are ideally suited to all parameters of the machine. Such a purchase will be the best option for installation.
These are all the main disadvantages of installing a washing machine under the sink. In addition to some inconvenience from the fact that when washing you can not come close to the bowl, because the place under it is already taken. But they get used to it quickly enough. It must be admitted that all these disadvantages usually do not outweigh the advantages of such an installation, therefore such solutions are quite viable and in demand.
How to choose the right equipment?
Let's start with the features of choosing a washing machine. Theoretically, you can choose any model you like. But in order to make it convenient to use the sink installed over household appliances, the device should not be higher than 60 cm.
The depth of the machine is also limited. It can vary between 34-40 cm. Thus, it turns out that for installation under the sink you can only choose compact model.
As a rule, the capacity of such machines is small and rarely exceeds 3-3.5 kg of dry laundry. This option is not always acceptable, so some decide to install standard equipment.
When choosing it, you need to understand that at least 25 cm will need to be added to the height of the selected machine. This is the height of the sink and the dimensions of the gap between the planes of the devices.
Somewhat more difficult to determine the depth of the device. It should be completely covered by the sink, and best of all, so that the bowl protrudes beyond the boundaries of the washing machine in the form of a small peak.
Thus, the equipment will be reliably closed from water splashes that inevitably fly around during use of the bowl. Washing machines where the control panel is located on the top cover of the appliance in this case should not be chosen.
The best option is a control unit on the front of the washer. So it will be convenient to use, and splashes on the panel will not fall. When choosing the depth of the machine, you need to understand that it will not be possible to move the equipment close to the wall. A gap of about 8 cm should remain between the device and the wall, where engineering communications will be located.
It turns out that the choice will have to be stopped only on a compact or even supercompact model, the depth of which does not exceed 40 cm. There are also certain difficulties when choosing a sink.
For installation directly above the washing machine, only flat models are chosen. Standard bowls with a drain in the center will not work. On sale you can find special water lily sinks for installation above the washing machine.
Their main feature is the placement of a drain hole and a siphon in the back of the bowl. They can be located on the side or back of the sink. The operational characteristics of water lilies vary depending on the type of drain.
There are two types of drain:
- Vertical. The flat siphon is placed directly under the drain hole. The main disadvantage of such a system is that the siphon is located above the washing machine, which, if leaks occur, threatens problems with wiring or a short circuit. A significant plus is a good outflow of water.
- Horizontal. It involves placing the siphon as close to the wall as possible. This suggests that for some part of the path, the runoff runs horizontally. This increases the likelihood of blockages. The undoubted advantage of the system is its complete electrical safety, since the siphon is located far from the electrical appliance.
In shape and size, water lilies can be completely different. Among them, it is easy to choose the model suitable for your bathroom.
Like standard sinks, they can be equipped with a hole for mounting the mixer, overflow system, cork plugs and other accessories.If you plan to install a sink built into the countertop, you can select any suitable model.
Requirements for installing a sink over the washer
There are several requirements that must be precisely observed when installing the sink located above the washing machine. The bowl is placed in such a way that its edges protrude beyond the edges of the appliance by at least 2-5 cm, preferably even more.
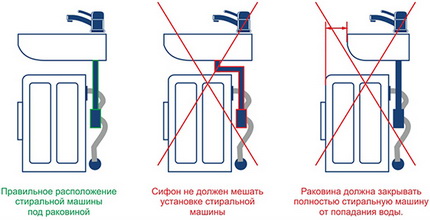
In no case should the appliance drain pipes be located on the machine body. They are placed behind the equipment. This is necessary in order to prevent liquid from entering the appliance in case of leakage or damage to the integrity of the hoses.
If the sewer outlet is located in the wall immediately behind the appliance, then the minimum width of the sink should be 58 cm. In the case when such a conclusion is in another place, the minimum width of the bowl can be 55 cm.
Installation instructions for a water lily sink
Before installation water lily shells above the washing machine it is worth checking its complete set. The equipment is a hinged sink, so brackets are required for installation.
Most often they come with a bowl. It is desirable that this be so, because their shape may be different. If there are no brackets in the kit, they must be purchased in advance.
Having prepared all the necessary materials and tools, we get to work. The operations are performed in the following order:
And now we will thoroughly discuss the details of each of the upcoming stages.
Marking the wall for mounting the bowl
The first thing we need to note is a line showing where the top edge of the washing machine will be. It will become the main one, and the rest of the markup will be performed from it.
We put the bowl on the wall, given that there must be a gap between it and the washing machine. Its dimensions depend on the type of siphon for the sink. Having placed the bowl correctly, we outline the mounting holes.
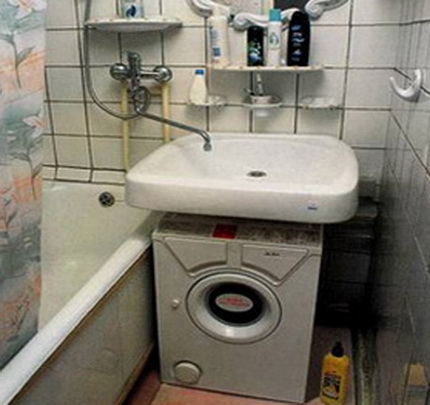
The important point is the location for mixer installation. If it is assumed that it will be common for the bathtub and sink, and this option is chosen very often, you should check whether the length of its spout is sufficient for both plumbing fixtures. If this is not the case and the bowl is too far from the bath, you can install it close to the side.
Putting the bowl back in place
We start by drilling holes in each of the marked sections. The diameter of the drill must match the diameter of the anchor. We insert a bolt anchor into the prepared hole.
We put the brackets in the prepared place. Then we tighten the bolts, but not completely, so that each one has small gaps of the order of 0.5-0.7 cm. This is necessary for subsequent fastening of the sink.
We seal the future joint between the edge of the sink and the wall. To do this, apply silicone sealant to the back of the bowl with a strip. It should be located at a distance of about 0.5-1 cm from the edge. In the same way, we process the brackets in those areas where they will be in contact with the sink. After that, put the bowl on the brackets.
We take a special metal hook that comes with the water lily and insert it into the technological hole. It is located on the back wall of the sink. You can put a metal hook in place from any convenient side.
After the hook is installed, we fix with its help the bowl in place and fix the connection with a self-tapping screw or dowel. Now you can finally tighten the anchors holding the brackets.
Siphon assembly and connection
Perhaps this will be more convenient to do while the anchors are not yet fully tightened. First, we assemble the device. This must be done strictly according to the manufacturer's instructions.
During the assembly process, we lubricate all threaded connections, as well as all sealing elements with silicone sealant. We work with plastic parts very carefully so as not to break them with excessive force.
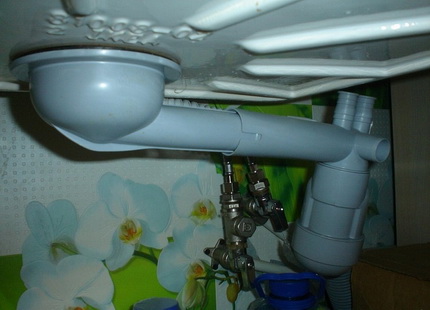
We connect a specially designed for this siphon pipe to the drain hose of the washer. To be sure that when draining the water, the hose will not tear off the nozzle, we fix it with a screw clamp. We connect the siphon to the sewer outlet. Plumbers advise bending the corrugation to bend with a knee and secure with a soft wire or electrical tape.
Thus, an additional water shutter is obtained. It will not be superfluous, because due to the design features of water lily siphons, the water seal in them often breaks down and an unpleasant sewer smell gets into the room. Bending the corrugated pipe will help solve this problem.
At the last stage, we proceed to install the mixer. It is rarely placed on the sink, most often mounted on the wall. The mixer is installed in accordance with the manufacturer's instructions.
After that, you can perform a test run of water, during which you need to check all the connections for possible leaks. If everything is in order, the equipment is ready for operation.
Mortise Sink Installation Guide
If you have chosen to mount the countertop sink above the washing machine, you will need to cut the bowl into the prepared base. In this case, we perform operations in this sequence.
Preparation of the template and base
We start by preparing a template with which we will lay out the countertop. Some manufacturers complete their products with such a template, the buyer can only cut it before installation.
If this is not so, we make it ourselves. To do this, take a sheet of cardboard, put the bowl upside down on it and circle the edges of the sink. Cut the finished template.

Getting started with the markup. If it is planned that the built-in washbasin will be supported by the sides on the base, we mark this way. We put the template in the place where the sink will be, and circle it with a pencil. We measure the sides and set aside the obtained distance inward from the edges of the intended hole. If the sink will be flush with the countertop, just circle the pattern.
Now you need to cut out the intended hole. First, drill a hole inside the marked contour. We insert the electric jigsaw blade into it and carefully cut out the hole. Its edges must be processed. We start with grinding.
Grind until the entire edge is smooth. After that, it must be treated with sealant. We apply it quite abundantly and spread it over the surface with a spatula. Glue the sealing tape on a damp surface.
Putting the sink in place
On the sealing tape previously glued to the hole cut, apply another layer of sealant and immediately put the bowl back in place. Gently swing it to find the optimal position.
After we make sure that the sink is installed correctly, we tighten the fasteners under the countertop. Now let the sealant dry.
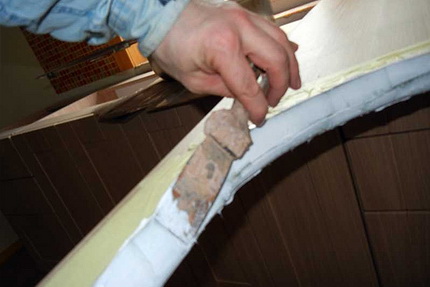
After the composition has dried, you can proceed with the assembly and connection of the siphon and mixer. The assembly of equipment is carried out in accordance with the instructions received from the manufacturer.
Conclusions and useful video on the topic
Video # 1. What are the sinks above the washing machine:
Video # 2. Water lily sink for mounting above the washing machine:
Video # 3. How to put in place the sink built into the countertop:
The sink above the washing machine is one of the most practical solutions for small bathrooms. It allows you to place in a small area all the necessary appliances and plumbing equipment in the bathroom.
Installation of devices can be done independently. It is necessary to act carefully and clearly fulfill all the requirements of the instruction, then the result will surely please.
Want to talk about how to install the sink over the washer? Do you know the technological subtleties of the process that will be useful to site visitors? Please write comments in the block below the text, publish thematic photographs, ask questions.

 Water lily sink: selection and installation tips when positioned above the washing machine
  Sink in the bathroom: types of washbasins + nuances of choosing the best design
  Countertop washbasin: features of selection and installation
  Stone sink: advantages and disadvantages of natural stone, comparison with alternative options, installation nuances
  Overhead sink on the countertop in the bathroom: how to choose + installation manual
  Bathroom sink height: standards and best wiring diagrams
  How much does it cost to connect gas to a private house: the price of organizing gas supply
  The best washing machines with dryer: model rating and customer tips
  What is the color temperature of light and the nuances of choosing the temperature of the lamps to suit your needs
  Replacement of a geyser in an apartment: replacement paperwork + basic norms and requirements
I saw in some online stores special washing machines under the sink. There are those that go immediately with the sink, there are those that need to be built into them. Prices, of course, are different, but the main drawback is that this type of washing machine is not very popular, so the choice is poor. I found only a few options and then I doubt the purchase. Still, you will have to somehow combine and build it yourself.
My bathroom is very small, and it would be interesting to try this option with a machine under the sink. This would free up a bit of space, because now even turning around without hitting anything is problematic. True, the machine at the same time should not be smaller than the standard, because with a small child it is necessary to wash a lot, and if not everything will fit in one lot ...