How to cook vertical and horizontal seams with electric welding: step-by-step instructions
Electric welding is a technology of combining the structure of metals by heating and melting by an electric arc. It has become widespread in various sectors of the economy, including the private sector.
In fact, this method can be used for welding any metals together, taking into account the temperature of the electric arc (7000-8000 degrees). But before turning to this technology, you will have to study how to cook a vertical seam by electric welding, and deal with the technique of obtaining a horizontal seam.
The content of the article:
Welds: General Definitions
The technology of welding metals is closely related to the concept of a weld. This is formed in the process of solidification of metal, molten by electric arc welding.
Depending on the place of welding, the seam can be located horizontally or vertically. In addition, the spatial location of the seam can be lower, lateral, upper.
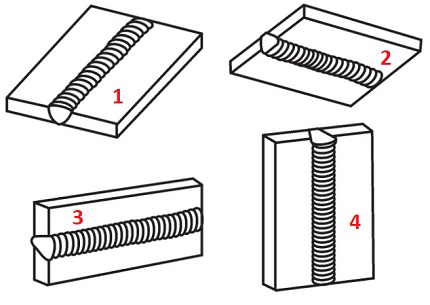
The simplest and easiest to perform is the laying of welds in the plane of the lower horizon. Under such conditions, molten metal can be easily controlled.
The remaining options for the location of seams in space (lateral and upper) are recognized as technologically difficult to perform, requiring the study of welding techniques, and the development of relevant experience.
How to cook a vertical seam?
The complexity of welding control in the conditions of creating a vertical seam is due to the usual physical phenomenon - gravity. This has an effect on the mass of molten metal, which, being in liquid form, rushes down.
Here, the actions of a professional welder are to prevent the molten mass from tearing away from the place of welding. To achieve this result, a stably burning electric arc, kept at the minimum allowable distance from the end of the electrode to the weld pool, will help.
Bottom-up technique
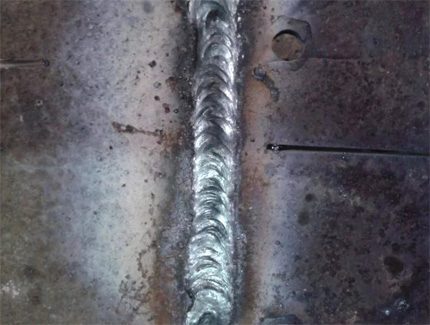
The vertical joint, as a rule, is welded with the electrode in the direction from the lower point to the upper one. Such a route provides more stable control, and the electric arc confidently holds the molten bath, preventing spreading. It is the passage from the bottom up that manages to form the highest quality vertical seam.
Of course, before starting to weld a vertical seam, it is necessary to prepare the boundaries of the joint, process it in accordance with the technical requirements. The welding machine must be adjusted to the welding conditions (set current, pick up the electrode).
Initially, several point “tacks” are made along the seam line — welding with a short seam (1–2 cm). The purpose of such actions is to eliminate during the heating process the displacement of the parts being welded due to thermal deformation.
When the joint is welded vertically, the angle of electrode retention relative to the plane on which the seam will be laid is held within 45-90º.
The welder instruction sets the following actions:
- The contact of the electrode on the metal ignites an arc.
- "Tack" is made in 3-4 points along the junction line from its middle to the edges.
- Welding starts at the bottom of the junction line.
- The electrode stroke is directed upward, the weld pool is held in the working area.
The electrode should be advanced at a moderate speed.The main speed criterion is the formation of the optimal amount of molten weld pool.
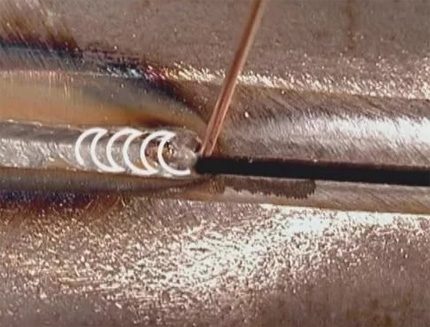
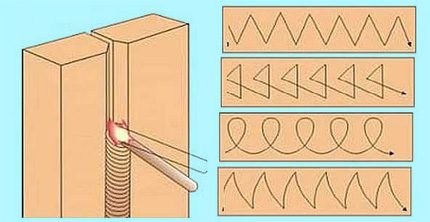
Simultaneously with the vertical stroke of the electrode, transverse zigzag movements with a "crescent", "herringbone" or other "pattern" are permissible. But the transverse stroke technique seems relevant only on metals with a wall thickness of more than 4 mm.
It is recommended to weld metal with a vertical seam in one pass without stopping. For beginning welders, this seems to be a difficulty. However, experience is gaining rapidly.
Top down technique
Having gained experience, welders easily lay a vertical seam by moving the electrode from top to bottom. What is the trick of performing such an operation?
It's simple: setting an electric arc on fire, the electrode is installed relative to the working plane at an angle of 90º. As soon as the metal at the point of arc formation begins to melt, the angle of the electrode is changed to 15-20º, slightly lowering the holder.
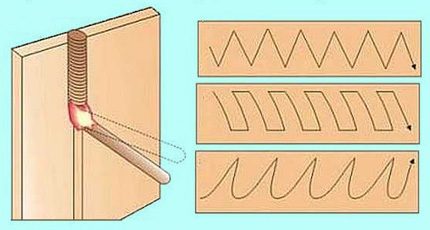
The electrode wiring along the junction line of thick-walled metals is also performed by transverse zigzags of a “sawtooth” or “rectangular” shape. Some welders use the “wave-like” melt distribution technique.
Meanwhile, the method of forming a vertical seam in the direction from top to bottom is accompanied by great difficulties for the welder. However, according to many experts, welding in this form gives the best result in terms of quality indicators.
Horizontal weld technology
The specificity of welding a horizontal seam is almost the same as for a vertical one. Technical nuances - again, manipulating the installation angles of the electrode.
The direction of movement during the welding of parts at the junction can be selected from its extreme left point to the extreme right point or vice versa. The specific choice of direction is determined by the welder, based on the degree of personal convenience.
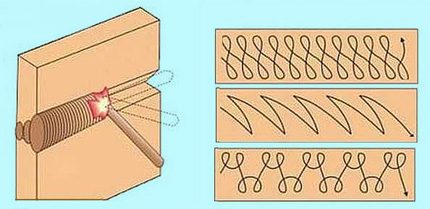
But how to cook a horizontal seam by electric welding in order to prevent melt from flowing out of the rut due to the acting gravity?
Here, the welder needs to choose an electrode position in which the burning force of the electric arc would be equivalent to the gravity of the metal droplets. You may need to adjust the current strength and experimentally select the optimal speed for moving the electrode.
Typically, the welding of a horizontal seam is carried out continuously until complete. However, if it is not possible to control the melt (weld pool), you can try to change the technique - go on the move with periodic extinction of the arc.
All these subtleties are accumulated with the advent of experience in welding. Therefore, do not despair if nothing is successful from the first attempts.
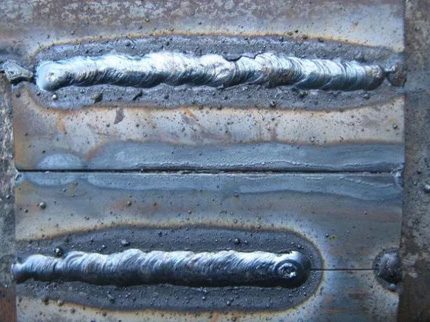
The formation of a horizontal seam of the desired width and depth of penetration, as a rule, is achieved due to the careful lateral movement of the burning end of the electrode from the edge of one joined part to the edge of the other.
For welding metals up to 4 mm thick, different versions of the "pattern" of the transverse electrode stroke are used. There are no specific recommendations on this subject. The main thing is to get the required seam width and penetration depth.
Arc: optimal length control
The gap between the hot end of the electrode and the metal plane, sufficient for the formation of an electric discharge, is called the arc length. One of the main foundations of the welder's instructions is to control the optimal arc length.
Theoretically, in the welding mode, you can get three arc gaps:
- short (1 - 1.5 mm);
- long (3.5 - 6 mm);
- normal (2 - 3 mm).
Insufficient heating of the metal in width is characteristic of the short-arc burning regime. On the edges of the seam, in such cases, there is a so-called "undercut" - a small depression. The presence of such a defect indicates a low quality performance of the weld.
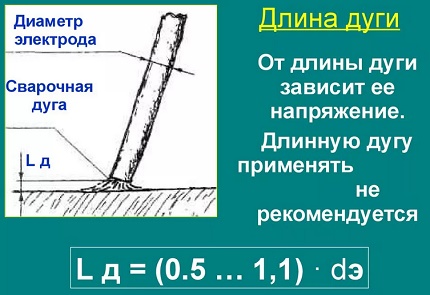
The mode of welding with a long arc, as a rule, is accompanied by its periodic extinction. Here, a small heating of the metal in depth is noted. There is no need to speak of good seam quality either.
Thus, the only option that the novice welder should be guided by is the normal arc length, which should be no more than Ld = 0.5-1.1 * De (Ld is the arc length; De is the diameter of the electrode).
Electrode position control
The welding process can be performed when the electrode is positioned angle forward, angle back, right angle. Using any of these three technological methods, the welder is able to create seams in different working conditions.
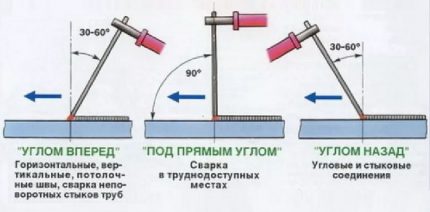
So, the “angle forward” method is traditionally used to connect elements with horizontal and vertical seams in the conditions of the upper arrangement of parts in space (ceiling welding). The same technique has been successfully used for welding fixed pipe joints or in the construction of homemade gas cylinder stoves.
Holding the electrode strictly at a right angle (90º), the welder ensures the execution of work in hard-to-reach places. Finally, the “corner back” technique allows high-quality welding work at corner joints.
Installing the electrode “angle forward”, usually work with thin-walled metals. In this position of the electrode receive a wide seam of shallow depth. On thick-walled metals, on the contrary, they try to apply the technique “backward angle”, ensuring the metal is heated to a sufficient depth.
Current Parameters and Electrode Movement
The value of current strength and the speed of movement of the electrode are significant factors that affect the quality of the seam. Welding with high currents is accompanied by heating of the metal to a large depth, which allows to increase the speed of movement of the electrode. Under the condition of the optimal ratio of current and electrode velocity, an even high-quality seam is obtained.
Conformity table for current, electrode, metal thickness
| Current strength, A | Diameter of an electrode, mm | Metal thickness mm |
| 35-50 | 1,6 | 1-2 |
| 45-80 | 2 | 2-3 |
| 65-100 | 2,5 | 3-4 |
| 85-150 | 3 | 4-5 |
| 125-200 | 4 | 5-6 |
When moving the electrode at a certain speed, the magnitude of the arc power should be taken into account. Excessively fast electrode feed at low power will not be able to provide a sufficient heating temperature.
As a result, it will not be possible to boil the metal to the desired depth. The seam simply “lies” on the surface, barely “grabbing” the edges of the edges.
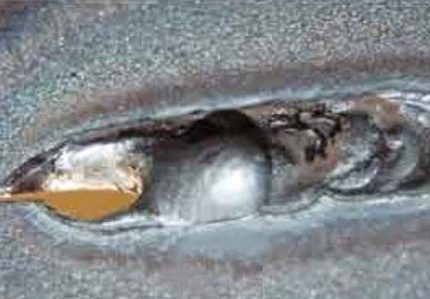
On the contrary, under conditions of excessively slow advancement of the electrode, an overheating atmosphere will be created, which threatens the deformation of the metal on the welding line. If the metal elements have a fine structure, a powerful arc will simply burn through the metal.
You can successfully practice the field of a novice welder and hone your seam skills with making a stove for testing, the base of which is a metal pipe. We recommend that you familiarize yourself with useful information.
Instructions for the novice welder
Welding work is permissible only with the use of appropriate equipment.
The standard kit contains:
- Jacket, trousers, gloves, shoes made of fireproof durable strong materials.
- Headgear that completely covers the back of the head.
- Special protective mask for face and eyes.
For welding, a serviceable apparatus should be used, the electrical part of which is closed by a reliable housing. The electric cables included in the apparatus must be completely insulated and meet the electrical characteristics of the device.
The place of the welder must be equipped with a work table, light sources, a grounding bar, protective equipment against electric shock and fire fighting equipment.
And before starting work, you need to carefully study electric welding rules, consider and study the methods and options for making compounds.
Conclusions and useful video on the topic
We offer you to watch a video practice of welding: how to cook horizontal and vertical seams:
It is not necessary to have the qualifications of a professional welder, but mastering the welding technique is desirable. Thanks to the existing welding skills, a person has more opportunities for the implementation of various household projects.
If you want to learn the technology, you can always, and practical experience will help to master the technique of production work at a high level.
Want to talk about your own experience in welds? Do you know the subtleties of the process that are not given in the article? Please write comments in the block below.

 Electric welding for beginners: the nuances of welding and the analysis of basic errors
  How much does it cost to connect gas to a private house: the price of organizing gas supply
  The best washing machines with dryer: model rating and customer tips
  What is the color temperature of light and the nuances of choosing the temperature of the lamps to suit your needs
  Replacement of a geyser in an apartment: replacement paperwork + basic norms and requirements