How to disassemble a washing machine: the nuances of disassembling models of different brands
Damage to the washing machine is an unpleasant problem that needs to be addressed immediately. If the equipment is under warranty in the service center, troubleshooting is not worth it yourself. When the warranty period has expired, you can try to fix the unit with your own hands.
To do this, you need a basic set of tools and a guide that tells how to disassemble the washing machine. We suggest that you familiarize yourself with the detailed guidance. With such an arsenal, even an ordinary home master can restore the device.
The content of the article:
Potential problems and breakdowns
In order not to make unnecessary efforts, it is advisable to observe the technique and understand what exactly is the deterioration of work. If the overall washing quality has fallen, an unusual noise has appeared during the spin cycle, and the laundry has remained wet after the spin cycle, the problem should most likely be found in the pump.
The same unpleasant phenomena provokes a clogging of communication hoses. It is better to get to all these nodes from the front of the unit or from below. If foam has gone out of the machine during operation, you need to stop washing, set the program “Drain without spin” and wait until the appliance has completed all the necessary steps and opens the door.
Then you should remove the laundry, manually clean the interior of the foam and restart the wash without spinning. If this is not done, the foam will penetrate the engine or the control board, and the repair of these components will cost the owners a substantial amount.

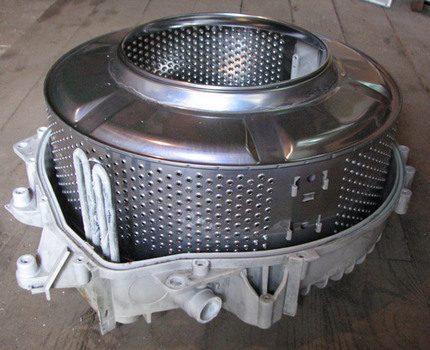
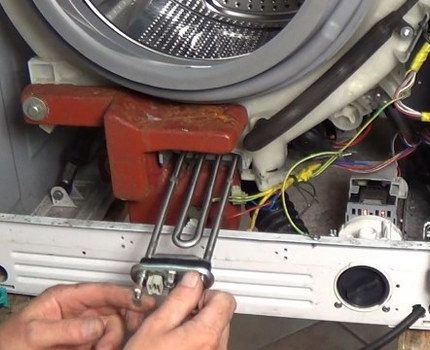
If the device does not gain temperature and does not warm water, it is most likely that the working heater has failed. Its location is indicated in the accompanying technical documentation. Usually it is located at the rear, but for some models, depending on the manufacturing plant and internal structural features, it can stand in front.
Perhaps, as a result of using hard water, scale has formed on it and it will need to be cleaned. Or, if the element is burned out, you will need replace it with a new heater. The replacement process is described in detail in our recommended article.
For a uniform and quick drainage of liquid from the washing container, the pressure switch or pump is responsible. Slowly pouring water clearly indicates that these elements have lost their functionality due to breakage or operational wear.
To repair them or replace them with new ones, you will have to dismantle the side wall and penetrate the upper part located behind the rear panel.
This is just a short list of the main breakdowns found in the cars. It is relevant for all household washing equipment, regardless of the brand and design features of each individual appliance.
Problems with electronics and program control belong to the class of more complex problems and require professional intervention. To eliminate breakdowns of this level, regardless of whether there is still a guarantee for equipment or not, it is better to contact a specialized service center.
Certified masters working there will carry out diagnostics, quickly identify the source of the problem and repair the damaged electronic unit or replace it with a new one.
The nuances of the preparatory process
Before proceeding with disassembling the washer, it is necessary to carefully study the accompanying documents accompanying the equipment, study the electrical circuit and familiarize yourself with the design of the unit.
In the next step, you must perform the following steps:
- carefully disconnect the device from the electrical network and the water supply system;
- disconnect the drain hose from the sewer outlet;
- pick up the set of tools required for the upcoming work.
Only after such thorough preparation can you proceed directly to disassembling the washing unit.
It is advisable that the wizard has sufficient time at its disposal, as the disassembly / assembly process does not endure haste and fuss. In addition, all repairs should be carried out carefully and delicately, without harming other internal and external parts of the unit.
Tool List
For proper disassembly of the washing machine, the home master will need tools such as:
- wrenches (size 8, 9, 19);
- service hook;
- screwdrivers (classic flat and Phillips);
- pliers and nippers used for self-clamping clamps;
- ordinary nippers;
- pliers with an insulated rubberized handle;
- bent long pliers.
Almost all of these items will certainly be found in the home arsenal, and you will just need to buy the missing items in the hardware store or borrow from friends or neighbors.
In addition to all the items listed above, it is worth stocking up with a medium-sized basin, where it is convenient to drain the remaining water in the hoses, and several microfiber cloths. They will be able to get your hands wet, wipe the internal parts and collect the remains of the working fluid spilled from the pipes from the floor.
Instructions for disassembling washing machines
Structurally, washing machines, even produced by different manufacturers, are very similar to each other. They have the same basic “stuffing" and work on the same principle. The main difference that matters during disassembly is the loading method - frontal or vertical.
All other criteria relate to external decorative fragments, small internal parts, fasteners and are not significant.
Detailed description of disassembling the front washer
Front-type machines differ from their analogues in that they load laundry through a round door located on the front part. On the one hand, it is convenient and practical, on the other hand, it requires special attention and caution when removing the glass loading hatch during disassembly and repair.
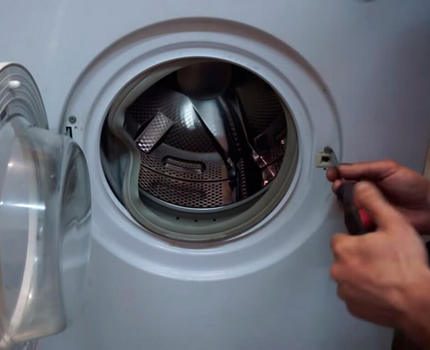
Completely, as they say, to the screw, the technique does not always need to be disassembled. Knowing how the device is arranged, and understanding the nature of the problems that have occurred, you can at least roughly determine the location of the problem.
That will help to start disassembling exactly where it is easiest to get to a failed element without touching normally functioning parts.
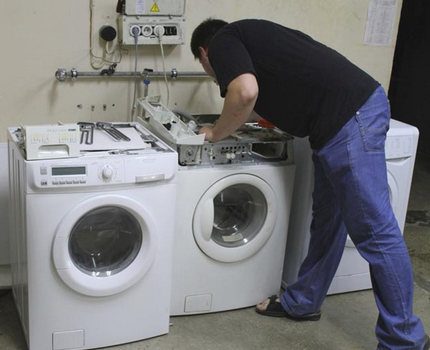
We suggest you familiarize yourself with step-by-step instructions that will help you cope with the amount of work yourself.
To disassemble a front-facing machine, you must act in the following order:
- Remove top panel. Carefully unscrew all fasteners holding the top panel of the device with a Phillips-head screwdriver. Gently pull the lid towards you and remove, being careful not to damage the fragile internal elements.
- Take out the washing container. Release the container responsible for the distribution of detergents. To do this, gently press the special zone located in the center compartment of the tray with your fingers. After all these manipulations, the capacity can be removed without any problems.
- Dismantle control unit. To do this, unscrew the screws in the upper area of the front panel, carefully unscrew the unit 90 degrees and carefully remove it from the fasteners. Using the service hook, fasten the panel to the side of the unit.
- Disconnect connectors with wiresby simply pulling them out of the corresponding grooves located in the control unit. This item is relevant if the design of the washing machine requires it.
- Remove service panelgently prying off with a flat screwdriver. In order to get to it, it is necessary to unscrew the screws facing the side parts below, on the front side of the device.
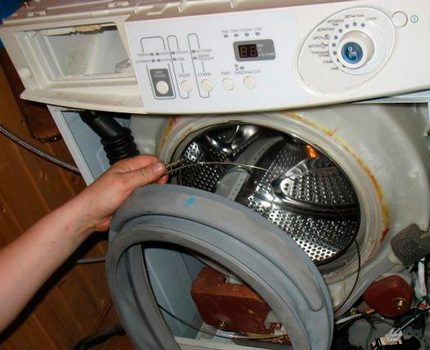
- Detach rubber sealing sleeve from the center panel. To do this, use a screwdriver to release the clamp from the slots holding it.
- Remove the screws holding the center panel to the housing., and dismantle the entire item.
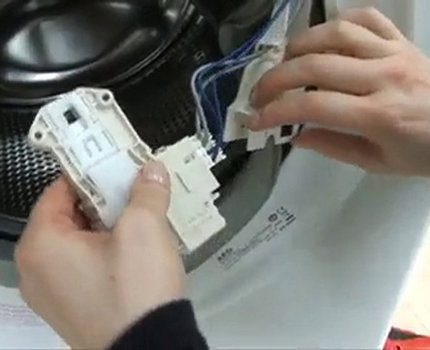
- Disconnect the lock connector of the front hatch.
- Carefully remove the rear external panel and set her aside. If necessary, unscrew the fixing screws and the clamping bolt of the drum unit.
- Remove the clamp with pliers and carefully remove the inlet hose suitable for the tank. Using the same principle, disconnect the hose going to the pressure switch.
- Remove counterweight blockslocated in front or behind (depending on model) to ensure a stable position of the unit on the floor during operation and spinning, having previously unscrewed the long fixing bolts.
- Remove the heater. In the bulk of the models, it is located on the back in the lower compartment of the case. Some manufacturers put it also low, but in the front area of the tank. For proper disconnection, unscrew the locking nut located in the center. Then push the protruding pin and push it in. Pry off the heater with a flat screwdriver and carefully remove.
- Take out the tank. To remove the tank, you need to twist the lower shock absorbers, remove the springs and only then you can remove it.
- Disassemble the tank itself. If there is a need for this, first twist the locking pulley bolt, press the shaft into the tank, remove the clamp and divide the tank shell into two halves.
After the machine is disassembled, you can proceed with the repair and replacement of failed working elements.
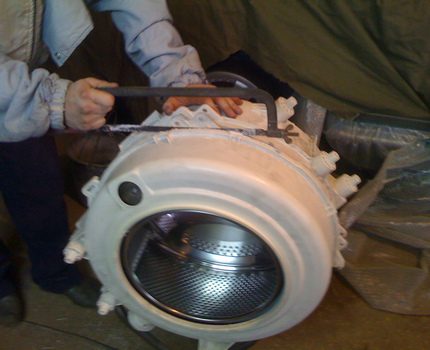
When all the necessary activities are over, you will need to reassemble the unit, install it at the previous location, correctly connect to the central communications and test for operability. If everything is done correctly, the machine will function normally and will not cause any more trouble to the owners.
Top-loading washing machine analysis
For vertical washing machines negative phenomena such as spontaneous opening of the working drum, corrosion of the metal block, imbalance of the central moving unit during washing, and bearing failure are most characteristic.
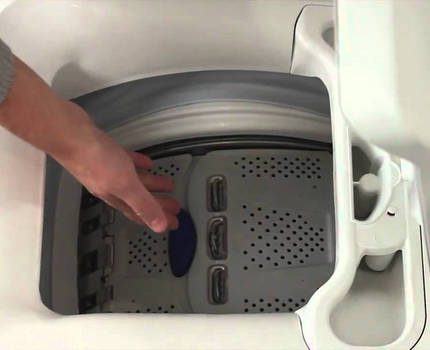
To troubleshoot such a plan, the equipment must be disassembled. This process is laborious and requires a lot of attention and concentration.
But this does not mean at all that it is impossible to repair a vertical unit at home. You just need to strictly follow the instructions and be careful. Then everything goes smoothly and getting to the problem node is not difficult.
We offer a phased process description for independent masters. Before you start disassembling a washing machine with a vertical type of loading laundry, you must disconnect it from the central communications.
Then put the machine in a convenient place so that it does not interfere with anyone living in the room. Next, you need to prepare the profile tools and stock up with a basin and a rag in order to immediately wipe the remnants of water spilled onto the floor from the communication hoses.
Now you can do the disassembly of the equipment and take the following steps:
- unscrew the fixing screws located on the sides of the device;
- gently slide the base unit toward you and disconnect the electrical wires;
- remove the control panel;
- remove the dispenser for powder and other detergents;
- dismantle the side and top panels;
- remove the mounting clamp;
- carefully remove the plastic casing, trying very hard not to damage it;
- start repairing equipment.
When disassembling a washing machine, you need to remember exactly the order of the wires and internal elements.
For warranty, it is appropriate to photograph all the nodes, then to assemble the unit correctly and strictly in the same sequence as it was originally.
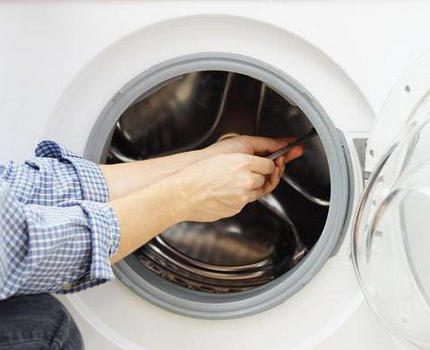
At the end washing machine repair It remains to return the equipment to its original place, connect it to the main communication nodes and activate the washing mode. If the work proceeds as usual, and the device does not fail, then the home master did an excellent job and did everything absolutely right.
The subtleties of disassembling machines of different brands
Washing machines made by different manufacturers are generally similar and perform the same set of basic functions. However, there are significant differences in the design of the units and the arrangement of internal working parts.
For proper disassembly, it is very important to know the specific unique features of the model to be repaired. Then work will pass easily and it will be possible to penetrate into the malfunction zone without any problems.
Samsung car disassembly steps
Samsung household washing machines are quite easy to understand. The container for loading the powder is conveniently located and holds only two screws. The working heater is located at the bottom of the tank directly under the front cover and it is not difficult to get to it.
Details on the repair of washing machines brand Samsung will acquaint walkthrough, which is given in our recommended article.
The nuances of fixing models from Ariston
In Ariston products, the bearings and seals of the tank most often fail. The design of the model is thought out in such a way that this unit cannot be repaired. But for skilled and experienced home craftsmen there are no barriers.
To replace the gland, the whole tank is expanded or sawed with a hand saw. There is no other way to restore parts, except, of course, buying a new tank and installing it in a company service center of the company.
Ariston brand washing machines of the latest generation are equipped with self-diagnosis devices, which significantly speeds up the process of finding damage. Fault and Error Codes in the work are displayed on the scoreboard, notifying of a problem that has arisen or is brewing. Their decoding will help to understand what and how to repair.
Atlant washer disassembly procedure
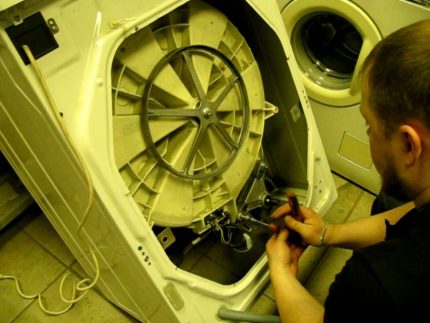
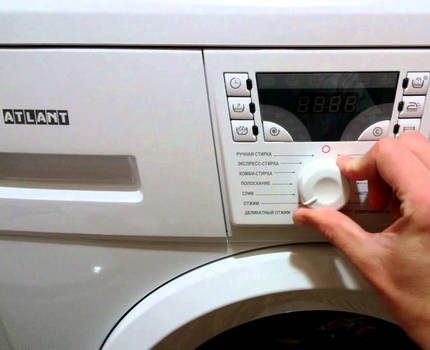
The devices of the Atlant brand are practically designed and are subject to repair. At the very beginning of the disassembly, you must remove the counterweight, and then remove the external control panel.The drum in these models consists of two halves pulled together by bolts, so any working parts can be replaced in two counts.
Specifics of Electrolux brand cars
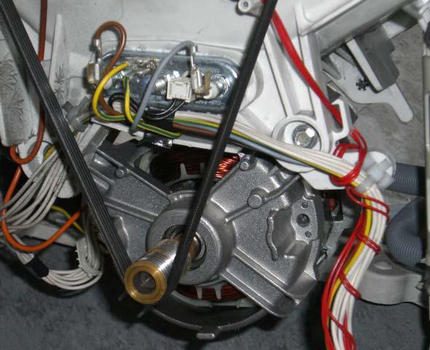
Cars Electrolux are very reliable and rarely break. Top Ten Sales Leaders Washing machine Electrolux will introduce the rating compiled by us. The front panel is removed elementarily and immediately opens access to all the main components and parts.
Separate removable bearings accommodate working bearings and seals. To replace them completely disassemble the drum is not required.
Features of washing equipment brand LG
Household LG washing equipment differs in a difficult design. To remove the front panel, you will first have to unscrew the nuts that securely fix the manhole cover with a screwdriver. Then you have to carefully remove the screw that tightly tightens the clamp to hold the cuff.
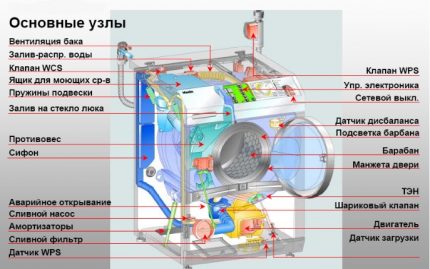
Then you will need to remove the weighting agent located on top and only then carefully remove the tank to be repaired or replaced.
The South Korean manufacturer is supplying its new models with a self-diagnosis system. Decryption error codes It will help to quickly and accurately determine what needs to be changed and where to repair it. Allows you to immediately decide whether to produce DIY repair or better go to the workshop.
Conclusions and useful video on the topic
A detailed description of self-parsing a Samsung washing machine with a front-loading type of laundry. Interesting design features of the model and curious nuances that arise during the disassembly process:
How to disassemble the LG washing machine at home. Detailed execution of all processes in steps:
Parsing a washing machine is a meticulous process that requires attention. If the breakdown concerns only a separate part of the system, it will not be necessary to completely disassemble the unit. If faults are observed in the main nodes, you will have to make efforts to fix the problem.
Our step-by-step instruction, which describes the process in an accessible way, will help. Having at hand such a cheat sheet, even a person with minimal experience will cope with the repair of the washer. If you still have questions - ask them in the comments and we will try to help you.
Tell us about how to disassemble the washing machine for repair with your own hands. Share what difficulties you encountered and how you solved problems. Please leave comments in the block form below, ask questions and post a photo on the topic of the article.

 How and how to clean the washing machine: the best ways + an overview of special tools
  How to clean a washing machine with citric acid: advantages and disadvantages of the method
  How to independently connect a washing machine: step-by-step installation instructions
  Which company has the best washing machine: how to choose + brand and model rating
  How to open a washing machine if it is locked: repair guide
  Steam washing machines: how they work, how to choose + an overview of the best models
  How much does it cost to connect gas to a private house: the price of organizing gas supply
  The best washing machines with dryer: model rating and customer tips
  What is the color temperature of light and the nuances of choosing the temperature of the lamps to suit your needs
  Replacement of a geyser in an apartment: replacement paperwork + basic norms and requirements
By her stupidity, she washed a swimsuit on the “bones” without a special bag ... One of the bones jumped out and somehow mysteriously fell into the tank of the washer. Rumbles there, it is audible. What part of the machine to disassemble? Where to begin? I can’t imagine. Advise, experts! Typewriter - Bosch, front-loading, model WLG 20060, without any features.
If I were you, I would turn to a specialist, otherwise I’ll screw up the excess and the machine will no longer wash at all. More expensive. Here, as if it were not necessary to take out the drum, disassembling the washer completely.
Hello. First of all, before removing a third-party item, never use a washing machine.
Then, with the help of a flashlight, carefully inspect the tank, if you see an object in the holes of the tank, try to remove it very carefully using thin knitting needles with hooks or a clamping loop (like the ones used to remove mites from the skin), that is, to reach the hole, and then pick up with tweezers.
But, as a rule, such manipulations rarely end in success; a “stuck” stuck “bone” is a rarity, and even less, it can be carefully removed. Since you do not have the skills to parse washing machines, then, as Ignat advised, you will call a master - the procedure is very simple and quick, the master cannot take it expensive. And at the same time, he will examine the damage that the unfortunate “bone” managed to inflict on the internal parts of the washing machine.
We flew the heater on the Zanussi easyiron washing machine. I decided to change it myself, the machine is old, and the repairmen wanted half the cost of the machine. To disassemble it you need to: remove the bolts that secure the back of the casing, then disconnect the terminals of the heater. I pre-photographed so as not to forget how everything initially looked, then pictures were taken at each stage to know how to collect back. Unscrew the 2 clamping nuts and, gently prying the heater with a flat screwdriver, remove it, loosening from the socket. Put a new one. Assemble in the reverse order. In general, everything is simple.