Condensation in ventilation in a private house: causes of moisture accumulation and ways to fix the problem
The owner of a private house needs to consider many factors from the very beginning of construction to the complete availability of housing. If you have your own home, then you probably came across a situation where you had to plan or redo communications. An important point can be missed even when working with the master. For example, frozen condensate in ventilation in a private house or on the roof of the MKD will soon weaken the draft, up to a complete stop of air exchange.
In the cold season, moisture can collect in excess and destroy materials. The ventilation in a large house cannot be redone in one day, but thanks to the article you will learn all the nuances and will be ready for repair. You will not make mistakes, save time and money. We will talk about the features of condensate and methods for its elimination.
Condensation forms during mechanical problems with ventilation and certain external conditions. There are many options how to get rid of it, and three ways with a more thorough approach. From the article you will understand which method will be more convenient and justified for you.
The content of the article:
Causes of condensation
Condensation occurs due to external factors, with poor ventilation. Installers sometimes make mistakes and the system works poorly. Condensation also builds up due to increased humidity in the house.
Drops on the inside of the windows will indicate excessive humidity in the room. In summer, only frequent ventilation is needed, and there will be no moisture in the pipes. In cool time, the air liquefies on the walls of the air channels, primarily at the junction of heat and cold.
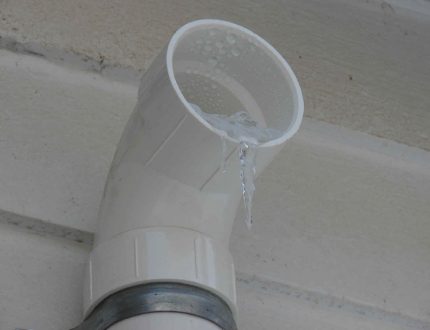
Other causes of condensation:
- leakage of ventilation;
- destruction of the pipe from the side of the street;
- the proximity of the channels to the external wall;
- the pipes were not insulated;
- insufficient wall insulation;
- temperature differences in the building / on the street;
- icing at home;
- basement water;
- the house was built on a wet foundation;
- there is a leak in the water supply.
Condensate ventilation ducts will gradually fill harmful microorganisms. It will be difficult to remove them from there, and in addition there will be an unpleasant smell and the likelihood of getting sick.
Ventilation pipes need to be cleaned. Insects, spiders, leaves get there. Birds erect nests in the conclusions. Due to weakening traction, more condensate forms. It does not hurt to check the strength of the inflow / outflow of air with a sheet of paper or a lit match. Improper circulation also reduces traction.
In winter, the outdoor outlet can completely freeze, and if you do not control this moment, there will be excess moisture on the walls and ceilings, and the finish will deteriorate.
Condensation is also caused by large bodies of water nearby. Sometimes the residents themselves are to blame - if they dry their clothes indoors.
How to get rid of condensation in ventilation?
Condensation is the transfer of gas or saturated vapor into moisture. Sometimes this is called the conversion immediately to a solid (desublimation). In severe frost, moisture near the ventilation head quickly turns into ice.
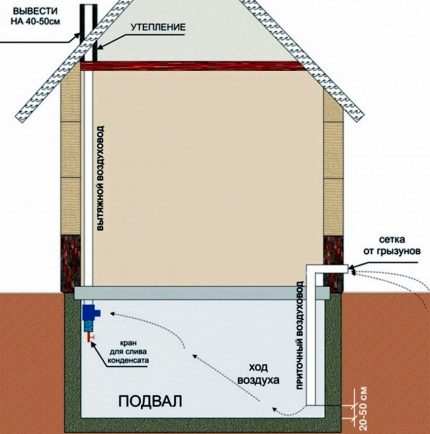
Residents of private buildings are easier to solve the problem: it is easier to find the necessary conclusions, nobody forbids changing the ventilation, and special permissions are not needed. Thanks new ventilation pipes condensation in private homes appears later than in old high-rise buildings, under the same conditions.
In the case of low traffic, the channels are cleaned with a pipe brush. When depressurization will have to look for a hole. Humidity rises due to unbalanced air exchange. In private houses there are more rooms, and a powerful ventilation system should be laid. If it already works, and replacement is undesirable or difficult, it remains to stimulate the removal of moist air and the flow of fresh instead.
The complete absence of moisture and frost in the ventilation and a stable result give three methods:
- Reliable thermal insulation (insulation).
- Forced ventilation
- Changing the pattern of the external duct - to remove moisture into the condensate collector.
With the second and third methods, thermal insulation will bring additional benefits. Keep in mind that with the first and third options, you need to work with all organized natural ventilation: its supply, exhaust and supply and exhaust ways.
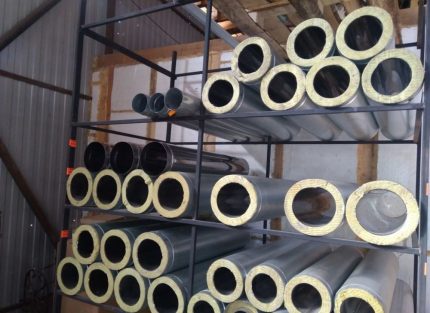
Sometimes it is necessary to change damaged or old ventilation elements. In the worst case, be prepared to install the new system and plug the old one. The problem cannot be ignored if there is always a lot of moisture in the attic.
Method # 1. Correct and high-quality thermal insulation
Warming is primarily in places with the greatest temperature difference. Channels near the ceiling of the upper floor, in the attic and roof are in need of insulation. They are insulated in this order, and then they are insulated below, if temperature contrast is also possible there.
Supply systems ideally isolate not only through pipes, but also through valves. After arranging the problematic part of the ventilation, it will be possible to save on the rest.
Such heaters are suitable:
- polyethylene foam;
- polypropylene;
- expanded polystyrene;
- mineral wool;
- glass wool.
Mineral wool reliably protects from the cold, but quickly deteriorates from moisture and partially loses its properties. Only a layer of waterproofing will help. Glass wool is stronger than the usual mineral, but otherwise almost the same.
In polyethylene foam, good moisture resistance, low weight are noted. Similar qualities are observed in polypropylene. Foamed polystyrene (expanded polystyrene) almost does not let steam through, which is considered a plus in modern design conditions for heat retention.
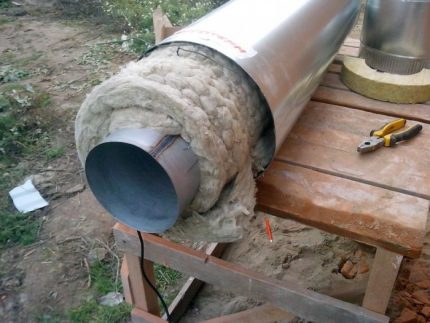
Phased pipe insulation:
- We wipe the channels, remove all moisture.
- We wind heat-insulating material on pipes. We start with the channels of the top of the building and problem areas. We fix it with tape. We lay the adhesive tape longitudinally and additionally wrap it with transverse segments with a small interval.
- We achieve maximum tightness at the joints of the insulation and pipes.
- For channels with a circular cross section, cylindrical gaskets are also suitable. Cut them on one side. Then we glue and fix with tape.
- Do not leave clearance with air. Condensation may also form there, and it will ruin the thermal insulation. This will also lead to corrosion.
The distance between some pipes is inconvenient for insulation, so it is closed up. Suspended formwork is installed there, after which the space is filled with cement mortar. In places where ventilation goes behind the brickwork, it is worth denser to seal the seams, isolate cracks. The above will not fully protect against cold, but the main thing is that cold air will not fit the pipes and will not cause condensation.
After the correct work Dew point will move beyond ventilation. And as soon as you eliminate the condensate, the humidity will drop dramatically: in the case of ventilation of a private house, the changes will be significant - up to 60% or less.
Do not insulate narrow corrugated pipes from ductile metals. They are replaced with plastic ones.
Warming will simultaneously solve other issues. Fire safety will increase. Heat losses will decrease. The hosts will not be disturbed by noise in the ventilation ducts.
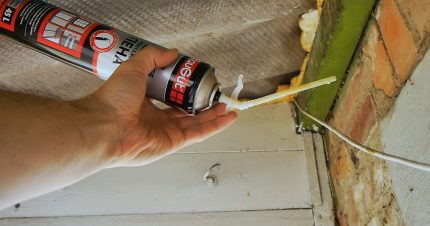
The thickness of the insulation should be selected based on all the needs at once. To get rid of condensate guaranteed, the external part of the ventilation is protected by a heater with a thickness of 50 mm, or better - from 100 mm. Pipe head equip deflector.
Method # 2. Forced ventilation
Its arrangement begins with the kitchen. An exhaust fan is installed there. Old natural ventilation is left or blanked. A new device is sometimes mounted in a window cloth, instead of a window leaf or a large sash.
A more comfortable option may be the exhaust system in the wall or pipe, leaving the room on the street. An exit hole is made either far from the outside of the chimney, or slightly lower.
Exhaust system from the street check valves. Instruments look like nozzles. There is a flat version with a film partition. The film bends outward and lets warm air out of the house, but prevents the cold from entering even in strong winds.
There are valves with a plastic partition, which scrolls slightly along its axis, but only when exposed from the inside. With a greater thickness, such a device is less leakproof.
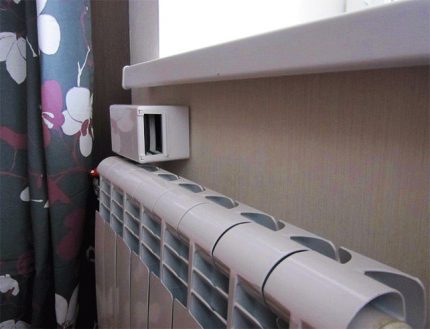
For air from the street supply valve. It is placed next to a battery or other heating element and adjusted if necessary. The house will still be warm, and almost all the condensate will be able to be taken from the ventilation.
The best material for an external forced ventilation pipe is considered plastic.
Method # 3. Changing the pattern of the outdoor duct
Consider the option where the external part of the ventilation leaves the building horizontally and has a bend up. Then the ventilation pipe is separated at the bend. Necessarily at the lowest point - consider this if the drawing is more complex.
In the resulting hole, fix the tee. A sawed-off part is placed in the upper pipe, and the lower one is closed with a plug cone (condensate collector). Draining condensate will come out through it. In another way, this method is called condensate drain. The resulting system is insulated. This reduces the likelihood of freezing of the outlet during prolonged frost.
On the condensate collector, you can fix the tube to drain the liquid, and send the free end into the bucket. This is done if the collection is in an inaccessible place. Sometimes they manage with only one bucket or organize a drain into the sewer. With a moderate amount of moisture, absorbent material is placed in the filtration zone. The cassette with it often has to be removed and dried.
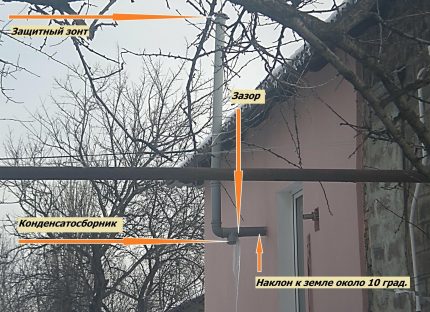
The conical shape of the plug has an advantage over a flat one, in which water stands and almost does not leak, despite the holes. The liquid from the latter is drained by hand.
In winter, the situation changes a little - icicles appear and on a cone they cover a large area. Air from the house heats the ice a few days after a severe frost, and they fall. The length of the lower pipe of the tee is enough so that during this time the water does not reach the level of branching. Watch for the formation of ice and, if necessary, knock it yourself with a stick.
In a house with ventilation not yet laid or not yet ready, it makes sense to make a side exit across the pediment. The task for self-laying will become easier than the idea of drilling a hole in the roof slope. Do not use this option if the pipe extends far from the pediment.
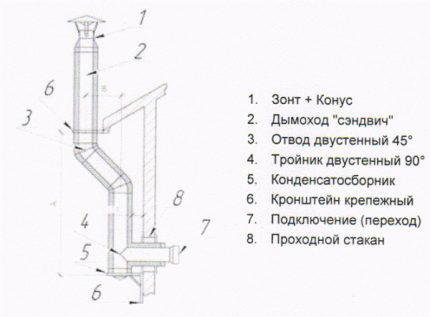
Bending with a long channel after it will significantly reduce traction. On the other hand, the rooms below will get better moisture protection.
If the outer part of the ventilation goes only horizontally, then you can crash into it on any site. In a strictly vertical pipe, as well as in a bent one, they search for a lower point. From a smooth vertical channel, the drain usually goes inside the house.
Conclusions and useful video on the topic
Insulation ventilation with mineral wool in order to eliminate moisture is a good example:
Sewer pipe in the role of ventilation, with a special channel for condensate:
Excessive humidity in ventilation is eliminated in several ways. To do this, repair and clean the pipes, insulate them or install an additional ventilation system. If you live in a private house, then to remove condensate from the ventilation, you can somehow change the structure of the pipes. Sometimes the system is completely redone, replaced with a new one. If in your case there were few negative factors, then the state of ventilation will allow it to be maintained.
Ask questions and write comments about ventilation in your home. Tell us about her condition, effectiveness. Perhaps your information will be of interest to other users. The contact form is located below.

 Underfloor ventilation in a private house: solution options and practical implementation methods
  Basement ventilation in a private house: the best ways to arrange proper air exchange
  How to get rid of condensate in the ventilation pipe: the subtleties of eliminating drops from the duct
  Ventilation of a septic tank in a private house: is it needed + tips for arranging
 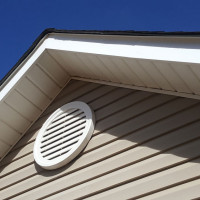 Ventilation in a private house through the pediment: arrangement options
 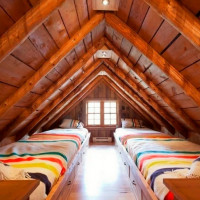 Attic ventilation in a private house: rules and devices for organizing air exchange
  How much does it cost to connect gas to a private house: the price of organizing gas supply
  The best washing machines with dryer: model rating and customer tips
  What is the color temperature of light and the nuances of choosing the temperature of the lamps to suit your needs
  Replacement of a geyser in an apartment: replacement paperwork + basic norms and requirements