Ventilation in a private house through the pediment: arrangement options
Properly equipped ventilation in a private house through the pediment is the result of proper design. There are not so many options for its organization and all of them have long been known and calculated. But for some reason, this particular question raises many doubts among the owners of private houses. Have you noticed how many different versions are being discussed on building forums? People are trying to find new solutions and "try on themselves" already ready.
In fact, everything is simple. To be sure of the choice, you need to know the basic rules of organizing air exchange and be aware of the latest innovations in the construction market. Especially when it comes to self-construction of a building: in this case, you should familiarize yourself with the applicable standards, as well as with the features of materials and structures.
In this article, we examined all possible options for ventilation through the pediment, touched on the goals, technological methods and the main characteristics of the materials used. After reading it, it is easy to navigate the already proven methods and choose the most suitable for yourself.
The content of the article:
Purpose of arranging ventilation on the pediment
In a ventilated room, the used air is constantly replaced with fresh air. If behind the pediment is attic, then such a replacement provides a comfortable microclimate for those living in the house.
And if the attic is located behind it, then the benefit of ventilation will be, first of all, for the structural elements of the roof.
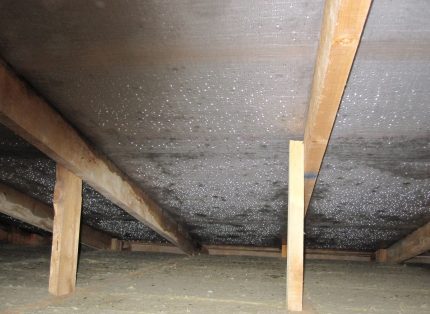
If you properly organize the exit of air ventilation through the pediment, then the optimum temperature and humidity conditions will be observed inside. This means that building materials will not suffer from condensation, will not change their heat-shielding and strength characteristics.
Air exchange regulations
To effectively change the air, remove household fumes and prevent condensation, it is necessary to correctly calculate the total cross-sectional area of all ventilation openings. According to the rules, it must be at least 1/500 of the floor area.
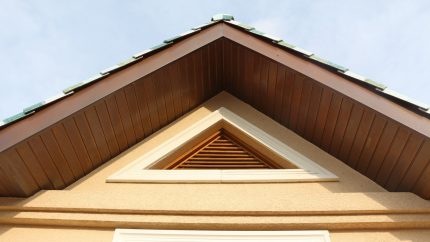
In addition, it is important to consider the properties of building materials. Modern versions of insulation and moisture-proof films allow less air to pass than their predecessors. Therefore, they require more efficient ventilation.
Therefore, when using materials with a high degree of tightness, it is worth increasing the cross-sectional area to 1/400 and even to 1/300 of the total overlap area.
Methods of organizing ventilation through the pediment
The main methods of venting through the pediment include: installing ventilation valves, installing grilles and dormers, as well as erecting a ventilated pediment.
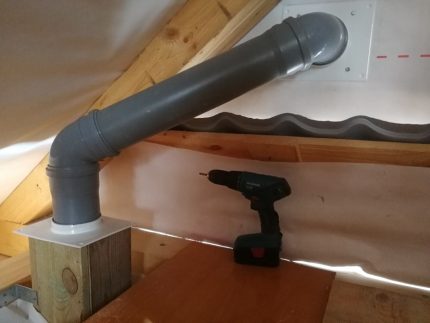
All three methods are considered interchangeable and complementary. In addition, each of them can exist separately or be part of a system containing aerators, turbo-deflectors and products.
Installation of ventilation valves
Vent valves are not the cheapest, but very successful option. Especially when it comes to the most modern models.
In addition to air renewal, they are capable of:
- regulate the volume of incoming air;
- reduce noise;
- direct air flow to the heating radiator;
- to filter.
The principle of operation of the device is simple: capturing the desired amount of air from the outside, it filters it, directs it to the noise absorber, and then to the radiator. So the warm fresh stream gets to the house.
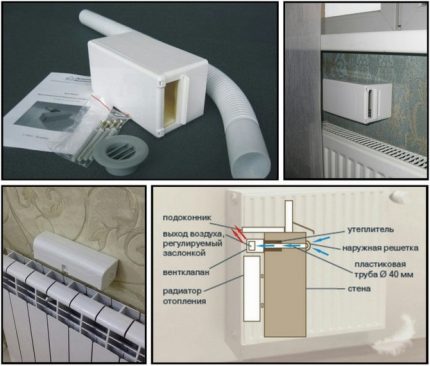
In this case, the movement of air can be initiated by the difference in external and internal pressure or mechanically started using a fan.
Installation vent valve carried out in several stages:
- Drilling a through hole at a downward angle of 5 degrees is necessary to remove moisture that accidentally gets on the outside.
- Installation of pipe and insulation.
- Mounting the housing to the pediment.
- Lid installation.
To realize the function of heating the air, the valve body must be placed directly above the heating radiator. The required distance is indicated in the instructions for the device.
Installation of grilles and dormers
Lattices and dormers are usually used to organize air exchange in cold attics.
For the attic, this method is not suitable, since in the cold season it violates the comfortable temperature regime.

In shape and gratings, and dormers can be very different: from traditional circles and ovals, to curved triangles and polygons. Their main purpose is to lay a natural duct through the pediment. Therefore, their design is the simplest. It includes a box and a platband.
To establish such a design is possible even for beginner builders. To do this, you need:
- In the gable wall, make a hole that is suitable in size and shape to the acquired grid.
- Install the product in the resulting opening.
- Attach the clypeus outside.
According to the standards, the lower point of the grille or dormer window should be located at around 80-100 cm from the upper point of overlap. This is the only way to ensure efficient and regular air exchange.
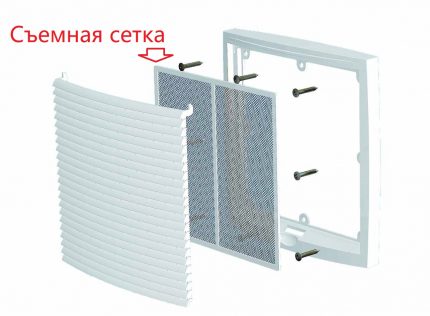
Another rule for installing grilles and dormers is the location of the blinds on them.
During installation, they should always be pointing down. Even if the design of the product allows you to change the angle of their disclosure.
Arrangement of ventilated gables
The principle of creating ventilated gables is to arrange gaps between materials with different thermotechnical properties.
There are two ways:
- At one level, when the gap is established between the outer finish and the windproof film.
- In two levels, when it is necessary to leave small distances between the external finish and the film, as well as between the film and the insulation.
The first method can be applied only when using a membrane sheet instead of a classic plastic film. Unlike a film, a membrane provides an unimpeded exit of condensate from a heater. Therefore, there is no need for a gap between them.
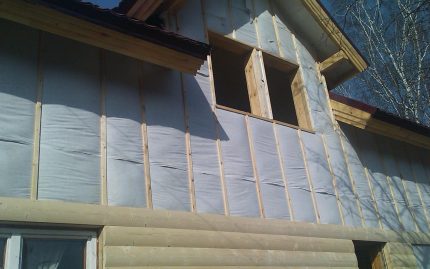
It is customary to equip the gap with wooden blocks 2-3 cm thick. With their vertical arrangement, continuous installation is allowed when the bars fit tightly against each other over the entire height of the pediment.
With a horizontal arrangement, it is necessary to fix them at a distance sufficient for the installation of the finish. Otherwise, an obstacle will be created to the natural movement of air masses.
Gable ventilation with low roof
Owners of private houses with a low roof have another option for arranging ventilation through the pediment.
To do this, a large ventilation grill is made of wooden planks and is installed directly under the visor.
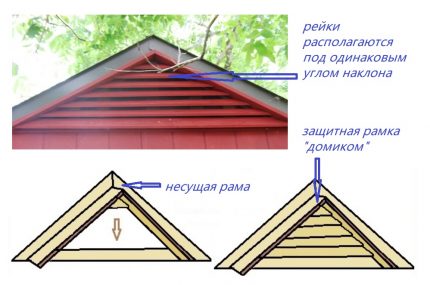
The lattice creation algorithm is simple. First of all, it is necessary to prepare the supporting frame, which will hold the entire structure on the pediment.
Then you need:
- attach a protective frame to it from two planks connected by a "house";
- chamfer at an angle of 22 to 45 degrees from all the crossbars of the grill;
- fill the grate with rungs, starting from the top - the shortest.
The hats of bolts and nails used to fix the boards are recommended to be treated with water-repellent sealant.
After this, it remains only to attach the finished structure to the upper part of the pediment and build small ebbs from sheet metal.
We also recommend that you read our other article, where we talked in detail about ventilation design rules in a private house.
Conclusions and useful video on the topic
The example of external grilles shows how different the products needed for the ventilation can be:
You can arrange ventilation through the pediment of a private house in various ways: with the help of home-made and purchased grilles and dormers, ventilation valves and ventilated structures of the pediment itself.
In the calculations, it is necessary to take into account the physical characteristics of the materials used, the overlap area and seasonal temperature indicators. It is also worth keeping track of the latest developments in the construction market and not to forget about the possibility of an individual approach to solving standard tasks.
If you are at the stage of choosing the appropriate method or already have the appropriate experience, share your thoughts with other users. In the form below you can post your questions, tips. In addition, here you can put ready-made schemes, drawings and sketches. Joint discussion always allows you to find the right solution. Join now!

 Basement ventilation in a private house: the best ways to arrange proper air exchange
  Ventilation for a gas boiler in a private house: arrangement rules
  Underfloor ventilation in a private house: solution options and practical implementation methods
  Ventilation of a septic tank in a private house: is it needed + tips for arranging
  Attic ventilation in a private house: rules and devices for organizing air exchange
  DIY ventilation in the workshop: options and principles for arranging an air exchange system
  How much does it cost to connect gas to a private house: the price of organizing gas supply
  The best washing machines with dryer: model rating and customer tips
  What is the color temperature of light and the nuances of choosing the temperature of the lamps to suit your needs
  Replacement of a geyser in an apartment: replacement paperwork + basic norms and requirements