Roof ventilation for metal: an overview of options and nuances of arrangement
The metal tile guarantees reliable protection of the house from the influence of external adverse factors, easy to install. However, it also suffers from atmospheric water, condensate, household fumes. Properly arranged roof ventilation for a metal tile will protect the roof from harmful effects.
You will learn all about ways to remove moisture that destroys building materials, which negatively affects the microclimate, from our article. We will talk about how to protect the multi-layer structure and the supporting frame of the system. We will tell you what needs to be done so that the roof with a metal-roofed roof lasts as long as possible.
The content of the article:
Roof ventilation requirements
The main purpose of roof ventilation is to drain the roofing cake and remove all types of moisture from under the roof, which reduces the insulation quality and the bearing capacity of building materials.
With proper installation, ventilation provides the following benefits:
- cools tiles in the summer;
- creates conditions for uniform heating of all areas of the under-roof space in cold weather;
- removes moisture from the roof from under the roof, which prevents the appearance of ice;
- improves the operating conditions of the rafter and roofing system, eliminating the appearance of corrosion and mold;
- creates comfortable conditions in a roofed attic or attic, which is relevant in the presence of equipped premises.
Roofing pie, installed in violation of technology, even with the most advanced ventilation system, can cause inefficient ventilation and accumulation of moisture inside. Air cannot circulate freely if at least one layer is laid in violation of the rules.
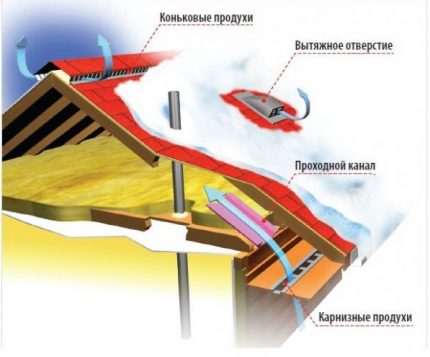
The main thing is that proper roof ventilation provides a long service life for all roof materials.
Methods of ventilation
To create conditions for unhindered circulation of air masses in the attic space, there are two ways: point and continuous. They differ in the different distribution of the outgoing air flow, which carries away all the fumes.
Ventilation by the continuous method is laid even when designing the roof or before installing the metal tile. Its essence is the equality of the outgoing and incoming flows, achieved due to the same ventilation gaps-products. They begin at the eaves and end at the ridge, i.e. tops of the roof.
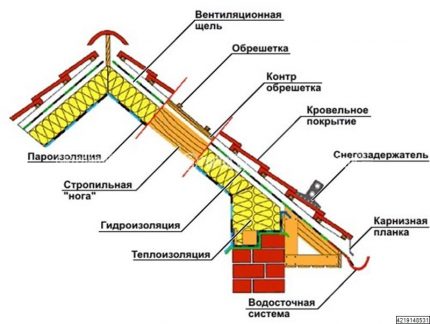
To exclude the possibility of clogging of the holes, they are closed with plates or gratings with small cells. An important nuance - the total gap area should be at least 1% of the total roof area.
In order to ensure this condition, with the height of the beam for the device of the crate and counter-lattice on top of steam, heat and hydrosolation, you need to decide in advance.
This method works effectively on simple gable roofs, the air in which can be circulated freely under the roof space. If the scheme is performed correctly, a natural, like stove draft occurs. It provides a constant flow of air.
Failures in the functioning of the system lead to stagnation of moist air under the roof and, as a result, the appearance of fungus and rust. The point method, in addition to the continuous one, is used on complex roofs and in the presence of an attic.
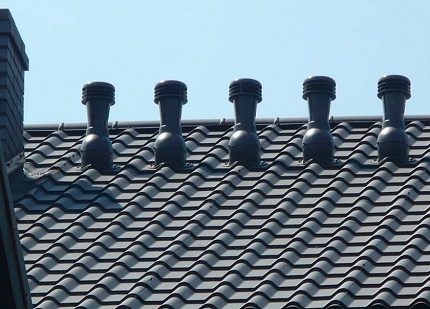
“Dirty” air flows are discharged through a metal or plastic aerator, a device made in the form of a short pipe with a deflector or a flat tile with a grill. Aerators are installed in places requiring active removal of moisture to the finished roof, taking into account the rose of the terrain winds.
In order not to damage the structure, more than one aerator cannot be installed on one floor sheet. On the roof with a complex geometry and with several skates, ventilation exits for the metal tiles are made near each of the skates with a distance of no more than 0.6 m. A point exit is recommended for a small slope of the roof (up to 1/3).
Installation of subroof natural ventilation
To organize a natural under-roof ventilation system, the following steps are taken:
- The crate is nailed to the inside of the rafters, a bar is attached to it. In the area of the valley, the beam should be solid. To create an additional gap in the gap between the crate-beam, a ventilation crate is laid.
- Lay a vapor barrier on top of the crate. An important detail: between the vapor barrier layer and the rafters, there should remain hollow ventilation ducts with a minimum height of 5 cm with bar walls. In the interval between the rafters, a heater is placed on top of the vapor barrier. When using a vapor barrier membrane, clearance is not necessary.
- Above the insulation, another tier of crates is arranged and waterproofing is laid. This row of bars provides a distance between the thermal insulation and the waterproofing film. It can not be arranged if a specialized membrane is used as a waterproofing. Then waterproofing cover the insulation without ventilation gap.
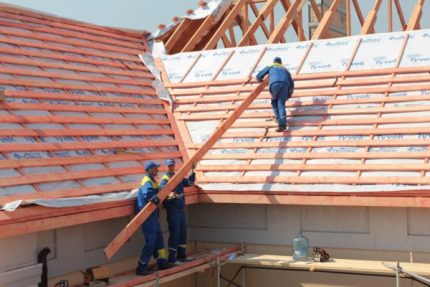
- They beat the counter-lattice to the outer side of the rafters, on it - the crate. This forms ventilation ducts between the waterproofing and the roof. In the case of laying a metal tile, this gap is required, it is necessary even in the case of a waterproofing membrane.
- They install a metal tile, make ventilation outlets in it in inter-rafter spans.
The ends of the roofing cake do not close anything except the bars. During continuous natural ventilation, air will flow through openings formed by the remote crate of the crate and counter-crate.
Working out through vents and aerators in the area of the ridge, along which the ramps are not hermetically connected. There is a gap of 3-5 cm between the roof planes along the ridge rib. It overlaps ridge aeratormanufactured for equipping the ridge with tiles or a solid metal strip.
Elements for roof ventilation
To equip the intersection of the roofing cake with a pipe of the internal ventilation system, coating manufacturers produce mounting kits.
When choosing them, you need to consider the following nuances:
- Metal profiles and aeration pads, as well as their color, must match.
- Material properties must be suitable for climatic conditions of use.
- In the kit, you must have instructions for installing the cover plate, template, fasteners, passage element. In some kits, there is no last part, but since high-quality installation of ventilation without it is impossible, it will have to be purchased separately.
- Some manufacturers equip the ventilation outlets with additional functions that improve the ventilation process. It can be a fan - mechanical or electrical, alcohol level, which facilitates installation on the base.
Design vent outlet not difficult. It consists of three main components: ventilation pipe, passage, deflector-umbrella. The first part is the main one, air through it is discharged through the roof to the street.
The task of the second element is to ensure the tightness of the pipe to the roof. The latter component acts as an umbrella protecting the hole from atmospheric precipitation and debris.
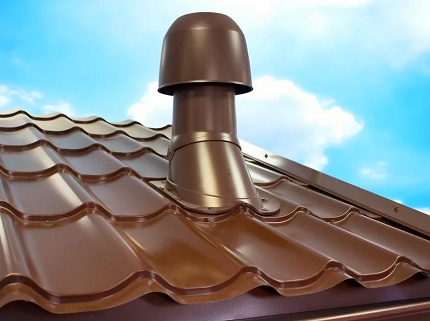
There are passage nodes insulated and uninsulated. Passages with a layer of insulation level the difference between external and internal temperatures. This prevents condensation inside the penetration. Elements without insulation are produced for use in regions with a mild climate.
In shape, the nodes of the wire can be round, oval, rectangular, square. The choice is made depending on the degree of humidity in the rooms, the minimum and maximum temperature indicators inside the house. They are released from plastic or metal. The best tube aerators are aluminum, they are resistant to corrosion, high temperatures.
The height of the ventilation pipe to the roof under the metal tile reaches an average of 0.5 m, the diameter ranges from 3 to 10.5 cm. The higher the pipe, the lower its resistance to wind, but the draft will be stronger. Usually a small part of it is brought out, but in regions with heavy snowfall, they try to install the pipe as high as possible - at least 65 cm.
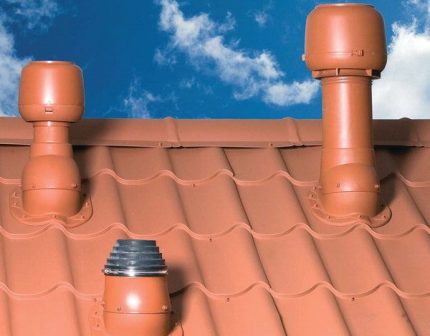
In order to provide good traction on roofs with slopes longer than 6 m, abutment protrusions of 0.4 m are used. In addition to the basic elements of a roof ventilation system, additional details play an important role.
These include:
- inspection hatches, with which they inspect the condition of the channels and wiring;
- continuous exits or ridge aerators;
- gratings with which overhangs are hemmed and used in other zones of the supply and exhaust system;
- fans
- special deflectors designed for flat skates and roofs.
Based on the design, the following types of roof ventilators are distinguished:
- Point devices. They have mushroom geometry, equipped with a fan. Designed for installation in places with limited access. In turn, point aerators are divided into ridge aerators, installed under the ridge, and pitched, which are mounted in areas requiring increased air circulation.
- Continuous. They are placed over the entire surface of the roof evenly for ventilation of all layers of the roofing cake, attic and attic.
To enhance the outflow of air, both ventilation pipes and aerators are equipped with turbine devices. The turbine located at the mouth can move independently or operate from an electric drive.
Top of continuous ventilation ducts, as with arrangement of a roof from a profiled sheet, most often closes the ridge fan. It is supplemented by a moisture-proof ventilation tape placed above the waterproofing layer.
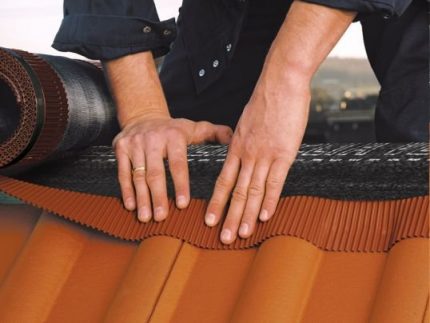
The fan housing for a metal roof is made of materials resistant to corrosion, acidic media, UV rays, high and low temperatures. The most suitable are stainless steel and polypropylene.
Aerators as part roof ventilation with metal used in all regions, regardless of climate. They have good operational parameters, tolerate temperature changes within +90 / -50⁰.
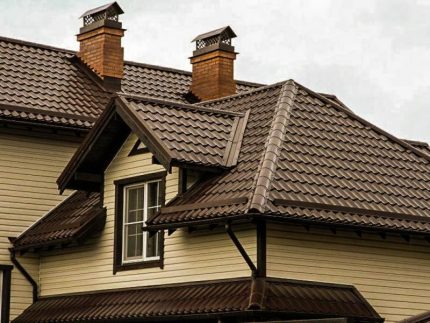
Pipes most often use plastic. They compare favorably with galvanized counterparts not only in their aesthetic appearance, but also in their long service life.
Design Installation Procedure
The technology of the device for the passage of ventilation through the roof on the roof with a metal tile is simple. To do the job, you need a set of simple tools: a pencil, metal scissors, a chisel, a building level, a screwdriver or a screwdriver.
At the first stage, they decide the issue with the installation location. To do this, from the inside of the roof using a plumb line, determine the point of passage of the ventilation outlet. Then the point is transferred to the roof by measuring its coordinates vertically and horizontally, starting from the rafters.
Then begin the arrangement of the site. Mark the contour of the lining fixation using a template that is superimposed on the crest of the wave. An incision of about 2.5 cm wide is made in the metal sheet using a chisel and a hammer. By marking with scissors, a contour is cut out for metal, trying to make the edges at the hole smooth.
The second stage begins with access to waterproofing by removing a sheet of metal with a cut out contour for mounting the pipe passage assembly. A sealing gasket loop is applied to the waterproofing web, and then a hole is cut out in the film.
They adjust the dimensions, cover the back of the gasket with glue, apply it to the waterproofing sheet and attach it to the crate with screws. Directly to the waterproofing layer, the insulating gasket is fixed with clips.
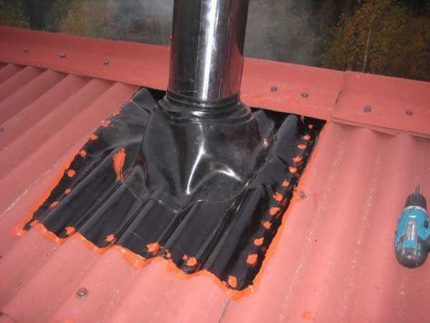
Install the gasket on the inside. The removed sheet is installed in place. Glue is applied to the hard pad intended for mounting from the outside, and it is pressed to the installation site on the metal tile. Further, they strengthen along the entire contour with self-tapping screws. Fasten the screw so that each subsequent point is in relation to the previous diagonally.
After the glue has dried, the vent pipe outlet is mounted. Its body is inserted into the passage unit, the edges of which are coated with sealant. Achieve a stable position, always equal to the construction level.
Alignment by eye is not suitable, even if it seems that the pipe is in a strictly vertical position. The pipe is also fastened with self-tapping screws, and mounted on its slice deflector. The tightness of the transition of the pipe through the roof is an important condition.
It is necessary to press the base of the passage to the roof so tightly that excess sealant comes out from under the gasket. Each negligence allowed during installation will lead to leakage through the roof.
The outlet of the exhaust pipe must be connected to the internal house duct. Most often this is done with the help of a corrugated pipe stretched through all layers of the cake - steam and waterproofing, insulation. Each intersection is sealed with adhesive tape, sealant, water-repellent material for hydrobarriers.
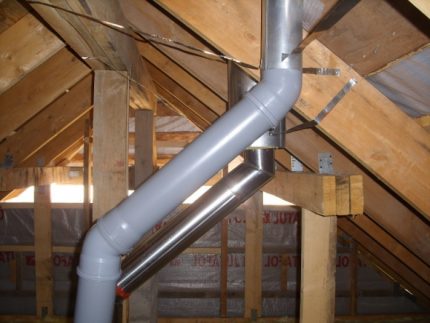
If the penetration is done correctly, it is not afraid of temperature changes, vibration, pressure exerted by precipitation. This element is made of materials not susceptible to corrosion, not melting under sunlight, resisting moisture. Most often, such a reliable barrier is rubber or silicone.
Conclusions and useful video on the topic
After watching this video, you can get additional information about the ventilation of a roof made of metal using aerators:
Video instruction on installing ventilation outputs:
Video about installing ventilation pipes on a metal-roofing:
In order for the metal roof to last for a long time without repairs, it is imperative to install roof ventilation. Installation of ventilation equipment does not require huge material costs. And the desire to save will lead to serious problems in the future.
Correction of errors made during installation will also cost a lot, so it is so important to take into account every nuance of installation technology.
Tell us about how to equip the ventilation of your own metal roof. Share technological intricacies known only to you with site visitors. In order to leave a comment, ask a question, publish a photo on the topic of the article, use the block below.

 Ventilation in the bath: an overview of traditional schemes and nuances of arrangement
  DIY ventilation in the apartment: an overview of the nuances of arranging the ventilation system
  Basement ventilation in a private house: the best ways to arrange proper air exchange
  Inspection pit ventilation in a garage: specifics of arranging an air exchange system
  Ventilation in a private house through the pediment: arrangement options
  Ventilation in a stretch ceiling: why do you need + subtleties of arrangement
  How much does it cost to connect gas to a private house: the price of organizing gas supply
  The best washing machines with dryer: model rating and customer tips
  What is the color temperature of light and the nuances of choosing the temperature of the lamps to suit your needs
  Replacement of a geyser in an apartment: replacement paperwork + basic norms and requirements