False ceiling how to do: instructions for the work + calculation of the necessary materials
Repair in the apartment often begins with the reconstruction of the ceiling, which plays an important role in creating a harmonious interior. Before choosing the type of decoration for the ceiling, you should evaluate its condition, for example, the presence of cracks or differences in height.
You must admit that leveling the ceiling with stucco is a time-consuming process that takes a lot of time and does not give a guarantee of eliminating all the shortcomings. One of the most popular ways of decorating the ceiling is a suspended ceiling, which will not only hide flaws, but also simulate the space of the room. In addition, such a ceiling is indispensable for the organization of spot lighting.
We will tell you how to independently install suspended ceilings, and also help with the selection of suitable materials.
The content of the article:
Benefits of False Ceilings
Suspended ceiling systems allow you to easily, quickly and for moderate money get a finished ceiling that will hide cracks and defects of the base, as well as hide electrical wiring, ventilation and communication cables.
False ceilings are universal, they can be used to decorate almost any residential, office, commercial and industrial facilities.
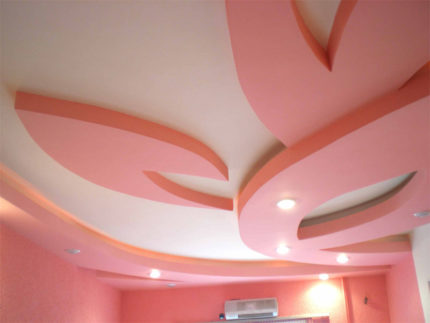
Such ceilings make the height of the room less and due to this have good thermal insulation, which is especially important for owners of apartments on the upper floors.
Some types of materials for suspended ceilings can provide sound insulation in the room, which will help if noisy neighbors live above the floor.
The main types of suspended ceilings
The simplest and most common type of suspended ceiling is a continuous ceiling made of drywall.All other types of ceilings are called modular, as they consist of special plates and battens.
False modular ceilings have the most diverse design and can have one or more levels. Their surface can be glossy, matte or mirror, and the pattern and color can be any.
The main types of suspended ceilings are considered in more detail.
Option # 1 - panel designs
Such ceilings consist of square or rectangular panels. Panel ceilings are concise and straightforward, so they are most often used to decorate various non-residential premises.
The system itself involves access to hidden communications. Also easy embed lighting equipment.
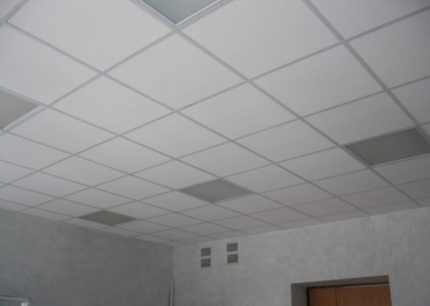
Armstrong tile ceiling has several advantages, among them:
- The ability to install on large areas of more than 1000 square meters.
- Creating a perfectly flat surface.
- Free access to ventilation.
- Quick and easy installation.
You can find ceiling plates made of MDF and fiberboard, metal, mineral and fiberglass.
Also, the plates themselves can be endowed with additional properties:
- acoustic;
- ventilation;
- heat insulating;
- moisture resistant.
If desired, on the panel you can apply any image or apply decorative elements.
The most expensive option are natural wood panels, the beauty of which is not comparable to any, even the highest quality imitation.
Option # 2 - cassette ceilings
Such ceilings are easy to clean and have a pretty attractive look. Finishing can be very different: mirror, matte, with polymer coatings and metallized.
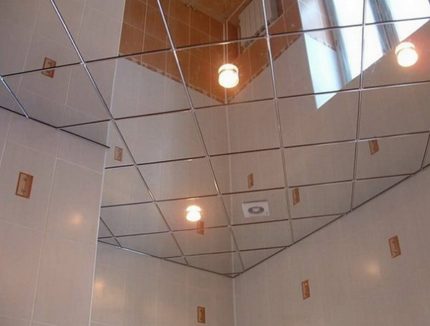
The design of the hidden type allows you to completely close the frame with cassettes. It is easy to assemble such a ceiling, and, if necessary, it is also easy to partially disassemble it. For example, to get to internal communications. Such systems are not afraid of water and fire.
Perhaps its only drawback is its rather high cost.
Option # 3 - rack type ceilings
The system of slatted ceilings uses long slats. The design is attached to the ceilings with special clamps (knitting needles). Such ceilings are usually made of aluminum, steel or PVC.
Aluminum rails for ceilings, in turn, have two common styles:
- Italian style. Reiki high with rounded edges. For them, both open and hidden type of fastening can be used.
- German style. Reiki squared which can be with perforation or without.
PVC slats are narrow - from 10 to 12.5 cm and wide from 15 to 50 cm. The former are usually called lining, and the latter - panels.
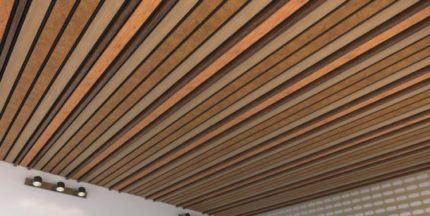
PVC slatted ceiling will not hit your pocket and is best suited for a bathroom or kitchen.
Option # 4 - drywall constructions
Unlike previous types of ceilings, the construction of drywall after installation requires decorative putty finishing and subsequent painting.
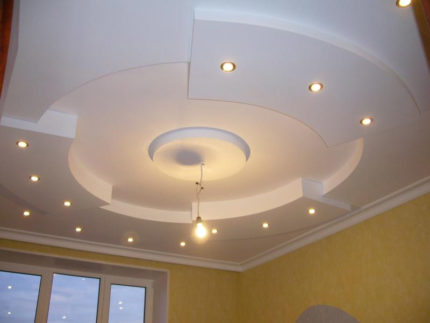
In addition to the aesthetic benefits of drywall, the characteristics of the selected drywall play an important role: ordinary, moisture-proof or fire-resistant. His choice, in turn, depends on the purpose of the room.
Plasterboard suspended ceilings come in various forms, for example:
- Framework. They consist of a box with one or more steps.It is possible to place hidden lights around the perimeter of the box.
- Diagonal. They have a flat base with protruding lower levels above one of the sides of the room.
- Abstract. They consist of several elements of irregular shape arranged in a spiral.
- Zonal. They allow you to highlight part of the room, by determining the boundary of a zone, for example, a working one.
- Curly. They have a flat base, against the background of which, as a rule, in the center of the ceiling, a curly geometric design stands out.
The advantage of this material is its low cost.
Calculation of the necessary materials
After choosing the type of suspended ceiling, you should decide on the required amount of materials. To do this, you need to measure the area of the ceiling and it is desirable to develop a sketch, which will greatly facilitate the work ahead.
Materials for the frame for almost all types of ceilings will be similar, so we give an example of calculating the necessary materials for a panel ceiling like Armstrong.
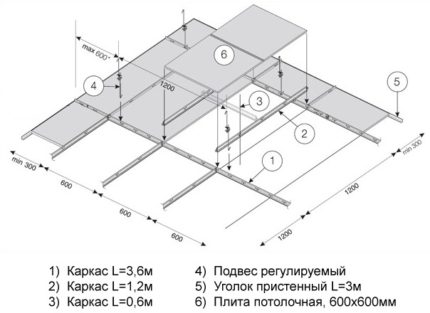
In order to understand the norms of consumption of materials for the Armstrong suspended ceiling frame, imagine that we have a square room with an area of 25 m2.
For the installation of a panel ceiling, the following materials will be required:
- the main profile is 3.6 m long;
- transverse profile 1.2 m long;
- transverse profile 0.6 m long;
- suspensions;
- wall corner 3.0 m long;
- screw dowels;
- anchor dowels;
- panel plates 600 * 600 mm.
Installation of the main profile is carried out in increments of 1200 mm. To find out the number of rows of the main guide, divide the room width of 5 m by 1.2 (step) and get 4.17 rows. The next step is to find out how many linear meters of this profile will be required. To do this, multiply the length of the room by 5 m by the number of rows 4.17 and get 20.9 m.
Installation of a transverse profile with a length of 1.2 m is performed in increments of 600 mm. To find out the number of rows of the transverse profile, the length of the room 5 m is divided by 0.6 (step) and we get 8.33 rows. Next, find out the required number of profiles in running meters. To do this, multiply the width of the room by 5 m by 8.33 (rows) and get 41.7 m.p.
The step of mounting a transverse profile with a length of 0.6 m is 1200 mm. The number of rows of the transverse profile is calculated by dividing the length of the room 5 m by 1.2 (step). We get 4.17 rows. We multiply the resulting value by 5 m - the width of the room and get 20.9 m.p. - this amount is needed for an area of 25 m2.
Suspensions are installed on the main rails with a pitch of 1200 mm. To find out the number of suspensions per 1 row of main guides, divide the room length of 5 m by the suspension pitch 1.2 and get 4.17 suspensions per row.
Earlier we found out that we have 4.17 rows of main guides. Accordingly, for a room of 5 x 5 m, 4.17 rows will need to be multiplied by 4.17 and we get 17.39 pieces of suspensions.
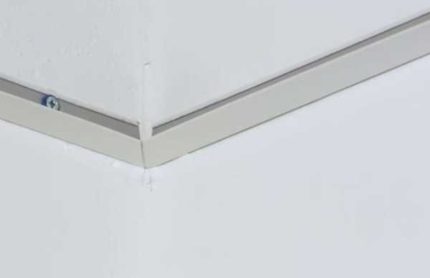
Consequently, 20 m of a wall corner is required.
To calculate the number of panel plates, it is enough to know the area of one plate (0.6 x 0.6 = 0.36) and then the ceiling area 25 divided by the area of one plate 0.36. Total, we get 70 pieces.
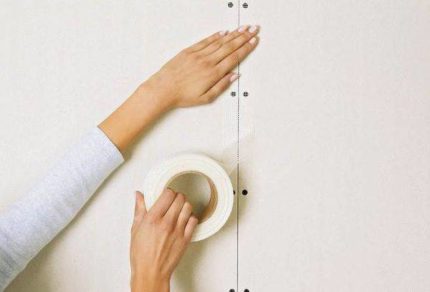
Fasteners should be bought with the expectation that one dowel is needed per 0.5 m of profile.
For the installation of a drywall ceiling, the following materials will be required:
- guide profile 27 x 28 cm;
- ceiling profile 60 x 27 cm;
- direct U-shaped suspensions;
- dowel nails;
- self-tapping screws;
- drywall sheets 9.5 mm thick.
Finishing the gypsum plasterboard ceilings will require additional materials such as primer, putty, and water based paint.
Phased installation work
Regardless of the choice of type of suspended ceiling, the main thing in their installation is that they are all attached to the frame, and the frame to the draft ceiling. Only the design of the frame itself will differ.
Before installing any type of suspended ceiling, a number of preparatory measures should be taken:
- Clearing the room from furniture.
- Ceiling ceiling preparation. For example, eliminating cracks and cracks to avoid future heat loss, ceiling insulation and his sound insulation.
- Laying communications. For instance, installation of ventilation systems and wiring for lighting.
After calculating the amount of necessary materials and conducting preparatory work, you can proceed with the installation of the suspended ceiling.
Methods for installing panel ceilings
Consider the phased installation work on the example of installing suspended panel ceilings of the Armstrong type.
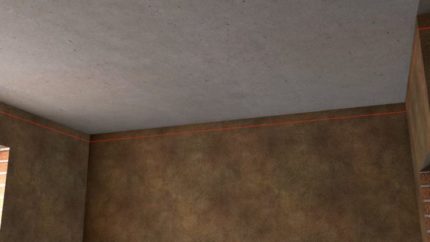
After that, a wall corner is attached to the walls along the perimeter of the room with dowels in increments of not more than 0.5 m.
Next, the main bearing profiles are installed with a length of 3.7 m with a step of 1.2 m parallel to the wall. After that, suspensions with a pitch of 1.2 m are attached to the ceiling and the ceiling rail.
Transverse profiles 1.2 m long are installed perpendicular to the main rails with a step of 0.6 m. Transverse profiles 0.6 m long are installed parallel to the main rails at a distance of 1.2 m from each other.
After assembling the frame, they begin to install ceiling plates.
The installation of suspended cassette and rack ceilings is similar to the installation of Armstrong ceilings, the only difference is the use of cassettes or rails instead of plates.
Installation of drywall ceilings
The first step is marking, and, most importantly, a straight line along which the guide profile will be attached. The laser level is best suited for this. It is also necessary to note the mounting points of the suspensions.
The guide profile 27 x 28 cm should be attached with dowels around the perimeter of the room with a screwdriver or punch.
Next, direct suspensions to the ceiling are mounted on metal anchors according to the marked layout with a step of 60 cm. After that, the ceiling profile 60 x 27 cm must be cut in length and inserted into the guides in steps of 40 cm.
Suspensions must be lowered and screwed to the profile with screws. The excess part of the suspension must be bent inward.

After installing the sheets of drywall, you can begin decorating. To do this, clean the ceiling from dust.
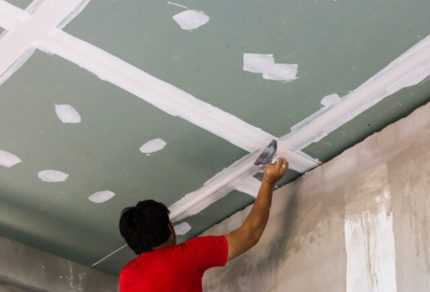
It is necessary to wait for complete drying and cover the entire surface with a primer. After that, you can proceed to the finishing putty of the entire surface.
Before painting with water-based paint, it is necessary to apply another coat of primer.
Conclusions and useful video on the topic
Armstrong suspended ceiling installation:
Installation of a plasterboard ceiling with a niche for lighting:
The choice of suspended ceilings is very large and depends only on your preferences and financial capabilities. A properly selected and installed ceiling can not only hide possible flaws, but also change the perception of space in the room.
Installation of suspended ceilings can be done by yourself. The main thing is not to rush, but to correctly carry out the preparatory work and adhere to the technologist.
Have you ever been involved in the installation of suspended ceilings? Please tell our readers what species they preferred and on what your choice was based. Were there any difficulties with installation? Leave your comments, add photos, ask questions and share experiences in the link section under the article.

 How to install a supply valve into the wall with your own hands: step-by-step instructions for the work
  Suspended ceiling fan: features of selection and subtleties of self-installation
  How to connect a kitchen hood to ventilation: a work guide
  How to install the hood if the gas pipe interferes: briefing on the work
  Ventilation of the bastu in the bath: advantages and disadvantages + instructions for the arrangement
  How to make a roof ventilation duct: a detailed construction guide
  How much does it cost to connect gas to a private house: the price of organizing gas supply
  The best washing machines with dryer: model rating and customer tips
  What is the color temperature of light and the nuances of choosing the temperature of the lamps to suit your needs
  Replacement of a geyser in an apartment: replacement paperwork + basic norms and requirements