How to make a warm floor under the tile: laying rules + installation guide
Installation of underfloor heating is possible in rooms with high ceilings. Most often they are mounted in the bathroom, but underfloor heating can be installed throughout the apartment.
There are several heating methods that you need to choose individually, depending on the height of the ceilings, the condition of the wiring and the pressure of the water in the apartment or country house. The most popular are heating mats, which are easy to install.
In this article, we examined the basic rules for laying infrared and cable floor heating. They also gave a detailed briefing on the arrangement of a heating system for tiles using heating mats. The material is equipped with step-by-step photos and video recommendations of specialists in laying warm floor.
The content of the article:
Varieties of underfloor heating
Before you start choosing a floor heating system, you need to consider that they have limitations. Despite the fact that the heating systems are able to completely replace the heating in the apartment, this cannot be done according to the norms of Russian legislation.
These limitations are caused by a number of reasons:
- Only allowed in apartments electric underfloor heating, and the massive use of such systems in the house leads to an increase in the load on the electric network.
- Massive or partial transition to electric heating leads to an imbalance in the heat supply system in the house.
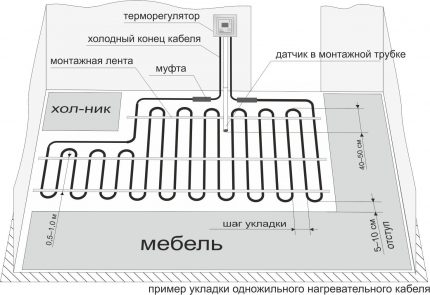
Since the floor will not be used as the main source of heat in the apartment, you can save on its installation. The saving consists in laying heating cable or film only in places that are free of furniture.
In a private house, the possibilities of using this technology are much wider. Depending on the available energy sources, you can choose an acceptable option between water and electric heating.
If the house is equipped with autonomous sources of electricity, such as wind generators or solar panels, of course, it is worth making a choice in favor of electric, i.e. cable or infrared heating systems.
If electricity is supplied through power lines, then using the electric heating option of a private house will be very expensive. In that case, it is better to opt for water floor heating. It will last about 35 years, after which it will require replacement.
Basic rules for installing underfloor heating
Despite the different heating principle, there are several basic principles for installing all types of underfloor heating under the floor tiles.
The first general rule is to remove the old screed after directly dismantling the coating. This will allow you to win a few centimeters of the height of the room, which is especially true in apartments with low ceilings or if the heater is mounted in only one room.
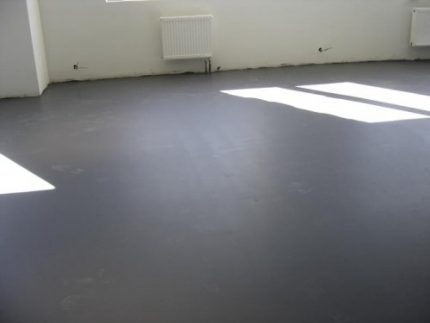
For waterproofing, you can use special compounds, such as water glass or bitumen. Particular attention should be paid to bathrooms. If moisture gets through the screed, this will lead to the gradual destruction of concrete. This is true for private homes, and for apartments.
After waterproofing, you need to make thermal insulation. Its thickness is determined individually, depending on the height of the ceilings and the level of the difference in pilaf between rooms. The thinner the insulation layer, the greater will be the heat loss.
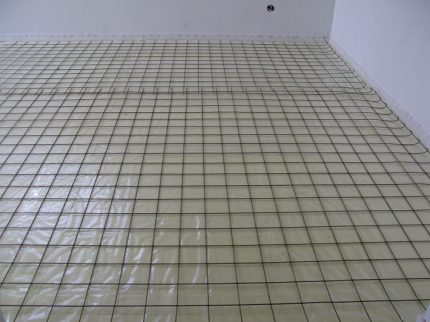
Another rule is the need to reinforce the floor under the tiles.
For this, ready-made reinforced meshes with a wire thickness of not more than 6 mm are used.
Mixtures with gypsum base cannot be used for pouring floor screed under the tile. They are too fragile and not suitable for pressure. In addition to fragility, they do not possess the properties necessary for adhesion to tile adhesive.
It is necessary to use leveling mixtures such as bulk floors. They give the best effect, since the surface is smooth and suitable for laying tiles with a minimum consumption of adhesive.
Rules for laying cable underfloor heating
Before installing new equipment that will create a load on the wiring in the apartment or house, you need to make sure that the wiring can withstand it. First you need to make a markup where the electric mats will lie.
When planning in an apartment, it is necessary to exclude laying in the locations of permanently installed large furniture without legs, plumbing fixtures and household appliances. This is due to the fact that electricity creates a magnetic field, which will interfere with household appliances.
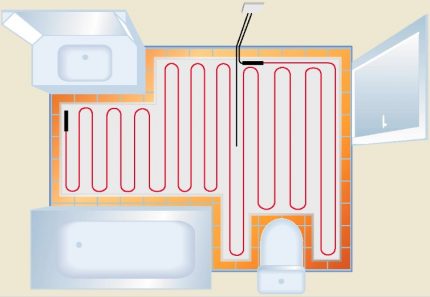
When planning, it is also impossible to lay electric heating in the locations of water and gas pipes.
Determination of power, cable cross-section and wiring in the house
The minimum distance from each wall should be at least 10 cm. You also need to exclude areas where furniture is installed. The area for installing mats is calculated by subtracting the total square meters from the total area where installation will not be carried out.
The resulting number must be multiplied by 140 watts if the floor will not be used as the main source of heat. If you plan to use only the floor for heating, then you need to multiply by 180 watts.
Based on the data obtained, it is possible to purchase a cable or electric mats for heating the floor covering.
As for the wiring, it is necessary to calculate the total power of the devices that are used in the apartment. This information can be found instructions for the technique, and even duplicate it on the instrument housing.
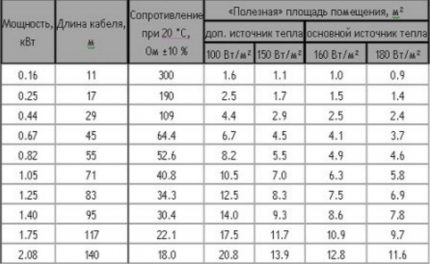
Aluminum is not suitable for wiring a house where it is planned to install a floor heating system. This is because copper has better thermal conductivity. According to the table, you also need to determine the current strength and put the machines on the electricity meter.
If the wiring in the apartment does not meet the necessary characteristics, it must be replaced before installing the heating cable or mats. If this is not done, then the apartment will periodically turn off the electricity, and then the sockets will melt.
Ultimately, this will result in a short circuit and fire. This is dangerous and you should not save on security, especially if the house or apartment is made of combustible materials. We recommend that you familiarize yourself with the wiring diagrams in the apartment and the recommendations for installing it yourself. For this follow the link.
Installation of mats and installation of control system
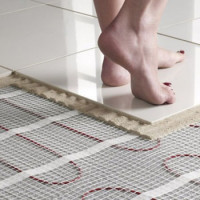
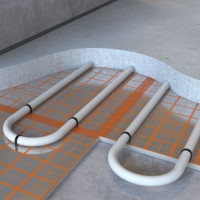
The installation of electric mats is simpler and faster than installing a cable. It is enough to place them on the heating area, which was determined during the preparation of the scheme.
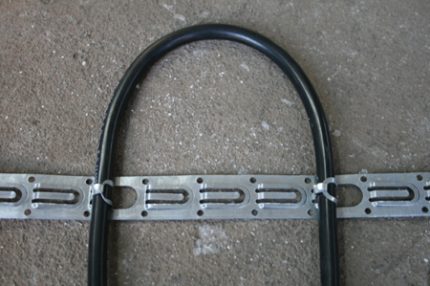
This will ensure a uniform level of floor heating. During installation, it is not recommended to break the cable.
After laying the cable, you need to install temperature controller. It performs an important function - maintaining a given floor temperature.
This allows you to reduce energy consumption, since periodically the heating will turn off when the set temperature is reached. If the temperature sensor detects a decrease in the user-defined mode, the heating will automatically turn on.
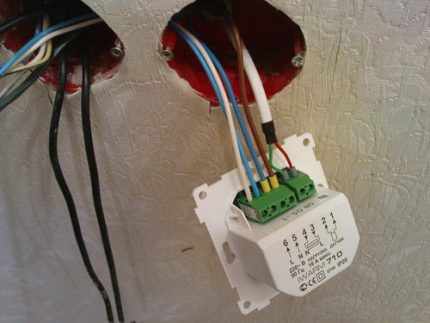
The hole should be located above 30 cm from the floor surface. A vertical channel is drilled down from the hole, where the corrugation for the temperature sensor will be installed.
The opposite end of the corrugation should be located between the turns of the heating cable at an equal distance. If this rule is not observed, then the sensor readings will be overestimated.
When connecting the heating cable to the control unit, follow the instructions from the equipment manufacturer. Before connecting, you need to check the resistance of the wires with a special device.
Rules for laying infrared warm floor
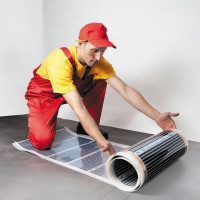
Despite structural differences infrared floor heating It is mounted as simply as electric mats. But there is a difference between them. When connecting a film heater, a parallel connection is not used, but a parallel one.
From a structural point of view, this is a more reliable way, since if a module fails, the rest will continue to function.
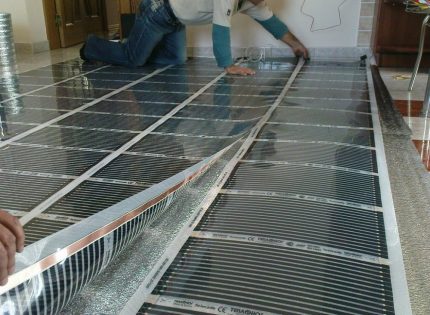
The film must be laid with a slight overlap, strictly following the markup. Between themselves, the modules are fastened with molar tape. This is a temporary method of fastening, since after filling with a bulk floor, the need for fastening will disappear.
We examined the features of the film type of heating in more detail in another article.
Installation Guide for Electric Underfloor Heating
The quality of the coating depends on the condition of the substrate on which it is to be laid. Work should begin with the dismantling of the old coating. Everything must be dismantled, including the old screed.
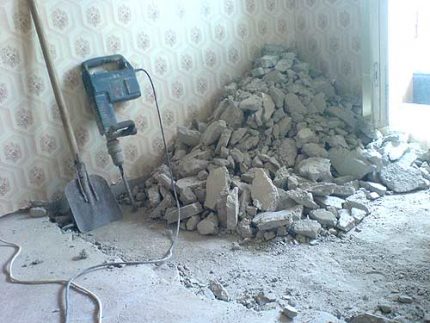
After removing the old coating, all fine litter and dust must be removed. After that, you need to inspect the floor area and in the presence of cracks they must be repaired. When the floor surface is prepared, you can begin waterproofing and warming.
Stage # 1 - installation of insulation under the electric floor
It is necessary to lay a heater on the prepared base. Cork sheets are preferred. They have sufficient density and do not sag under the weight of the screed, as is the case with polystyrene foam.
The use of low-density insulation will lead to the need to dismantle the finished floor due to depreciation of the material.
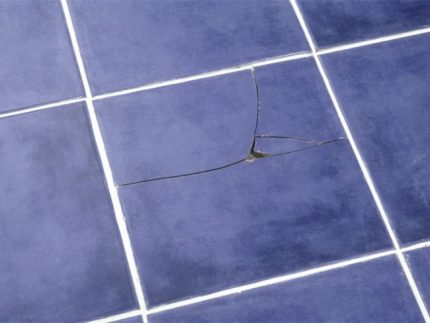
The insulation is attached to the surface by gluing to bitumen mastic. Through the use of this material, not only fixation of cork sheets is achieved, but also waterproofing.
The durability of underfloor heating also depends on the quality of gluing.After waiting 5-6 hours, you can proceed to pouring screed. Screed thickness should be at least 3 cm.
When using a bulk floor, there is no need to align with the rule, as is the case with self-mixed cement mortars. After work, you need to leave the surface to dry completely, for about 3-4 days.
Stage # 2 - laying heating mats
After solidification of the bulk solution, you can proceed with the installation of a warm floor under the tile. First you need to outline with chalk the places in which the mats will not be installed. This will help to navigate and not to overuse the material.
After installing the mats, you need to proceed with the installation of the control unit and the temperature sensor. The control unit must be connected in strict accordance with the scheme and color marking of the wires, which are provided by the manufacturer.
Down from the control unit, a special corrugation is laid where the temperature sensor will be installed. The end of the corrugation, which is located between the heating mats, must be tightly corked.
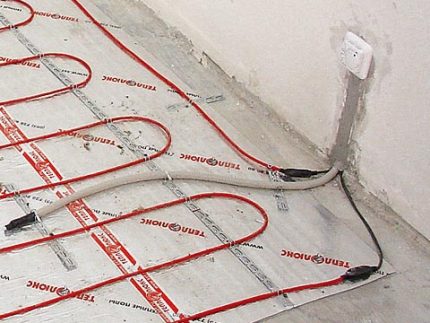
When the installation of electronics is completed, you need to turn on the system and check its performance. If there are no defects in the operation of the heating system, you can proceed with pouring the last layer of screed. The necessary fill level should be noted on the wall to make it easier to navigate.
The minimum thickness of the screed is 4 cm. During pouring of the self-leveling floor, it is necessary to monitor the uniform distribution of the liquid. You can use a roller to move excess solution.
After pouring, you need to wait a few days until completely dry. At this time, you need to control the temperature in the apartment. If the air is dry and hot, there is a risk of cracking the screed. Tile masonry can only be started after the bulk floor has completely dried.
Stage # 3 - cutting floor tiles
For work with a floor tile the manual tile cutter perfectly suits. To work with it, you need to prepare the tile in advance. The tile is pre-soaked if specified by the manufacturer.
If there are no such recommendations, then just wipe the tile with a damp cloth. This is necessary to clean the surface on which the cutting element of the tool will move.
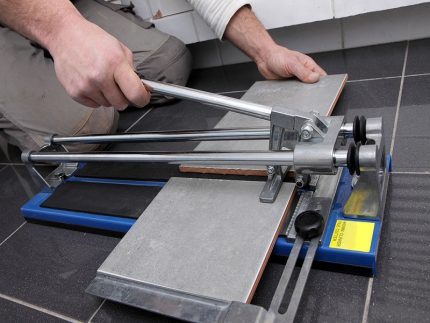
This is done as necessary, in places where the masonry approaches the wall or corner. If water or heating pipes come out of the floor, then there will be a need to make curly holes in the tile.
A hand torch is used for this. The holes made with it can have jagged edges. To eliminate the aesthetic defect, it is necessary to process the edges with sandpaper.
Stage # 4 - laying tiles on the heated floor
It is necessary to start work on tiling the floor with a markup, which is largely determined by the type of masonry. The most common tile laying options are diagonal and straight.
Which way to choose depends on the interior design and geometric features of the room.
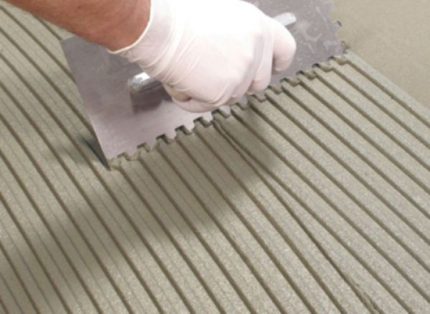
On top of the adhesive solution, tile is laid and leveled. It is periodically necessary to check for tilt. This is done using the construction level.
The level should not be longer than 60 cm, since with a longer length the error of the readings increases. In order to maintain an equal distance between the tiles, you need to use plastic crosses.
Their standard size is 2 mm. If the tile is large, a larger size can be used. The crosses that regulate the height are removed, and those that border four tiles are not dismantled after masonry, but are hidden during grouting.
For grouting, special compositions are used, painted in the tone of the lined surface. Grouting can only be done after the adhesive has cured.
Stage # 5 - varnishing of the finished tile floor
To preserve the tile in its original form, you need to take care of varnishing. This simple procedure will prevent the need for tile replacement.
Especially varnishing is relevant for matte tiles, which are often used for the floor in the bathroom, since it does not slip.
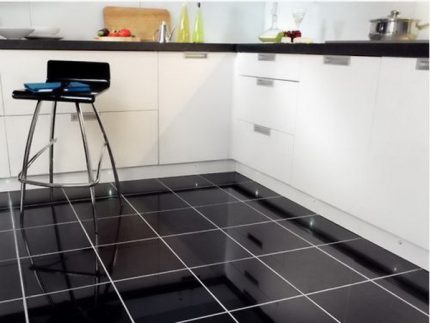
When the first layer of varnish is applied, it is necessary to open the window in the airing mode, and also close the door to the room. After complete drying, which occurs after 6-8 hours (depending on the composition of the varnish), it is necessary to repeat the procedure again.
Conclusions and useful video on the topic
How to mount the control unit:
How to lay a heated floor in rooms with small heat losses:
What will happen if you do not fix the insulation:
What to look for when designing a home:
Proper installation of underfloor heating systems for laying floor ceramics will significantly extend its life. It is necessary to carefully choose a company-heating system manufacturer.
Most often, electronics fail, which is easy to replace and continue to use underfloor heating. In the event of a breakdown of the control unit, it will be difficult to get a new one if the manufacturer ceases to produce heating systems. Temperature sensors are easier to pick up, as they are interchangeable in many models.
Have you installed underfloor heating in your home? Which heating system did you use? How satisfied are you with the result and have you encountered any type of breakdown? Share your experience in installing and operating a warm floor - leave your comments under this article.

 How to make an electric heated floor for tiles: film and cable option
  How to make a heated floor in the bathroom with your own hands: a step-by-step guide
  Infrared carbon warm floor: operating principle and laying rules
  How to make a water-heated floor with your own hands: a step-by-step guide from design to assembly
  Underfloor underfloor underfloor heating: types, features of choice, laying rules
  How to make a water heated floor under linoleum: design rules and an overview of installation technology
  How much does it cost to connect gas to a private house: the price of organizing gas supply
  The best washing machines with dryer: model rating and customer tips
  What is the color temperature of light and the nuances of choosing the temperature of the lamps to suit your needs
  Replacement of a geyser in an apartment: replacement paperwork + basic norms and requirements
For a long time I want to have underfloor heating in the kitchen and bathroom, I have tiles there and there. But I can’t make up my mind in any way, it’s neither fast nor cheap. But the main thing that bothers me is waterproofing. At first, I also thought about bitumen mastic, but it is not recommended to be used indoors because at high temperatures it begins to secrete toxins.
With liquid glass, the option is more interesting and seems to be more reliable. I would like to see a separate material on waterproofing, nevertheless it is very important, especially for the bathroom, especially since I have a shower cubicle without a tray, just a floor with a slight bias towards the drain. In such conditions, is it generally possible to make underfloor heating or too risky?
When buying an apartment and subsequent repairs, he made a warm floor in his kitchen. First, I had to change the aluminum wiring to copper. Everything turned out to be done by myself with a friend, there were no problems with installation. I tried to remove the old screed as much as possible so that the finish floor did not turn out too high. However, after laying the tiles, the level nevertheless rose, I had to make a threshold to the kitchen, and cut the door so that it could close. I cut the tile with the “grinder”, I did not find the tile cutter. The only thing I did not know was about varnishing the tiled floor, it would be necessary to tackle this issue at the weekend.