Laying between the tank and the toilet: types, purpose, installation features
How much irritation, headache, inconvenience does the water appear on the floor near the toilet! We think: what can happen in the simplest form of plumbing? We think: is this a serious breakdown or a minor violation? And when we find that the gasket between the tank and the toilet is damaged, we call the plumbers. It is so?
With our help, you can easily deal with the problem with your own hands. We will introduce the specifics of using gaskets of different configurations. Independent home masters who are not afraid of any work, we will find a detailed description of the procedure for laying and fixing the seals located between the toilet and the tank.
The valuable suggestions we offer will help novice plumbers. The article outlines the principle of replacing gaskets, technical nuances are affected, recommendations are given that ensure a successful result. A good help facilitating the perception of information are photos and videos.
The content of the article:
Briefly about household toilets
Despite the simplicity of the designs of classic household toilets, the requirements of GOST (in particular, 12499, 21485, 30493) are imposed on these plumbing fixtures.
These requirements determine both the individual structural parts and the accessories used, including toilet gaskets, which are superimposed when the bowl and water tank are articulated.
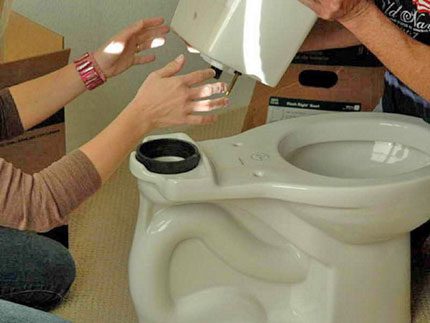
These nuances once again confirm: the quality of the home plumbing fixture and the operational safety of the device directly depend on the use of only “native” parts and accessories.And the gaskets between the tank and the toilet bowl do not remain on the sidelines, given their rather wide variety of designs.
Types of gaskets used
The purpose of the seal for its installation between the storage tank and the toilet bowl should be clear. The accessory, usually rubber or silicone, provides tightness between the two main parts of the toilet plumbing.
The shape of this mounting accessory can be:
- round;
- oval;
- trapezoidal;
- another (usually on imported devices).
It should be clarified: there are gaskets for the tank of a home toilet bowl, the design of which is designed exclusively for sealing drainage mechanics.
Also, there are seals, the role of which is to organize a soft insert between two ceramic parts.
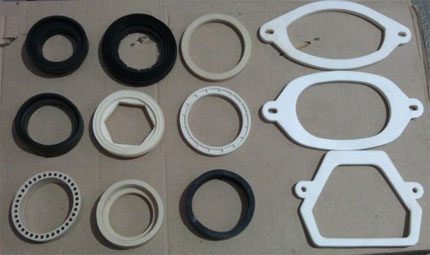
The presence of a soft insert between the mounting components additionally protects fragile faience parts from accidental damage during installation and operation. The type and shape of the seal is determined toilet sizebetween the tank and the bowl of which this part is stacked.
Option # 1 - Round
In most cases, round-shaped articles, thickened, made on the basis of dense rubber of white or black color, are used as a sealing seal.
However, there are also (in sets of inexpensive models) toilet gaskets for the storage tank made of foam rubber. Such a product economically justified by the manufacturer clearly does not satisfy user requests.
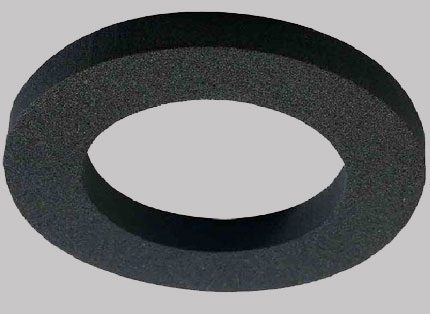
In practice, foam seals hold water for no more than 2-3 days of operation (should be noted when choosing). Ninety out of a hundred installations fail and, as a rule, force the master to change the foam rubber to a classic rubber (silicone) sealant.
Option # 2 - Oval
This type of gasket for home toilets under the tank has traditionally been installed on older models of plumbing fixtures. Modern designs are rarely equipped with such seals. In fact, this type of product has long been discontinued and is not used.
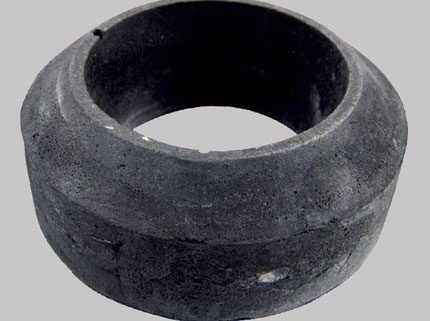
Meanwhile, oval products made of thick, high-quality compressed rubber showed reliable performance. True, to tightly press such seals to the seat of the hitch of the tank and toilet bowl, more effort was required than is required by the design of modern gaskets.
Option # 3 - trapezoidal
The trapezoid is also a rather rarely used type of gasket between the toilet bowl and the filling tank.
The trapezoidal shape of the toilet seal is characterized by a kind of negative point - for reliable sealing it requires pulling with at least three fixing screws.
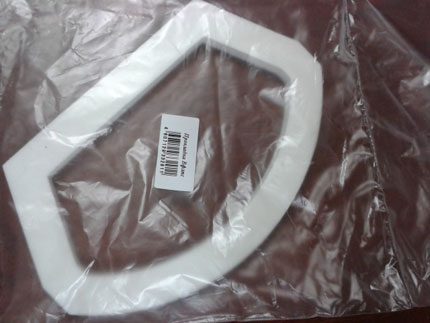
Therefore, plumbing fixtures for this type of seals usually have 3-4 fastening screws for the screed “bulk tank - toilet bowl”.As a rule, two screws are located symmetrically on two sides, and one (two) in the center at the long (short) base of the trapezoid.
Option # 4 - Universal
The most commonly used configuration of gaskets (on the toilets of the middle price segment) is represented by a product, one might say, of a universal shape.
The outer side of such a seal is flat and round, and the inside in the form of an equilateral hexagon. The working surface of the sealing ring (the area of contact with the faience parts) has a wavy shape.
Such a solution contributes to better sealing due to the achievement of high density even with a slight tightening of the fixing bolts.
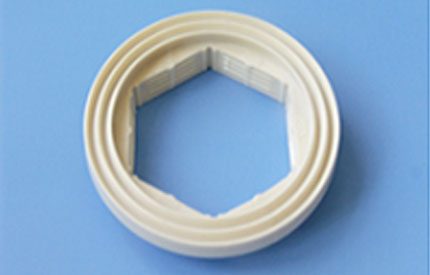
Officially, the product is referred to (marked) as M60 or KK100 - depending on the diameter of the passage opening. The hexagonal inner part of such seals is designed to fit over the fastening nut of the drain mechanism, which is used in the drain tank of modern toilet designs.
Nuances of mounting seals
There are usually no special nuances for installing gaskets between the drain tank and the toilet bowl. The exception is the rare, far from the standard configuration models of plumbing fixtures. As a rule, the seal is inserted (laid) inside the landing recess intended for it in the interface area.
After that, the drain tank is carefully placed at the installation site so that the holes for the mounting fittings on the tank and bowl stand are aligned. It is important not to shift the gasket from the landing area at the time of installation of the tank.
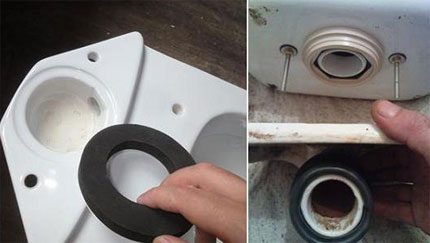
It is somewhat easier to mount the filling tank on the stand of the toilet bowl when gaskets of the type M60 and KK100 are used. This rubber seal is put on with a slight tightness on the fastening nut of the drain mechanism. Therefore, the risk of displacement of the gasket M60 (KK100) at the installation is practically reduced to zero.
Step-by-step instructions for disassembling the drain tank for repair work given here. In the article we recommend, you will find many valuable recommendations.
Intermediate gasket tank-bowl
Some models of domestic toilets are made to articulate the tank with the toilet bowl through an additional intermediate gasket. If one is included in the plumbing kit, it is easiest to install it by pre-fitting the threaded rods of the fixing screws.
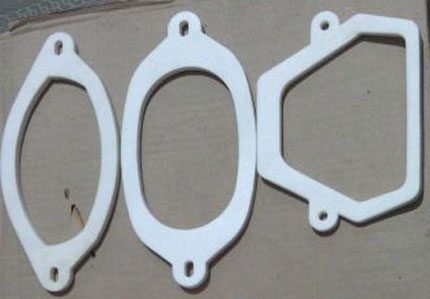
Intermediate seals traditionally have "ears" with holes through which the rods of the fixing screws pass. If the intermediate seal is installed in place, aligning with the mounting holes, and then trying to install the tank, the gasket can easily be moved from the landing site. Therefore, it is the nozzle on the screws that simplifies the installation procedure.
Force moment screeds
It would seem that there is nothing simpler than tightening the connection parts with screws after all the manipulations with the gaskets. Meanwhile, the fastening procedure also has its own characteristics. Screw the nuts onto the threads of the bolt studs evenly, by about 2-3 threads, applying the action to the bolt joints in turn.
The dismantling and reinstallation procedure is also carried out if the tank does not hold water. Those. if replacement of fittings responsible for the collection and discharge of water from this plumbing tank is required.
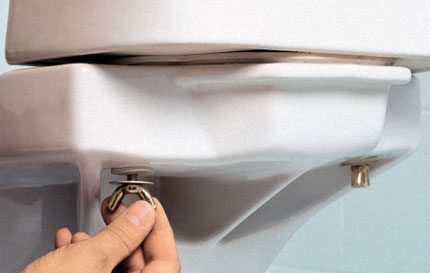
The torque should be calculated correctly. There is no need to tighten the bolt connections when the gasket is already firmly tightened. Especially hauling is not recommended for connections where polypropylene screws are used. And to ensure guaranteed reliability, it is reasonable to replace plastic fastening accessories with metal products.
Testing an installed gasket
The procedure for testing gaskets (checking the reliability of tightness) is an essential part of installation. The test does not require any special locksmith manipulations.
After completing installation work, it is enough to fill the toilet tank two-thirds with water for a short time stopcock. In this condition, the plumbing fixture should be carefully inspected in the area where the sealing rubber is located. The first test is considered passed if no obvious water leaks are detected.
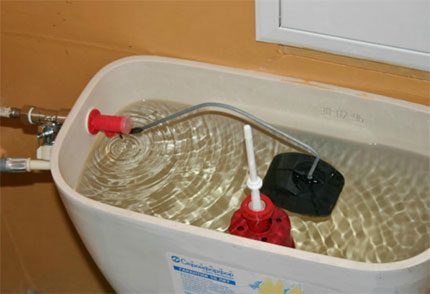
The second test will take some time - at least half an hour. It is necessary to fill the tank to the full level (the boundary level of the drain mechanism) and maintain it (half an hour or an hour) in this state.
Then take a piece of toilet paper and thoroughly wipe the toilet areas adjacent to the installation area of the pad. Similar actions must be performed both on the upper side and from below. Is the paper dry? In this case, you can start the plumbing in operation.
If after the second check the toilet paper becomes wet (even partially), these symptoms indicate poor sealing. You should not rely on "maybe" here. The right decision is to redo the installation of the tank with the correction of the installation of the sealing gasket. In this case, it is desirable to determine the causes of the leak.
It often happens that the water on the floor next to the toilet is not at all the cause of its leakage. it “Sweating” tank. We recommend that you familiarize yourself with the causes of condensation on its surface and with methods for removing unwanted moisture.
The principle of complete tightness
Why is it necessary to achieve complete tightness of the system at the installation of the filling tank to the toilet bowl? The requirements are explained simply. Even a small leak leads to the formation of foci of dampness. And dampness is the optimal environment for the reproduction of the microbial environment.
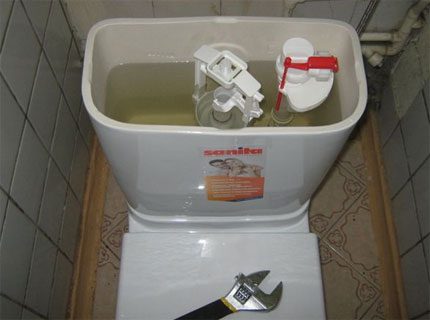
Insignificant (inconspicuous) water leak promotes the formation of water stone. This substance has a negative effect on rubber - it deforms individual sections of the gasket. As a result, the operation of the device turns into emergency leaks. Such accidents can occur at any time, including during the absence of homeowners.
Finally, the presence of a slight leak and an increase in the humidity level inside the toilet room affects the longevity of the surrounding materials. In conditions of dampness, the service life of even the highest quality products is reduced by half.
You will learn how to deal with a leak in the toilet itself from next article, the content of which we recommend to read.
Conclusions and useful video on the topic
There may be several reasons for leaking the tank.The video shows how you can fix a leak by replacing old parts with new ones.
The result of the review: such a seemingly insignificant detail of the bowl-to-tank toilet assembly as the sealing gasket actually turns out to be an important element of installation.
Without the installation of a rubber (silicone) sealing part, the operation of the toilet bowl is impossible in principle. Replacing branded gaskets with self-made products also does not solve the problem. True quality homemade depends on the material and diligence of the master.
In general, there is an object for attention on the installation of toilet plumbing.
Want to talk about how to change the gasket with your own hands? Would you like to share the “tricks” of the process, known only to you? Please write comments in the block below, ask questions, leave a photo on the topic of the article.

 Valve for toilet: types of valves and features of their installation
  Corner toilet with a tank: pros and cons, scheme and features of installing a toilet in the corner
  How to install a toilet on a tile with your own hands: step-by-step instruction + installation features
  Do-it-yourself toilet installation: features of mounting toilet bowls of various designs
  Seat toilet seat: types, selection rules and installation features
  Vertical release toilet: device, pros and cons, installation features
  How much does it cost to connect gas to a private house: the price of organizing gas supply
  The best washing machines with dryer: model rating and customer tips
  What is the color temperature of light and the nuances of choosing the temperature of the lamps to suit your needs
  Replacement of a geyser in an apartment: replacement paperwork + basic norms and requirements
It usually takes about 10 minutes to change the gasket between the toilet and the drain tank, and 8 of them - for dismantling and reassembling. I think that there is no need to call the plumbing, the operation is elementary - I unscrewed it, threw it away, wiped it dry, put in a new one (better silicone, they are more practical) and tightened it up so that the drain tank would not crack. Do not overtighten, in any case, caution is needed here! If the gasket is installed correctly, without distortions, then nothing will leak.