Duct mounting distance standards: calculation of the geometric data of the ventilation route
In a residential building, all conditions for normal human life should be supported. This is an undeniable truth, isn't it? To ensure a comfortable stay in any room, lay complex engineering communications.
Do not do without a ventilation system. When creating it, it is necessary to comply with the standards for the distances of fastening ducts, developed and approved by government departments. This requirement is relevant not only for legal entities, but also for private developers.
We will talk about how to properly plan and lay duct routes. Let’s show you how to fix them better. From the article we presented, you will find out at what distance from other communications ventilation ducts can be installed.
The content of the article:
Private house ventilation system
Design and installation of a ventilation system in a single-family residential building is carried out taking into account the performance requirements specified in SNiP 31-02-2001 and SP 55.13330.2016.
Ventilation in a private house can be either natural or mechanical inducing air exchange, with the removal and influx of air masses through the air ducts. The main thing is to keep the air clean.
Waste air masses with an unpleasant odor or containing harmful substances, such as products of fuel combustion, are discharged directly to the outside. That is, they should not in any way enter other rooms.
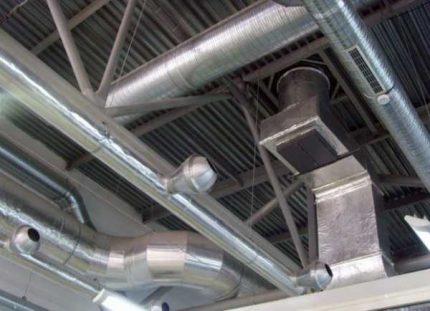
Be sure to ensure the removal and flow of air in the kitchen, bathroom, boiler room. The minimum performance of a ventilation system with full or partial air exchange in a given period of time is regulated.
When organizing a ventilation system that meets the established requirements and is able to provide a comfortable microclimate, it is important to correctly determine the configuration of the air ducts, take care to seal the ventilation openings, the places where pipes pass through walls and ceilings in order to prevent the occurrence of cold bridges and prevent rodents and insects from entering the house.
Duct Installation Rules
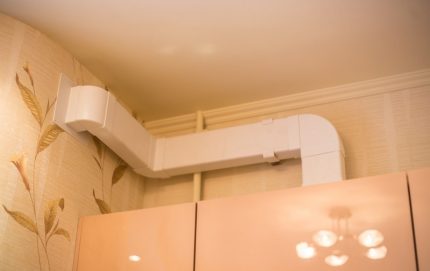
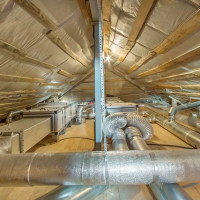
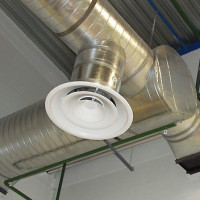
Ducts are metal or plastic pipes that discharge and supply air to rooms. They can have both round and rectangular sections.
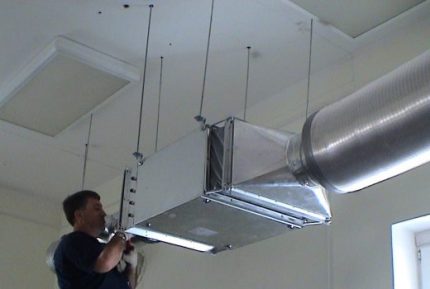
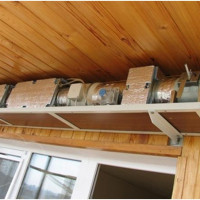
Work on installation of ventilation system include one of the most critical stages - fixing the air ducts to the supporting building structures. Fixing can be carried out using various fasteners - clamps, consoles, profiles, brackets, staples, punched tapes. The choice of mounting type depends on the size of the air channel and the shape of its cross section.
The finished duct system must be reliable and resistant to external and internal loads, as well as maintainable.
It is important that it meets the safety requirements, that the equipment does not pose a threat to humans and does not affect the safety of the house itself, the noise and vibrations created by the air flow do not exceed the maximum permissible level, and the weight of the air ducts is not transmitted to the fans.
Duct Mounting Methods
The air duct can be attached directly to the ceiling, wall, or to supporting elements fixed to them, for example, to a tee or a tee. Such beams are widely used in construction.
The orientation of the duct is predominantly vertical or horizontal, in some cases, if there is a technical need, the ducts are installed at a slight slope.
As the main fasteners are used:
- brackets;
- traverses;
- clamps;
- perforated tape.
For fixing rectangular ducts, L- or Z-shaped brackets and studs are used. The brackets are attached to the body of the duct using self-tapping screws forming holes in the metal.
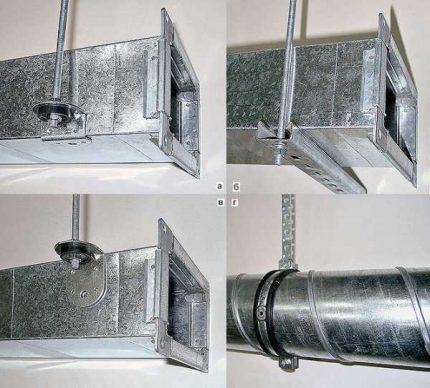
Studs are threaded galvanized rods. To fix the studs on the ceiling, a metal driven anchor with a spacer is used.
Pre-drill a hole and hammer the anchor with a chisel. The process is similar to installing a plastic wall plug in the wall. When the stud is screwed into the anchor, its spacer part opens like a flower petal, forming a structure that holds securely in the ceiling.
Other fasteners can be used instead of anchors, but they will not provide the same reliability. Under heavy load, the connection between the stud and the ceiling will loosen. As a result, the duct may move and deform.
If the duct is massive, it is better to choose a reinforced Z-shaped bracket. Thanks to the additional corner, which will support the air duct, the design will acquire the necessary rigidity and less load will be applied to the stud. To prevent noise from vibrating the duct, the fasteners are supplemented with rubber seals.
If one of the sides of the rectangular duct exceeds 60 cm, not brackets but traverses are used, also complete with studs. The traverse is a horizontal beam, which can both be suspended and rely on a vertical support.
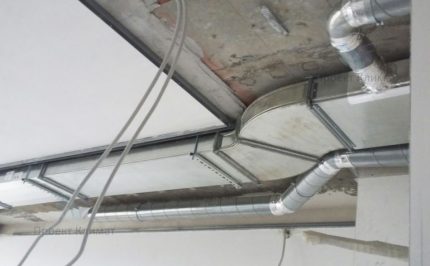
When using a traverse, self-tapping screws are not required and the duct retains its integrity. Placed on a support, it does not move laterally due to the studs that hold it in a stable position. In order for the duct to fit snugly on the traverse, a rubber sealant is installed, which dampens noises and vibrations.
Round ducts are attached to the bearing surface using studs and clamps of the appropriate diameter. In this case, the clamp should tightly enclose the duct.
It can also be worn over thermal insulation. Fasteners are available in a wide range of sizes corresponding to standard duct sizes. Due to the ease of use, installation time is saved.
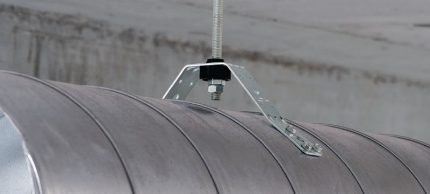
It is not necessary to mount the duct directly to the ceiling. You can do differently. If there is a metal beam (tee, I-beam, corner) in the area along which the ventilation duct passes, a clamp is put on it and a hairpin is fixed to the clamp.
In private homes, round ducts of small diameter are often used. If the diameter does not exceed 20 cm, punch tape can be used as fasteners. The manufacturing material for it is galvanized steel, which meets the requirements prescribed in GOST 14918-80. The thickness of the tape varies from 0.5 mm to 1.0 mm. There are mounting holes for fixing the ducts using self-tapping screws.
A loop is formed from the tape and put on like a pipe clamp. Another way - in the place of joining the pipes to fix the punched tape for the mounting bolt. It can also be used with clamps.
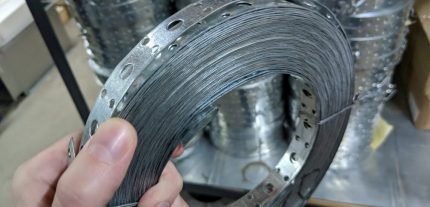
The advantages of this method: a punched tape is cheaper than hardware, it is easier to install with it. But there are significant disadvantages. Since the punched tape is not able to provide the necessary rigidity, vibrations and lateral movements are amplified.
There are difficulties when aligning the punched tape in height, because of which the duct starts to make noise during operation, the risk of depressurization of the main increases.
Distance between fixtures
SP 60.13330 and SP 73.13330.2012 indicate how to calculate the fastening of square and round ducts. It also takes into account the recommendations of equipment manufacturers, as prescribed in the instructions. To get the correct result, you need to know the length of the ducts and the permissible distance between the mounts.
Mounts for horizontal non-insulated metal waferless ducts are installed at a distance of not more than 4 meters from each other. This requirement applies equally to supports, suspensions, clamps.
The rule applies to rectangular and round ducts, in which the diameter or the largest side does not exceed 40 cm. For ducts with a rectangular section or a diameter of more than 40 cm, the distance between the fasteners is reduced to 3 meters.
Horizontal non-insulated metal ducts on a flange connection with a diameter or larger side up to 2 meters are mounted with a step of no more than 6 meters between fasteners. Mounting to flanges is not permitted. The maximum distance between the fasteners of vertical metal ducts is 4.5 meters.
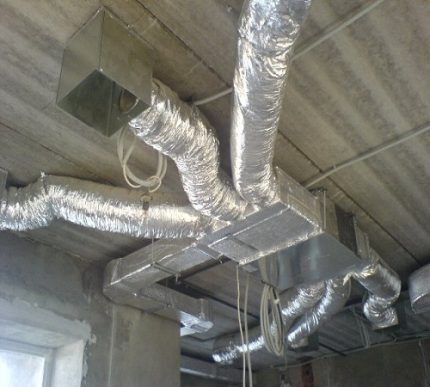
To connect the main sections of the ducts as shaped elements can be used flexible ductsmade from polymer film. In some cases, they serve as the main elements for building a ventilation duct.
For their fastening flexible polymer ducts, rings of steel wire are used. The diameter of the wire should be within 3-4 mm, and the diameter of the ring itself is 10 percent larger than the diameter of the duct. The step between the rings is no more than 2 meters.
With this type of installation, a support cable is pulled along the duct, to which the rings are attached. The cable itself is attached to building structures in increments of 20 to 30 meters. The flexible duct must be tightened so that sags do not form between the rings, which reduce the pressure in the system.
Distance to other structures
The standards determine not only the distance between the fasteners, but also the distance from the air ducts to the surrounding building structures. Round ducts are placed at a distance of at least 10 cm from the ceiling, and at least 5 cm from the ceiling.
At least 25 cm should be the distance between the round duct and the elements of the water and gas supply systems. Air ducts relative to each other are also located at a distance of 25 cm.
The distance between rectangular ducts and building structures depends on the width of the duct.
In the list below, the first value is the duct width, the second is the distance to the ceiling:
- up to 40 cm - from 10 cm;
- 40-80 cm - from 20 cm;
- 80-150 cm - from 40 cm.
Regardless of the shape of the cross-section, air ducts should be located at a distance of not less than 30 cm from electrical wires.
The joints of the ducts to each other should be located at a distance of at least 1 meter from the passage through the wall or ceiling.
The fastening is carried out in such a way that the axis of the duct of the duct is parallel to the plane of the wall or ceiling. In order to drain the condensate, the duct can be positioned at a slope of 0.015 in the direction of the condensate collector.
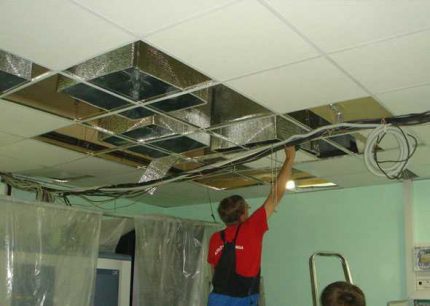
Fasteners perform an important function - keeping the ducts in the design position. In many respects, the life of the ventilation system depends on them. Therefore, they must have high mechanical strength to provide the necessary rigidity.
Made of galvanized or stainless steel, they are not subject to corrosion, resistant to aggressive environments, temperature extremes and allow you to quickly install the ventilation system without drilling and welding.
How many fasteners are required
The type of fasteners and their number are determined at the design stage, taking into account the weight, size, location different types of ducts, manufacturing materials, type of ventilation system, etc. If you plan to deal with these issues yourself, you have to perform calculations and use the reference data.
Mounting rates are calculated based on the surface area of the ducts. Before proceeding with the calculation of surface area, it is necessary to determine the length of the duct. It is measured between two points at which the axial lines of the highways intersect.
If the duct has a circular cross section, its diameter is multiplied by the previously obtained length. The surface area of a rectangular duct is the product of its height of width and length.
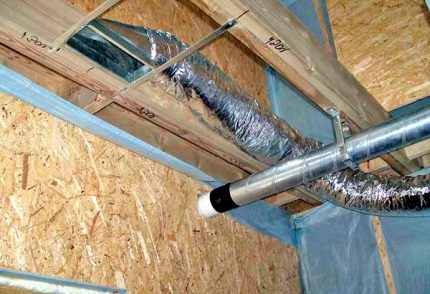
Further, you can use reference data, for example, normative indicators of material consumption (NPRM, collection 20) approved by the Ministry of Construction of the Russian Federation. Not today this document has the status of non-functioning, but the data indicated in it for the most part remain relevant and are used by builders.
The consumption of fixtures in the directory is indicated in kg per 100 square meters. m. surface area. For example, for Class H round seam ducts made of sheet steel with a thickness of 0.5 mm and having a diameter of up to 20 cm, 60.6 kg of fasteners per 100 square meters will be required. m

At duct installation direct links of ducts together with bends, tees and other shaped elements are assembled in blocks up to 30 meters long. Further, in accordance with the regulations, fixtures are installed. Prepared duct blocks are installed in their intended places.
Introduces the regulatory requirements for the organization of ventilation in a private house next article, which is worth reading to all owners of suburban property.
Conclusions and useful video on the topic
Fixing ducts to ceiling tiles:
Making clamps for round ducts with your own hands:
What does the ventilation duct assembly look like:
Installation of a ventilation system in a private house does not require the use of cranes and other special equipment, but already during the development of the project it is necessary to take into account the particular layout of the house, the location of building structures on the way of the ventilation main.
Approximately, "by eye" it is impossible to determine the length of the duct links and the distance between the mounts. To do this, you need to know the standards and based on them perform calculations based on specific conditions. As a result of correctly performed work, your home will be equipped with an effective and durable ventilation system for a comfortable life.
Want to talk about how the ventilation system was assembled in your house / apartment / office? Do you have useful information on the topic of the article, which should be reported to site visitors? Write comments, please, in the form below the block, post a photo and ask questions.

 Calculation of air ducts for speed and flow rate + methods for measuring air flow in rooms
  Calculation of the area of ducts and fittings: rules for performing calculations + examples of calculations by formulas
  Requirements for the ventilation of a gas boiler: standards and features of the system assembly
  Private house ventilation standards: device requirements and calculation examples
  How to make a ventilation calculation: formulas and an example of calculating a supply and exhaust system
  Ducts for ventilation: classification, features + installation tips
  How much does it cost to connect gas to a private house: the price of organizing gas supply
  The best washing machines with dryer: model rating and customer tips
  What is the color temperature of light and the nuances of choosing the temperature of the lamps to suit your needs
  Replacement of a geyser in an apartment: replacement paperwork + basic norms and requirements