Do-it-yourself well repair: routine and emergency repairs
The well is an ancient hydraulic engineering structure that has not lost its relevance to this day. Owners of country houses and cottages will agree with the need for such a design on the site. It can be a traditional source of water or it will serve as the basis for arranging an autonomous water supply.
In any case, from time to time it is necessary to carry out cleaning and repair of the well: doing it yourself is quite simple. Next, we will tell you when repair is needed and how to carry it out without the help of specialists.
The content of the article:
When do you need to repair?
The first "bell", indicating that something is wrong with the well, is a deterioration in water quality. It acquires an unpleasant aftertaste, smell, becomes cloudy. Drinking such water is not recommended. And it is also unsuitable for household appliances and sanitary equipment: filter cartridges “fly” quickly, appliances deteriorate.
The causes of contamination in the well can be very different:
- A large number of silty natural deposits on the walls and bottom of the mine, which are a mixture of microparticles of organics, bacteria and unicellular algae. The organic mixture decomposes, which gives the water an unpleasant aftertaste and smell.
- Large contamination accidentally caught in the mine. This may be an animal that has fallen into a well, or leaves that have fallen into the water, garbage, and the like.
- Organics and soil particles entering the mine through a cladding that has lost its tightness.
To prevent turbidity of water and other troubles, the owner of the well needs to carry out all repair work in a timely and competent manner.
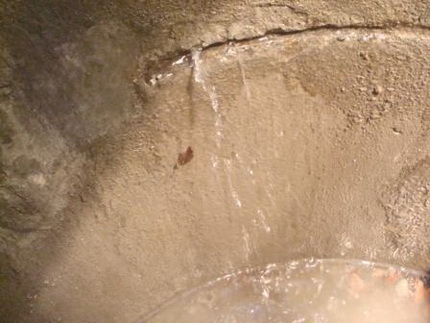
Well shaft repair activities are of two types:
- scheduled maintenance;
- unscheduled repair work.
The first are carried out regularly, after a certain period of time. Their goal is to maintain proper cleanliness in the well shaft and timely detection of minor damage that needs to be repaired immediately.
It must be understood that any major breakdown or accident is always preceded by many minor malfunctions. If you do not fight them, serious problems will mature.
During scheduled repair work, the filter is usually replaced or completely cleaned, deposits and growths are removed from the walls of the mine, disinfection, the elimination of minor defects and damage, as well as water pumping, which is necessary after repair or a long downtime.
Unscheduled repairs are carried out to eliminate major defects that have arisen due to extraneous mechanical stress, improper operation, etc.
Well Safety
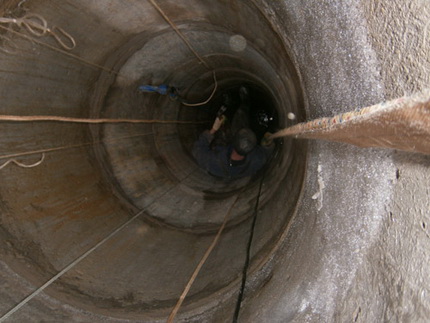
Working at depth is very dangerous, so neglecting personal safety rules is unacceptable. Experts recommend for the period of repair work to enclose the mine with boards placed on the edge.
In addition, the area around the well mouth should be freed from foreign objects so that nothing could accidentally fall into the trunk. Especially if there is a working person.
All tools and equipment must be intact and safe. Be sure to check the tensile strength of the rope that will be used to lift the tank with sludge or soil.
If work is required at a depth of more than 6 meters, another safety rope must be tied to the bucket. Lifting mechanisms, if used, should work flawlessly.
Before the first descent into the trunk, as well as after breaks and every morning, it is necessary to check the air quality in the well. This can be done by lowering the burning candle, if it goes out, it is necessary to carry out measures for the ventilation of the barrel.
Then check the air quality again. If the influx of harmful gases in the well is strong and constant, continuous ventilation is necessary.
For these purposes, a fan or a burning stove mounted on the surface is used, the blower of which is connected to the bottom of the shaft through a pipe. When lowering or raising any objects, you should always notify those who work below. During the dive, the depth of the unprotected mount of the barrel wall should not exceed one meter.
Scheduled repairs
For the normal functioning of the well, it is necessary to regularly carry out scheduled work on its cleaning and inspection. During their conduct, small damage is often detected, which is immediately eliminated.
Well cleaning is carried out in stages:
- We dismantle the well above the house or the cover of the structure to ensure free access to the mine.
- We pump out all the water from the well. You will have to do this several times. The first - before the diagnosis of the mine, the following - during the work, and the last time after the cleaning.
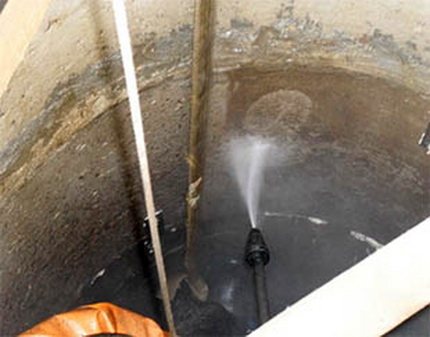
- We clean and wash the walls of the mine. To remove plaque we use a stiff brush and a scraper. To speed up the process, you can use the apparatus for high pressure car washes.
- We conduct a thorough inspection of the walls and bottom of the structure.
- Eliminate the detected defects.
- We clean the bottom from blockages of soil and suspended sediment. If necessary, replace the bottom filter.Alternatively, it can be raised to the surface, washed and laid again.
As seen, well cleaning - An indispensable component of carrying out unscheduled repairs, since it is simply impossible to detect problems in a contaminated well.
What kind of work you need to carry out depends on the type of structure. Consider the most common problems and how to solve them.
Wooden wells and their repair
Wooden is a well whose shaft is a blockhouse. The problem for such a construction most often becomes premature damage to individual crowns, which must be replaced.
Sometimes, during a routine inspection, it turns out that almost all the crowns are affected by rot. In this case, no cleaning of the logs with their subsequent processing will help, you will have to re-shift.
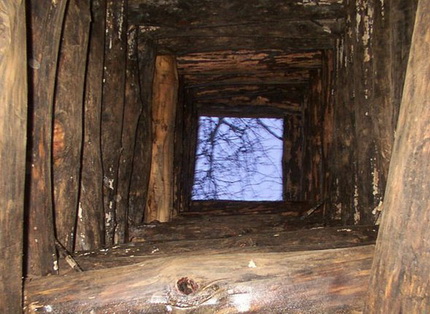
How to replace a log house of a wooden well?
If a decision is made to completely replace the log house of a wooden structure, we perform the work in this order.
Stage number 1 - pumping water from the mine
First you need to completely pump out water from the well, using any suitable pump. It should be noted that pumping will have to be carried out constantly, because water will arrive continuously. After draining the structure, you can proceed with further work.
Stage No. 2 - we repair the damaged crowns
The lower crowns of the structure, which was assembled according to all the rules, should be on special strong supports. They need to be carefully removed, which is usually not difficult. They are most often badly damaged and you can get them one at a time, carefully helping yourself with a crowbar.
As practice shows, a well log house does not "react" to this operation, since the years of operation have made it almost monolithic.
After that, we begin to carefully disassemble the log house from below. We lift the logs up. If it suddenly seems that some elements are well preserved and can still serve, still dismantle and raise them to the surface. Subsequently, we use them when installing a new log house.
After all the parts have been raised to the surface, we clear the shaft of crumbled soil and remove our old bottom filter. Then we seal its walls with a wide board to prevent shedding.
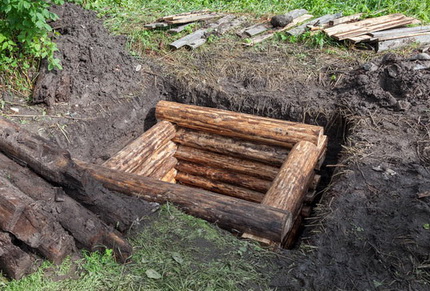
Stage number 3 - collect a new blockhouse
The material from which it will be collected should be taken care of in advance. For a log house, do not take conifers that give bitterness to tar in water.It is optimum to choose moisture resistant ash or oak. The latter must necessarily be stained, that is, past special treatment. It consists in placing logs in running water for at least a year.
During this time, all tannins and other undesirable substances will be washed out of the wood, and the material will be best prepared for long-term contact with water. Treated in this way and dried oak logs are ideal for lining the well.
Work with a log house is similar to the construction of a log house. All structural elements are folded as needed, numbered and disassembled for subsequent installation.
The quality of the work performed is very important. Untidy gaps are simply unacceptable. The soil from the mine walls will certainly fall into them, because it is impossible to caulk the log house.
A feature of a well log house is that the lower part is chopped without residue. If you make the upper part of the structure with it, you get the traditional Russian version of the arrangement of wells.
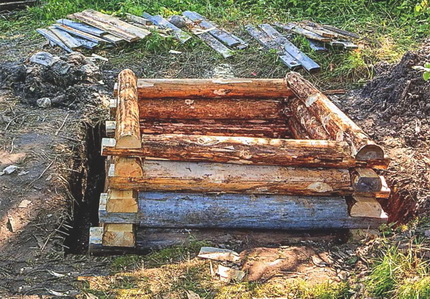
Stage number 4 - we put the crowns in the well
At least two people are required to work. One will be at the bottom, the second at the top - for safety. A new one is falling asleep at the bottom of the well. bottom filter. Then we put on it new props, bars, on which we will lay the log house.
The first crown is assembled at the top and, fastened with temporary boards, carefully upset in the shaft. Lower it to the props. We collect and lower the next crown in the same way.
But it will already be deposited on the walls. We gently tap it so that the earth does not crumble from the walls. Thus we raise the log house to the surface of the earth.
All the dirt that has fallen to the bottom of the well: clay, construction waste, and soil are immediately removed. Otherwise, even before the start of our work, our bottom filter will become clogged with a cork resulting from mud trampled underfoot. After the mine comes to the surface, its dimensions change.
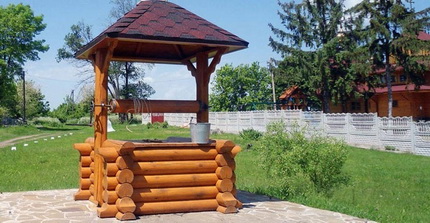
It should become wider. To do this is quite simple: all the elements are extended onto the tree trunk, and the structure is chopped into a bowl. Thus, we bring the mine to a height of about 1.5 m, and more if there are kids in the house.
The aboveground part can be fastened with metal pins or brackets. For the underground, this is unacceptable. Our well is almost ready, it remains to equip its aerial part to your liking.
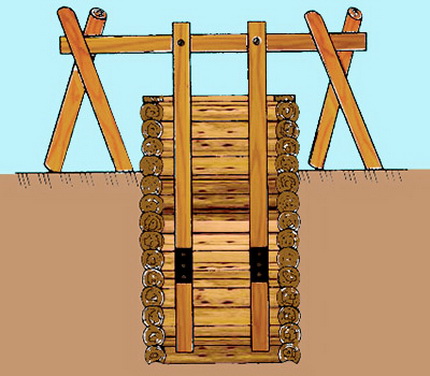
Replacing logs in a log house of a wooden structure
If the damage is not so global, repairing your wooden well will be easier. You can do without replacing several parts inside the log house. We carry out the work as follows.
If the damaged elements are below the water level, install the pump and pump out the water. Then we proceed to strengthen that part of the log house, which is located directly above the destroyed logs.
For this, we mount a special device. We install goats on both sides of the well head. We lay four short logs on them. We fix two strong long boards on them, which we lower into the blockhouse.
We beat the long crowns to them with crowns located above the damaged elements. Thus, we, as it were, “suspend” the remaining part of the log house.
As an option, instead of long boards, you can take strong ropes with hooks and fix the logs with their help. After the reinforcement has been carried out, carefully remove the damaged logs and raise them to the surface.
Guided by their size and shape, we are preparing a new part to be inserted into the log house.I must admit that this is quite difficult to do, since the new log should be covered with the groove of the old upper part.
First, gently cut down the lower part of the lower located old log, so that it is with the groove on the same level. Then we take the prepared log, put it in place and carefully drive in with a wooden hammer.
Then securely jam. Instead of logs, concrete elements cast in size of the old part can be used. This greatly improves the efficiency of the repair.
Damaged elements of the surface part of the log house can be repaired by concreting using sliding formwork. Before starting repairs, we prepare the site on which the worker will be placed. The easiest way to knock her out of strong boards.
The dimensions of the structure must be such that it freely fits inside the mine. We hang the platform on cables to a beam lying on the top of the well, and lower it into the trunk.
We fasten the reinforcing mesh to the wall above the damaged area and mount the sliding formwork. We prepare a cement mortar with a fine filler and pour the mixture into the resulting gap.
After the composition has hardened, we will get reinforced cement, which is practically inferior in strength to concrete. Upon completion of the repair work, the well is required disinfected.
Repair work in a concrete well
Concrete mines, despite their strength, also require repairs. The most common causes of it are shear or fracture of the rings making up the column.
Damage to joints and cracks
The cause of the problem may be a shift of the rings or their destruction. If only the outer layer is damaged, repairs are carried out from inside the well. First, carefully clean the wall of the shaft.
Then we determine the degree of destruction, for this we tap the seam or crack. We remove all chipping elements, after which we carefully repair the damage.
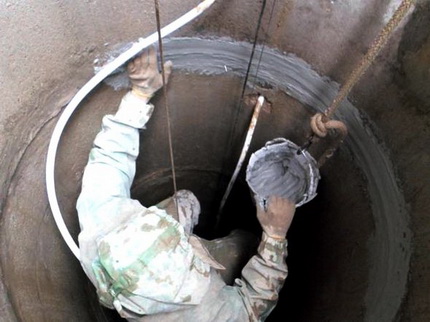
If it turns out that the crack is through, work will have to be carried out from the outside of the well. To do this, we dig a concrete column around the perimeter so that a repair trench is formed in which you can work relatively freely.
After the damage has been completely dug up, we clean the wall of dirt. The defect is sealed with cement or mastic and covered with a layer of waterproofing.
Concrete Ring Shift
To prevent this problem from occurring during the installation of concrete rings, it is recommended that they be braced, that is, fastened together with metal plates measuring 0.4x4x430 cm.
At least 4 such brackets are installed on each joint. Holes are drilled under the rings in the body of the rings. The plates are fixed with 12 mm anchor bolts. This procedure prevents the component rings from moving relative to each other.
If the scaling has not been completed, and the shift has occurred, we proceed to the repair work. We dig a repair trench around the column. We descend to the shifted ring.
We return it to its place, after which we close the seams on both sides and close them with sealant. Then we put fastening brackets on each seam throughout the column so that it would not be necessary to correct the ring shift again.
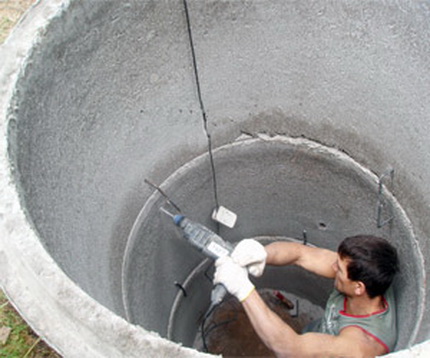
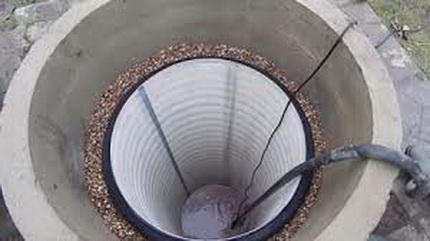
If the first method is not suitable for any reason, we use a repair column made of plastic pipes whose diameter will be less than that of concrete rings.
Plastic elements are lowered into the shaft and connected by twisting along the thread, which must be pre-treated with sealant. We lift the repair column to the full height of the concrete shaft. We fill the free space between the ring and the pipe with sand or a sand-cement mixture.
Pneumatic repair method
This is a new method that professionals often use. It consists in eliminating surface defects made of concrete through the use of special restorative and protective agents.
These compounds significantly increase the resistance of concrete to mechanical stress, increase resistance to temperature fluctuations. In addition, they provide anti-corrosion protection of valves and reliable waterproofing.
The composition for the work is prepared in strict accordance with the manufacturer's instructions. Before applying the mortar, the concrete base must be prepared: remove dirt, clean up crumbling areas and moisten them with water.
For better adhesion of the material, it is desirable that the base is slightly rough. The application of the composition and its subsequent drying is carried out according to the manufacturer's instructions.
Drying well deepening
Increasing the depth of the well is used when reducing the amount of water or in the event of a complete cessation of its flow. It should be noted that this is a very time-consuming and expensive procedure that does not guarantee a positive result. There are many ways to deepen.
Deepening through the use of a repair column
To implement this option, repair rings of a smaller diameter than the main column are used. They alternately fall down, undermine and settle. In this way, the repair column is assembled.
After water appears in the mine, work is stopped, the joints of the rings are sealed and braced. The main and repair columns are fastened with brackets or corners, the space between them is filled with gravel.
Column extension on top
This method can only be used for relatively new wells that are no more than 6-12 months old. After this period, the earth around the structure is too compacted, and it will be impossible to besiege the column.
The lower ring is dug up from below to a shallow depth, after which the structure is upset and the actions are repeated. The main disadvantage of this method is the risk of stuck columns.
Bottom extension
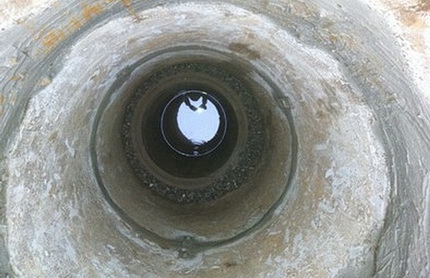
This method can be used for wells that have served for several years. It consists in digging the ring 25-30 cm, after which the wall is expanded with brickwork or concrete structure, which is poured into the installed formwork.
The main disadvantage is the high complexity and low speed of the process, since before the next digging up by 25-30 cm, you need to wait until the solution reaches its full strength.
On our site there is material in which methods are described in more detail well recessesWe recommend that you familiarize yourself.
Brick repair work
Bricked wells are the easiest to repair. The elements of their cladding are small and easy to replace. First of all, the walls need to be thoroughly cleaned of dirt, otherwise it is easy not to notice the damage.
If there are through cracks between the bricks, they should be qualitatively repaired from the outside of the structure. We are preparing a repair trench. Having reached the defect, we clear it up to 10 cm in depth.
After that, we carefully lubricate the gap with clay, deepening at least 5 cm.Inside the well, work comes down to replacing damaged bricks and restoring crumbling plaster. Defective brick or its remains are carefully hollowed out of the wall. We take a new part and insert it into the place of the old one, laying on a cement mortar.
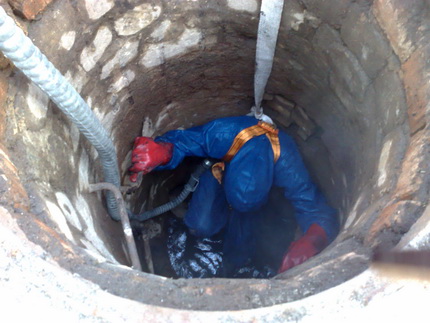
Before plastering, carefully prepare the base. With a steel brush, we clean it from dirt and mucus, otherwise a sinus will form under the solution, in which water can accumulate. And this will lead to the rapid destruction of the new plaster.
We carefully tap the old coating and remove all unreliable sections and crumbled fragments. After that, once again we clean the base and proceed to plastering.
Conclusions and useful video on the topic
Wooden well maintenance work:
Repair of a concrete well with insulation of joints:
Repair of a well using a plastic pipe:
Repairing a damaged well is quite simple. It is necessary to accurately determine the cause of the problem and choose the best way to solve it. It is important to understand that work will have to be carried out at depth, which is risky enough.
Therefore, do not neglect safety regulations. Properly completed repairs guarantee further trouble-free service of the water source.
If you have already encountered well repair and you have successfully completed this task, please share valuable experience with our readers. Tell us what problem you had and how you managed to deal with it.

 Do-it-yourself water-boring for water wells: a review of technology
  Do-it-yourself well arrangement at the cottage: step-by-step instruction + advice from experienced craftsmen
  DIY winter well insulation
 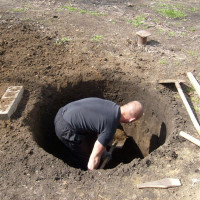 Digging a well with your own hands: types of well structures + an overview of the best digging technologies
 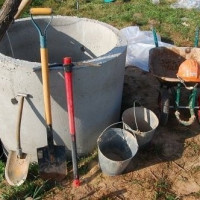 Do-it-yourself deepening of the well: a review of the best methods to get to the aquifer
 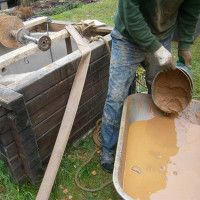 Do-it-yourself well cleaning: a review of the best preventative and capital methods
  How much does it cost to connect gas to a private house: the price of organizing gas supply
  The best washing machines with dryer: model rating and customer tips
  What is the color temperature of light and the nuances of choosing the temperature of the lamps to suit your needs
  Replacement of a geyser in an apartment: replacement paperwork + basic norms and requirements
Only a week ago I finished work in my concrete well in the country. I realized that you can’t postpone when crumbs appeared in buckets of water - concrete began to sprinkle. He invited a neighbor to help. He constantly controlled the ropes on which I went down, supplied cement mortar. He cleaned and re-plastered all the seams. I think 2-3 years will be without repair.
Recently I was doing a major overhaul of my parents’s well in the country, because the water has become completely useless. I'll tell you honestly, 0 doing it yourself is pretty hard. The first thing I did was pump water. Since the mine shaft is concrete, I used cement to seal defects. Then he plastered all the cracks and weaknesses, removed the old bottom filter and put in a new one. Now the well is as good as new. Everyone is happy, most importantly, the water is normal.