Installation of the pump in the well: how to properly install the pumping equipment
Comfortable living in a private house depends on many factors, and not the least role is played by its water supply. If the site already has a well, then the issue is half solved. But to ensure proper water supply, it will be necessary to choose a suitable pump, otherwise it will be difficult to get water from a deep and narrow hole, to put it mildly, agree?
At first glance, installing a pump in a well seems to be quite a challenge. Here, as in any business, there are a number of important nuances. Therefore, before proceeding with its solution, it is worthwhile to thoroughly approach the study of this issue. We will help you understand the intricacies of installing pumping equipment.
Useful tips for installing surface and submersible pumps are provided in this material. Also here are photos and videos with expert advice that will help to better understand the intricacies of installation.
The content of the article:
What should be a good pump?
First you need to select and purchase a suitable pump, as well as a number of materials necessary for its successful installation. The pump is usually taken submersible, while it is highly desirable that it be centrifugal.
Unlike centrifugal models, vibrating pumps cause dangerous vibrations in the well, which can lead to the destruction of soil and casing. Especially dangerous are such models for sand wells that are less stable than artesian counterparts.
The power of the pump should match the productivity of the well. In addition, the immersion depth for which the particular pump is designed should be taken into account. A model designed to operate at a depth of 50 m can supply water from a 60-meter depth, but the pump will soon break down.
Another risk factor is the level of quality of drilling operations. If an experienced crew drilled, the well would be better able to withstand the damaging effects. And for wells created with your own hands or the efforts of “co-workers”, it is recommended to use not just a centrifugal pump, but special models for wells.
Such devices better tolerate the loads associated with pumping water heavily contaminated with sand, silt, clay particles, etc. Another important point is the diameter of the pump. It must match the size of the casing. It is important to consider the features of the power supply of the pump. For wells, both single-phase and three-phase devices are used.
For four-inch pipes, finding equipment is easier than for three-inch pipes. Well, if this moment is taken into account at the stage of well planning. The greater the distance from the pipe walls to the pump casing, the better. If the pump passes into the pipe with difficulty, and not freely, you need to look for a model of a smaller diameter.
Read more about choosing a pump in the article How to choose a pump for a well: recommendations for choosing pumping equipment.
Preparation of installation related materials
A pump stuck in the casing can be a hefty headache. And to pull out (as well as lower) it is necessary with the help of a special cable. If the pump is already equipped with a polymer cord, you must ensure its high quality and sufficient length. Sometimes it’s wiser to purchase this item separately.
It is believed that a reliable cable or cord should be designed for a load that is at least five times the weight of the equipment attached to it. Of course, it should well tolerate the effects of moisture, since part of it will be constantly in the water.
If the device is suspended relatively shallow, less than ten meters from the surface, you need to take care of additional depreciation of the equipment during its operation. To do this, use a piece of flexible rubber or a medical tourniquet. A metal cable or wire for suspension is not suitable, as they do not dampen vibration, but can destroy the mount.
A special power cable is designed to power the pump. Its length must be sufficient so that the cable lies freely and is not taut.
To supply water from the pump to the domestic water supply, special plastic pipes are used. Structures with a diameter of 32 mm or more are recommended. Otherwise, the water pressure in the system will be insufficient.
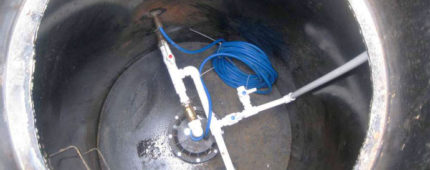
Pipes can be used both metal and plastic. There are disagreements about joining metal pipes. Some experts object to a threaded connection, as less reliable. It is recommended to use flanges, and the bolt should be on top, this will prevent it from accidentally falling into the well.
But the threaded connection in the wells is used quite successfully. During installation, winding is mandatory. Some experts recommend taking linen cloth or Tangit sealing tape instead of the usual FUM tape or tow. Flax winding is further strengthened with silicone sealant or similar material.
The characteristics of the water supply pipe should be selected in accordance with the conditions of its operation. For depths up to 50 meters, HDPE pipes are used, designed for a pressure of 10 atm. For a depth of 50-80 m, pipes capable of working under a pressure of 12.5 atm are needed, and pipes for 16 atm are used for deeper wells.
In addition to the pump, pipes and cord or cable, before installing well submersible pumpIt is recommended to stock up on the following materials:
- clamps for fixing the electric cable to the pipe;
- check valve;
- manometer;
- stopcock for a water pipe;
- steel mount;
- power cable, etc.
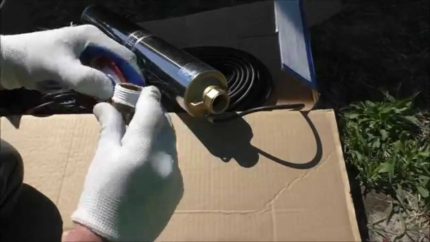
Before connecting the pipe to the pump, a nipple adapter should be attached to its outlet pipe. Usually modern submersible pumps are equipped with such a device, but if it is not, this unit must be purchased separately.
It should be remembered that for pumping the well immediately after drilling, i.e. to remove a large amount of very dirty water from a well, such a pump cannot be used. He will quickly fail. Typically, the well is pumped by a separate pump, which is cheaper, and works better with dirty water.
Surface Mount Installation Rules
Surface pumps are not often used for water supply of this type, since they are suitable only for shallow hydraulic structures with a depth of up to eight meters.
Nevertheless, this option has a right to exist, and its installation is no more complicated than the installation of submersible equipment.
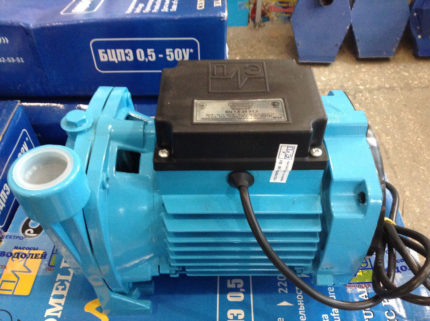
Mount the device as follows:
- The surface pump is installed in a special caisson or in a separate room.
- A hose of suitable length is connected to the suction pipe of the pump.
- A non-return valve is attached to the other end of the hose (a protective measure to prevent water from draining when the pump is finished).
- A protective strainer is installed on the valve to prevent various contaminants from entering the pump housing.
- The hose is lowered into the well.
On this installation can be considered complete and make a test run of the pump. To install such a pump into a well, a special adapter is often used. In this case, the hose is connected to the adapter, and the adapter is connected to the pump. Otherwise, the installation order is exactly the same.
It’s a little more difficult to install a surface pump in the well equipped with a remote ejector. In this case, two hoses must be lowered into the well. In addition to the suction, a pressure hose is also mounted. It is connected to the side fitting of the ejector using a special outlet.
Besides check valve and a filter, an ejector must also be installed on the end of the suction hose. It should be remembered that surface pumps are very sensitive to contamination in the water supplied from the well.
Installation of a submersible pump
Submersible pumps are installed directly in the well. For them, unlike surface models, there is no need to equip a caisson or a separate room.
First, the pump is assembled and run, i.e. attach to it a water supply pipe, electrical cable, cord or cable, etc. After that, the pump is lowered into the well.
Step 1. Preparation for installation of equipment
A non-return valve is fixed on the pump nozzle so that when it is turned off, water remains in the device. Then install a special bowl-shaped filter designed to filter small particles of sludge. A pipe or discharge hose is installed behind the check valve.
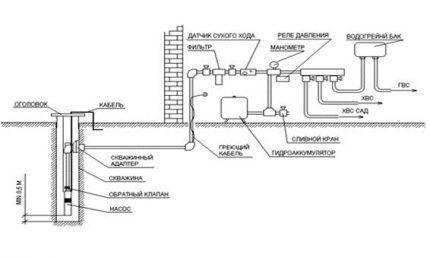
The non-return valve is necessary so that water remains in the water supply system even after the pump is turned off. This situation can lead to a complete breakdown of the equipment. A bowl filter protects the pump chamber from siltation.
Sometimes a check valve is already provided by the manufacturer and is part of the design. In this case, an additional valve is not needed.
In some models, it is recommended that you do not use plastic pipes to supply water, but a special rubber hose. In any case, before starting work, you should carefully study the technical data sheet of the product, as well as the installation instructions attached by the manufacturer.
When installing a water supply pipe, it is important to ensure that it is as smooth as possible. The fewer obstacles to submerging the structure into a narrow casing, the better. Then the pipe is attached to the corresponding pump nozzle.
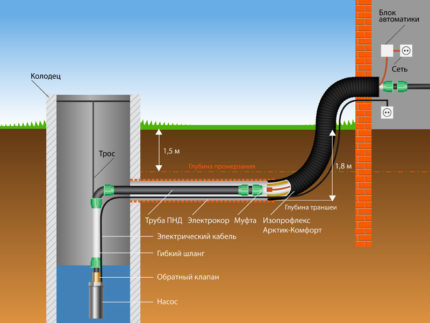
Another important point is the waterproofing of all compounds. In addition to shrink tubes, special couplings are additionally used at the junction points of the electric cable. The power cable also needs to be carefully straightened, aligned and laid along the water pipe.
After the water supply pipe and cable are connected, proceed with the installation of the cable (cord, rope), which will hold the device to the desired depth. The stainless steel cable is threaded into the eyelets intended for this and secured using a special device. Then the cable is also laid out exactly next to the cable and pipe.
Now you should take the fixing clamps or special clips, and carefully connect the cable, electric cable and pipe with them. The connection should be tight enough, but not overly rigid. If the clamp pinches these structures too much, it can damage them.
Step # 2. Submersible pump
When all structures are connected, preparation can be considered complete. You can begin installing the pump in the well.
First, a special rubber gasket is put on the casing and a head is installed. Then the pump is carefully passed into the hole of the head and begin to gradually lower down.
Before lowering submersible pump into the well, a special protective ring can be put on its body so as not to damage the walls of the casing. You can do without this measure, but you will have to act extremely carefully and accurately. The movement of the structure should be very smooth, although its weight is not so small.
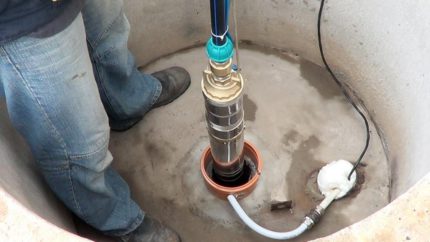
Usually at least three people do this. Two keep the pump on weight, and the third gradually releases the cable.
The pump is lowered very slowly. In no case should you pull the device by the pipe or power cable. If the construction encounters obstacles during lowering, it is necessary to act very carefully.
It is necessary to stop the immersion of the pump and make a few neat rotations in both directions. This usually helps to bypass a difficult area. In extreme cases, if this does not help, you will have to remove the pump and check the condition of the casing.
This test is best done before the pump is installed.And in the process of work, you need to carefully monitor so that foreign objects do not accidentally fall into the well that could interfere with the free movement of the unit. The clearance between the pipe walls and the pump is so small that even a regular nut can create a ton of problems.
The pump must be fixed at the correct height, below the dynamic level, so that the device is always completely in the water. But the pump should not be too close to the bottom water well. This may result in the pump being sucked into the sludge or sand when silting or sanding the well.
It is necessary to take into account the depth for which the operation of a particular pump model is designed. Conventional pumps, as a rule, are lowered to a depth of -10 meters, ejector pumps - at 15-20 meters, special equipment is designed for 25-40 meters.
Typically, the correct immersion depth of the pump is approximately one to two meters from the bottom of the well, depending on its characteristics. Then the cable is fixed on the bracket intended for this. It is usually located on the outside of the wellhead.
The water supply pipe is connected to home water system, for example, to a storage tank or to a special adapter. Perform a power connection and check the operation of the system. During installation of the protective device, the current value must be correctly selected.
If this moment is missed, the device may overheat. As a result, the stator winding often closes. Sometimes there are surges in the voltage supplied to the engine, or it constantly remains too low. All these situations are fraught with rapid breakdown of the device, in some cases the pump will just have to be completely replaced.
Step # 3. Determination of the pump operation point
During the installation of the pump, it is necessary to perform another important step - to determine the characteristics of the pump at actual load. The information specified in the passport of the device, in fact, can be very far from expected. It is necessary to measure the filling rate of a specific volume, i.e. calculate water flow per unit of time.
In addition, you should use a manometer to determine the pressure that is created in the water supply during pump operation. It will also be necessary to measure the current consumption during operation of the device. For this, special conductive tongs are attached to it.
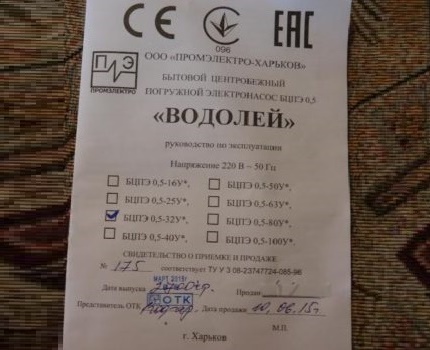
After the necessary measurements are made, they should be compared with the manufacturer's data specified in the technical documentation of the product. If it turns out that the actual figures exceed those recommended by the manufacturer, you should slightly cover the pump valve.
As a result, additional resistance will be created, which will bring the device parameters back to normal. Thus, the point of operation of the device is verified and set at different modes of its operation.
Some important recommendations
A special brass fitting is used to connect the check valve to the water supply pipe.The connection must also have a special driving sleeve. This measure will prevent compression of the pipe in diameter and compensate for the excess stress created by the compression fitting.
The fitting, like all connecting elements, must be of high quality, designed for increased tensile loads. Otherwise, the pipe may simply pop out of the fitting. To connect the opposite end of the PND pipe with the outlet on the head, the same compression drive fitting made of brass is used.
A special electrical cable for submersible pumps is on sale. It must be used to connect to the pump. Substitutions with less quality material are not allowed. The power cable is connected to the pump cable by soldering, twisting in such an important place is better not to use. The junction is closed with a heat shrink sleeve.
To fix the cable and cable to the water supply pipe, plastic clamps are needed. They are installed every 2-3 meters. This measure helps to prevent accidental cable tangling while lowering the structure down. Instead of clamps, you can use electrical tape.
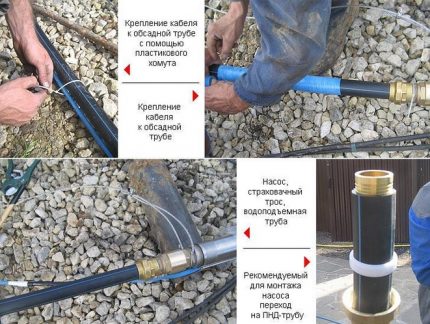
For the sake of economy, a special cable is used only in the area where it will be immersed in water. The rest of the distance is covered by a conventional PVA cable.
In any case, the cable cross-section must comply with the manufacturer's recommendations indicated in the pump data sheet.
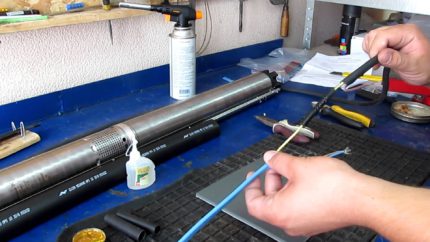
The pump can only be suspended on a stainless steel cable. Neither ordinary black steel nor its galvanized version are designed for continuous operation in water.
When lowering the pump in narrow areas, you can supplement the rotation of the pump with a little pressure. But in any case, the pump must maintain a vertical position.
During pump installation well head may shift a little. You should make sure that the weight of the pump falls on the cable, and is not held by the pipe. Only then can the head position be fixed with screws.
Conclusions and useful video on the topic
Video # 1. Practical tips for choosing and installing a submersible pump are provided in the following video:
Video # 2. A clear demonstration of another pump installation experience:
It is very important to perform all installation operations of pumping equipment in the well correctly, since any negligence can result in breakage or cable breakage.
There are situations when damaged pump impossible to get from working out. This leads to a complete loss of the structure and makes it necessary to start drilling again. Attention and accuracy will help to install the pump in the best way.
You can share your own experience gained during the installation of the deep pump or the connection of the pump station, ask questions, report shortcomings in the text, in the block below. Please write comments. We and website visitors will be happy to participate in discussions to clarify controversial issues.

 How to swing a well: methods for pumping after drilling and during operation
  Replacing a pump in a well: how to properly replace pumping equipment with new
  How to punch a well into water: options and drilling technologies that are in demand in practice
 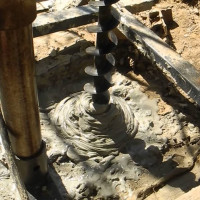 Do-it-yourself well without equipment: how to independently arrange a water source
 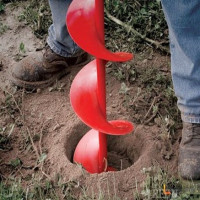 How to drill a well with your own hands: ways to budget independent drilling
 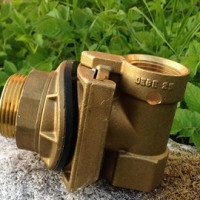 How to install an adapter for a well with your own hands: the best alternative to a caisson
  How much does it cost to connect gas to a private house: the price of organizing gas supply
  The best washing machines with dryer: model rating and customer tips
  What is the color temperature of light and the nuances of choosing the temperature of the lamps to suit your needs
  Replacement of a geyser in an apartment: replacement paperwork + basic norms and requirements
Typically, the technical specifications indicate the suction depth, which indicates the maximum depth the unit is capable of pumping water from, and the head value, which indicates the highest height to which it can deliver water. In the passports to the submersible pumps, the immersion depth, i.e. the distance from the water mirror to the top of the unit, and the distance from the bottom of the pump to the bottom of the output.
The technical characteristics of the pumps make it possible to choose a machine for pumping water, taking into account the depth of immersion, as well as buy it with the required performance.
Even for installation in sources with a low flow rate, it is important that the pump has a safety device that turns off the engine in case of a decrease in the water level in the well.
I drilled a well, everything went smoothly, but ran into the problem of installing a pump in it. I was afraid to somehow break the pump, lowering it incorrectly into the barrel.
I talked with friends who also installed a pump in the well, but it turned out that they all paid for professional craftsmen. I began to search for information on the Internet, and here, in principle, everything is written clearly, there were certainly a few incomprehensions, but I managed them myself. In general, the information is useful!