How to brew a gas boiler heat exchanger: manual repair
Do you know the situation that you have to repair an expensive part, and the budget for this repair is growing? Surely you know what costs can and should be considered redundant. For example, you have a gas boiler and you do not want to lay out up to 30 percent of the cost of the entire device for repairing a single part. If you don’t know how to brew a gas boiler heat exchanger, just read our article and you will learn how to do this.
Thanks to this article, you will learn the procedure for repairing a heat exchanger - parts that often cause boilers to break. We talked about soldering heat exchangers in different ways. Using our recommendations, you can independently repair a failed part.
In domestic conditions, heat exchangers are repaired by soldering. Welding is literally resorted to in production, sometimes using robotic devices. Leave the heat exchanger with extensive structural damage to the craftsmen, but in the case of small holes in the part, soldering can help. Find out more about this.
The content of the article:
Removing the heat exchanger from the boiler
Gas boilers are equipped with heat exchangers, sometimes they are called boiler radiators, in which some sources transmit thermal energy to others. Most boilers have primary and secondary heat exchangers, while the rest have combined or bithermic heat exchangers.
All types of exchangers are affected by adverse factors. The quality of the metal is deteriorating, the permeability of the channels is reduced, the pressure of water hits the walls. The primary and bithermic flame is affected by the flame of the main burner.
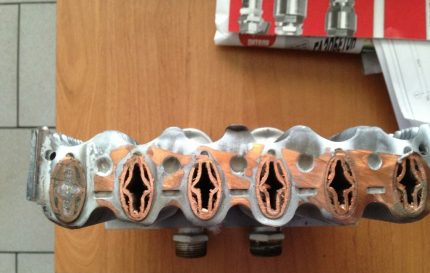
Worn out exchangers may have holes. Given the cost of this part, it makes sense to repair them, and not immediately replace them. Moreover, an analogue is not always possible to find.
If a heat exchanger flows in a gas boiler, you will notice smudges near household appliances or an error on the display. If necessary, remove the problematic part.
First do this:
- Disconnect the boiler from the mains and gas.
- Block the movement of the coolant into and out of the heating system. Turn on the tap for supplying tap water to the boiler.
- Drain the remaining water in the device.
- Remove the boiler cover.
- Bleed the air through the vent.
- Check the inside of the appliance. See if there is moisture somewhere and wipe it.
To get the primary or bithermic heat exchanger, free the combustion chamber from the elements suitable for it. Remove the pipe that supplies gas to the burner. Disconnect the electrical wires from the combustion chamber. If you forget this nuance, then later, due to inattention, you can damage them.
Unhook the sensors, pipes of the heating circuit, withdraw the pipes of both circuits from the bithermic exchanger. Remove components that prevent the device from being removed from the boiler.
Disconnect and pull out the combustion chamber. Remove the top and front covers. Remove the hardware under the heat exchanger and pull it out.
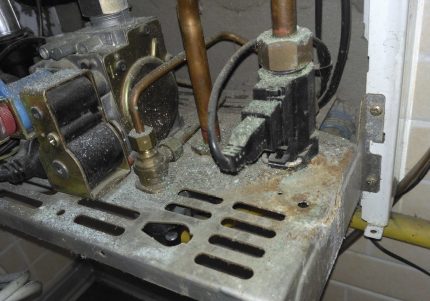
To get the secondary heat exchanger, remove the board and other electronic elements, unscrew and remove everything that will prevent it from pulling the unit out of the boiler. Isolate the contents of the device from water from the exchanger and its channels.
But a heat exchanger malfunction is not the only reason a boiler may leak. Other possible causes of the leak and how to eliminate them are described in detail in this article.
Soldering a gas boiler heat exchanger
All water, air and particulate matter are removed from the exchanger. Blow through the hose by machine, and the remainder is blown out by mouth.
Four components are used for soldering:
- soldering tool (gas torch, blowtorch or soldering iron);
- solder;
- flux;
- Stripping tools before and after.
Solder is a material for joining workpieces having a lower melting point than the base being processed. Solders are usually made of metals. They are produced in the form of wire, embedded parts, pastes, foils, powders, rods and granules. For soldering the heat exchanger, wires are most suitable. Take just that.
To repair the heat exchanger, a high-temperature solder is selected with a lower melting point, but not lower than 700 ° C, from the same material and with similar physical and mechanical properties. Corrosion properties and conductivity of the wire are also taken into account.
Copper, stainless steel and cast iron are common raw materials for exchangers, and zinc is often added to the base. For soldering copper heat exchangers are often used copper-zinc solders with inclusions that neutralize the dangerous effects of fumes.
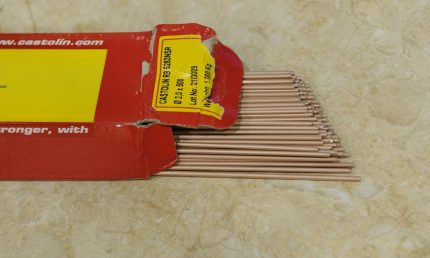
Solid high-temperature solders are marked with PSr, PMC, PMT, etc.
Copper-zinc is designated PMC and numbered based on the melting point:
- PMC-36 - from 825 ° C;
- PMC-42 - from 833 ° C;
- PMC-54 - from 860 ° C.
The standard heat exchanger of a gas boiler can be soldered by anyone, but whether this can be done depends on the materials of the part.
Good solders give airtight seams. The components of such alloys penetrate the soldered surface by diffusion, and the base is dissolved in a small amount in the auxiliary material. After solidification, a homogeneous layer appears.
Flux is a substance for eliminating oxides from a soldered base, increasing the solder fluidity, reducing the surface tension, and better wetting the workpiece. Universal and special tools are combined with heat exchangers. Solder pastes usually contain copper, which is good for a heat exchanger.Mixtures with silver are suitable too.
Preparation of materials before soldering
The soldering iron tip is tinged. The tool is heated to a slight reddening of the tip and covered with a thin layer of solder, while the oxidation film is removed. The sting and the wire are lowered into the flux. At the tinning stage, rosin or resin can be used for this.
After smoke is released, the sting is held for a few more seconds. Then the soldering iron with solder is lowered three to four times into the flux.
Devices are buzzing after purchase, and then from time to time - with frequent use. As a basis for tinning, sometimes use the tip of another soldering iron.
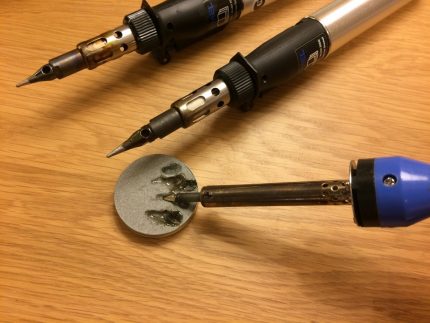
If the condition of the solder is not the best, then it should be cleaned of dirt and oxides. Preheat the end of the solder wire to operating temperature and immerse it in the flux, press firmly to the solid surface on which it is located.
If there is no new wire, then the old one can be treated with cleaning agents, such as:
- abrasive;
- solder paste;
- acid for tinning.
Before soldering, dust is removed from the surface of the heat exchanger so that sparks do not appear during operation. A place with a fistula is treated with a cleaning sponge or fine-grained sandpaper, wiped with a solvent to remove all chemical compounds.
Then, the problem area is heated with a hairdryer for best performance and to allow moisture to evaporate. Otherwise, it will come out sharply during operation and shift the solder. After warming up, the site is again cleaned.
How to seal the boiler heat exchanger?
A small fistula on the heat exchanger is found on green spots, but if such a shade is present on most of the device, then take into account the state of the coating, the color evenness.
Soldering agent is selected according to the situation. A soldering iron is suitable for fine work. A large tongue of flame from a gas burner will warm up the problem area well, but the power of the device may not be enough, contrary to expectations. The soldering iron also needs to be selected powerful.
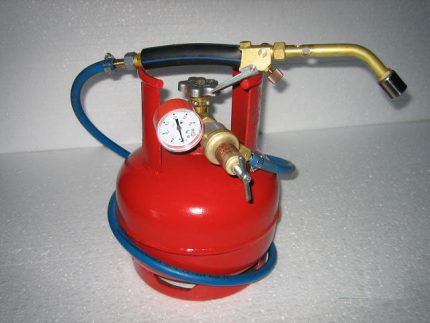
The bulk of the work looks simple. A flux is put on the heated place, after which they begin to solder. The solder is placed on the heat exchanger with the tip, the soldering iron is placed on it and gradually heated. The wire will begin to interact with the flux and base. The remaining uneven mass after soldering is distributed.
In case of gas burner, take the usual standalone or something more productive. For example, working from a large cylinder. Never turn on the maximum flame mode. Apply solder after the color of the flux becomes brighter, for example silver instead of gray.
Keep the torch so far that the wire melts more from the preheated heat exchanger, rather than the fire. For processing a small fistula, a half-minute soldering may be enough. Detailed soldering instructions can be found in this stuff.
Do not overheat the base and solder during soldering - the latter will be poorly fixed. Make sure that the resulting structure is not loose, and the color is not expressed matte. Soldering ideally restores the entire problem area, and if this is not so, then another approach will be needed.
Adjust the temperature of the soldering iron to 20 degrees above the melting index of the solder. To clean the finished joint, use braids and spring removers - the tools will also remove flux residues. Wipe the exchanger with a damp cloth and remove all microparticles.
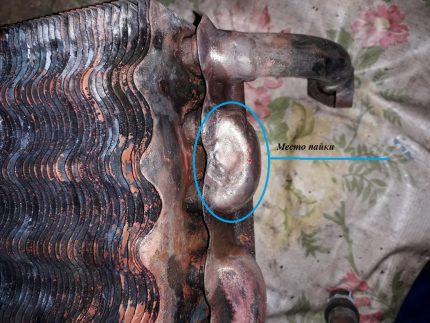
Water cannot be passed through the repaired heat exchanger for another 5-10 minutes.In any case, let the part cool down completely. Only include clean water on the first day after repair. Make sure that there is no rust.
Remove air from the system again and test the boiler. Check full load operation. Pass cold and hot water through the exchanger. After several temperature cycles, it may turn out that the exchanger is flowing again.
The repaired part must withstand thermal deformation. For safety, cover the joint on the exchanger with heat-resistant paint to increase strength. In the following days, retest the heat exchanger.
We also recommend reading about other malfunctions of gas boiler heat exchangers. More details - go to the link.
Cold welding as a repair option
The so-called cold welding is made on the basis of adhesives. A popular raw material for this is epoxy. Do not confuse material and cold welding in understanding the process with plastic deformation of metals without heating.
Choose the most moisture resistant raw materials from what the market offers. At the very beginning of work put on gloves and soften welding by fingers. Do this until the mass becomes plastic. Lay the material on the fistula and spread over as much area as possible. Make the layer thick, but not necessarily the thicker it is, the better. Apply with a wooden stick.
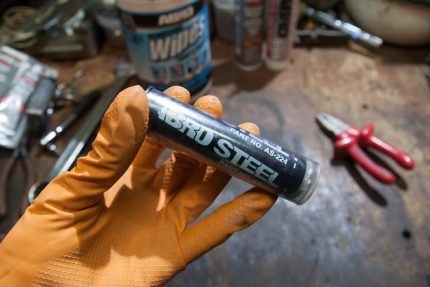
Wait until the finished layer has hardened and clean the area with fine-grained sandpaper and a damp cloth.
Wait half an hour first for better solidification. The recommended 3-5 minutes are sometimes not enough. Check the quality of the joint with temperature contrast and water pressure.
Conclusions and useful video on the topic
An alternative way to prolong the operation of the primary boiler heat exchanger:
Soldering the heat exchanger with two gas burners:
There are three simple ways to seal a hole in a heat exchanger: flame, sting and adhesive. Most often we are talking about a narrow hole on a primary or bithermic exchanger, so these methods are quite enough.
Leave a difficult damage to the masters. But, in which case, you will find how to solder the heat exchanger, remove it from the gas boiler and choose solder yourself. If possible, act on your own and remember the importance of the preparatory work.
Write comments, ask questions about the topic of the article. If you have a boiler, tell us if something has happened to its heat exchanger. Write about your experience in soldering and repairing exchangers or other boiler parts. The feedback form is located under the article.

 Do-it-yourself gas boiler heat exchanger repair + instruction on repair and part replacement
  How to increase the efficiency of a gas boiler with your own hands: the best ways to increase the efficiency of the boiler
  Conord gas boiler malfunctions: common breakdowns and solutions
  Water flows from a gas boiler: what to do if heating system equipment has flowed
  Replacing a gas boiler in a private house: norms and rules for completing the procedure for replacing gas equipment
  Immergas gas boiler errors: error codes and solutions
  How much does it cost to connect gas to a private house: the price of organizing gas supply
  The best washing machines with dryer: model rating and customer tips
  What is the color temperature of light and the nuances of choosing the temperature of the lamps to suit your needs
  Replacement of a geyser in an apartment: replacement paperwork + basic norms and requirements