How to hide heating pipes: we disassemble the types of boxes and decorative linings
It is difficult to imagine a living room without heating communications, which allow you to maintain a comfortable air temperature. At the same time, the appearance of these elements can hardly be called aesthetic, often they discord with a refined interior, breaking out of the general style.
We will tell you how to hide heating pipes in an original, maximally simple and affordable way. In our article, we describe in detail the options for camouflage using boxes and decorative overlays. Based on our advice, you can easily give the room a harmonious, cozy look.
The content of the article:
Different types of masking pipes
There are various ways of hiding the elements, allowing residents of the apartments to show creativity and imagination.
Among the most popular are:
- creation of closed heating systems;
- masking heating elements with furniture;
- the device boxes in which you can hide communications;
- pipe decoration with linings and other design elements.
To create closed systems, all pipes passing through the apartment are cleaned into specially designed walls-channels, after which the contours are sealed with plaster.
This method requires the ideal quality of communication elements: even minor defects can cause difficult leaks and breakouts over time. Of particular danger in this regard are plastic pipes, for the connection of which fittings are used, but leaks are possible in steel or copper pipelines if welding technology is not followed.
When disguised, communication networks are covered with items of household appliances and furniture, located behind a cabinet, under a sink or sink. Such a solution is easy to implement in the kitchen, but in living rooms, especially those solved in the spirit of minimalism, this is often difficult.
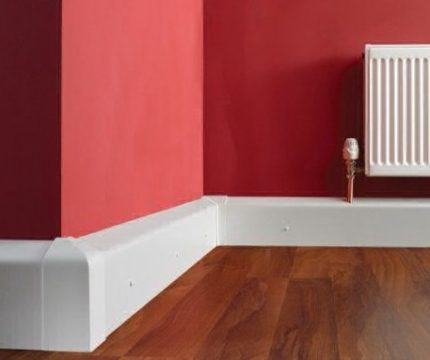
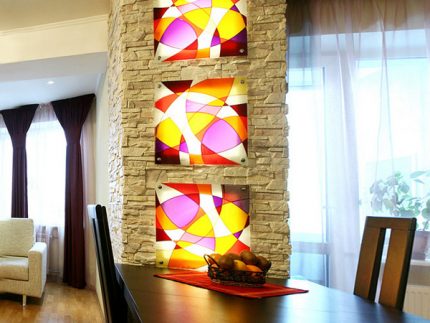
The most popular methods of hiding pipes are boxes made of different materials, as well as the use of decorative elements, for example, rings, ropes or ropes, stained glass.
We will consider the nuances of decorating heating elements below.
Features of factory products and homemade products
All designs designed to conceal heating systems can be divided into two large categories: finished appliances and specially made ducts.
Option # 1: factory-made devices
Such devices are purchased in specialized stores, where a large assortment of products of different colors, sizes and designs is presented. In shape, such structures can be angular, rounded or rectangular.
The first option is especially convenient in the corners of the room for masking risers, as well as if the heating system is located close to the ceiling or floor. Other modifications are perfect for pipes that are laid along the perimeter of the walls and a free-standing riser.
Various solutions are practiced. For pipe fittings fit parts polymer ducts factory made. When choosing such options, it is advisable to pay special attention to the quality of the material, since low-grade polymers under the influence of heat may turn yellow, swell and lose their appearance
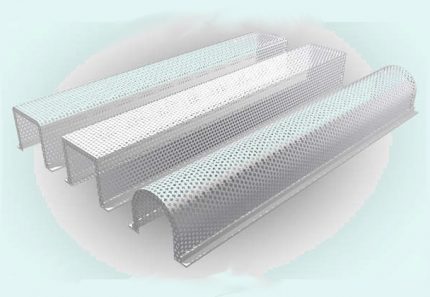
Boxes made of ordinary or perforated metal look very impressive. If a practical goal is pursued, it is better to give preference to the second option, because thanks to the holes, the metal elements provide better heat transfer.
Another option is the low-cost construction of MDF, which have an attractive appearance and good performance. The disadvantages include a small model range, in which “blind” devices without holes predominate, which reduces heat transfer.
Option # 2: self-made designs
Despite a significant selection of finished boxes, do-it-yourself designs are very popular. They not only save money, but also allow you to ideally solve the question of how to ideally hide heating pipes in the interior, taking into account the exact size and style of the room.
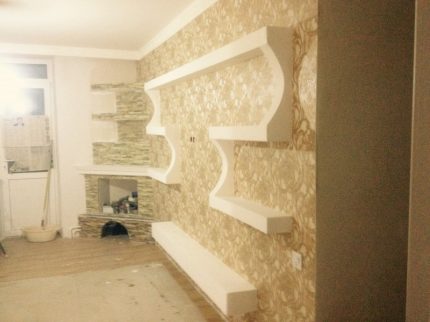
The most requested materials include:
- Brickwork. An effective, but rather complicated way of disguise, for which you will have to make a lot of work. In addition, such a box can hardly be disassembled if necessary.
- Drywall. To date, the most common material.
- Plastic liningfixed to a frame made of metal or wood.
- Boxes made of wood. Eco-friendly designs decorating any interior; usually made to order.
Among the most common include plasterboard boxeswhich are easily installed around pipes on a metal-frame. The choice of material for the manufacture depends on the design of the room, as well as on personal preferences and financial capabilities.
DIY plasterboard box
The easiest way to hide the heating system in structures made of drywall. This material attracts with a combination of ease of processing, excellent operational properties, and relatively low cost.
Guidance on the assembly of protective and decorative structures in the bathrooms you will find in article, the content of which we recommend to read.
Another important advantage is the compatibility of drywall boxes with various finishing methods, which allows you to perfectly fit the design into any interior.
For the manufacture of drywall boxes, the following materials and tools will be required:
- screwdriver;
- scissors (cutter, hacksaw) and a plane for drywall;
- sheets of drywall (for the bathroom and kitchen it is better to take moisture resistant, for the rest of the rooms - standard);
- wooden bars (metal profile);
- dowels, screws for fixing the structure;
- building materials for putty, primer, finishing;
- baseboards.
Decorative accessories will also help to improve the appearance of the structure, with which you can mask the joints of the box with the walls / floor (sockets, covers, rings, plugs). The work is carried out in several stages.
Step 1: getting started
First of all, it is necessary to determine the dimensions of the structure, for which accurate measurements of heating pipes are carried out. When calculating the parameters of the device being manufactured, it is important to add a few centimeters to the fit to the depth and width indicators: the heating pipes should not touch the walls and components of the frame.
In accordance with certain dimensions, cutting of wooden planks or metal profiles under the frame, as well as cutting of drywall sheets (at the same time, a minimum number of seams) should be performed.
Step 2: assembly of the structure
The starting profile, which will serve as the basis for the assembly of the frame, is fixed on the floor. Other parts of the structure are attached to it, creating a crate.
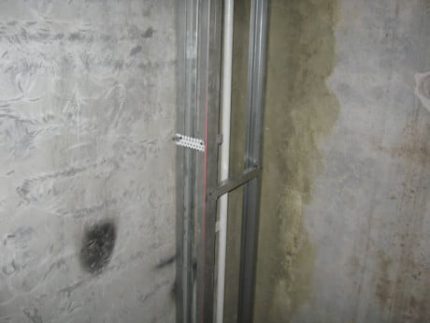
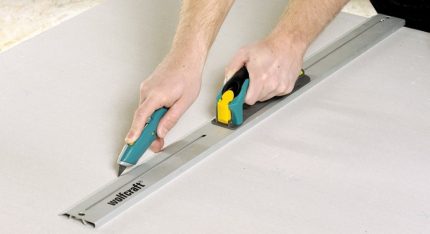
The edges of the cut drywall parts are processed with a special planer for this material, after which they are applied to the frame base and fixed with self-tapping screws. To protect the edges of the plates from damage, the corners of the device can be glued with special overlays, which are made of perforated metal.
Step 3: shutting down
In conclusion, finishing work is carried out. The joints between the slabs of the structure, as well as the entry point, are coated with putty.
After that, the surface of the box is primed, and then the finish is performed (painting, sticker, wallpaper, coating of decorative plaster). The final touch for a neat appearance is the installation of skirting boards at the junction of boxes with a wall and / or floor.
Plastic panel construction
In places where a large number of people stay (for example, in public buildings), as well as in corridors and bathtubs, structures made of durable plastic panels where the heating systems are hidden are appropriate.
The installation of such devices is desirable to be carried out in parallel with the lining of the room, since in this case it is possible to predict the rational consumption of finishing material. Installation of boxes is carried out in stages.
Step 1: securing the frame
First of all, a lath made of wooden beams with a cross section of about 40x40 millimeters is attached to the ceiling and walls. The fastening of these elements to the walls and ceiling is made using dowels equipped with a polymer sleeve. After attaching the bars, they are aligned in the horizontal and vertical directions.
In places (on the floor and walls) where the heating communications are located, additional support bars are installed to which frame racks located along and across will be attached.
Step 2: paneling the frame
Having installed the frame, you can go to the paneling, which is done as follows. Panels cut to the height of the box are installed on the side plane so that they are in a vertical position. It is possible to fix polymer parts with the help of small nails, special adhesive mixtures, a construction stapler.
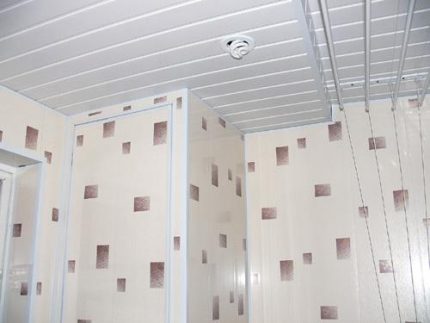
The last stage is the installation at the corners of special elements designed to hide the trimmed edges, so that plastic ducts for heating pipes get a neat appearance.
The use of natural wood
Designs made of natural material look great in any interior, but keep in mind that wood does not conduct thermal energy well. To improve heating, it is recommended to use open-top devices or large-mesh grids.
It is also important to consider that high temperatures negatively affect wood materials. Under their influence, a wooden box can gradually dry up and deform, and the paint swell.
To avoid this, it is necessary to ensure that the device does not adjoin the elements of the heating system: wooden slats should extend 3-4 cm from them.
Decorative linings for heating pipes
The most problematic area when laying communications is the area near the entrance and exit of the heating pipe: in this place it is extremely difficult to make a neat cut and evenly lay the floor covering.
Advantages of decorative elements
You can avoid an unaesthetic appearance by filling out the junction with decorative plates specially designed for heating pipes.
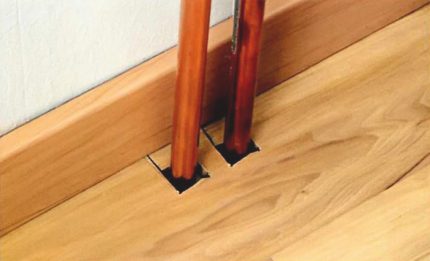
Such details not only give the room a neat look and decorate the interior, but their wide assortment allows you to find a model that matches the style of the room - from classic to art nouveau and avant-garde.
In addition, the linings are extremely practical. When carrying out general cleaning, redecorating or changing the coating, parts can be removed, and after completion of work, rinse and install again.
Pad materials
Decorative products can be made of different types of materials.
Most often there are elements for the manufacture of which are used:
- plastic;
- MDF;
- various types of wood.
Depending on the design, decorative products may have a corrugated, smooth, polished surface; be plain, with drawings or imitation of various materials (stone, mother of pearl, cork).
The most expensive are the lining of wood. To replace them, you can use parts from MDF that mimic the wood structure, however, it must be borne in mind that the service life of the latter is much lower (5 years against 10 for natural wood).
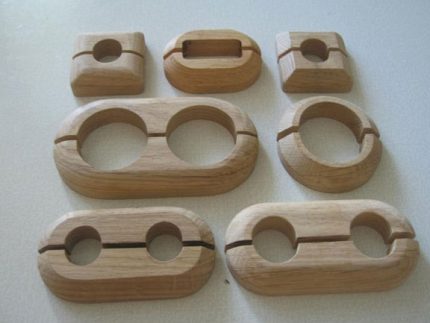
When choosing decorative linings for heating pipes, one must carefully select their size, which should correspond to the diameter of the pipes, and also pay attention to the correspondence of color and texture to the design of the room.
Decor Tips
Elements in the form of rings (they are also called sockets) have a collapsible design. As a rule, they consist of two parts connected by internal locks.The structure is disconnected, put on in a girth, after which the gap closes and the element latches in a fixed position.
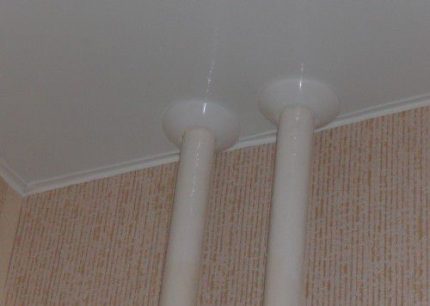
Installation of such products takes a minimum of time (no more than one minute) and is not difficult. It can be carried out even by beginners who have never been involved in repair work. If necessary, the element can be easily removed by opening the lock.
In addition to rings, other types of masking of joints can also be used, for example, decorative strapping from a jute rope or parts made of special heat-resistant fabrics. Such design options have an original appearance, and are also characterized by good thermal insulation properties, which helps to reduce heat loss.
Masking options for old pipes
Long-laid metal pipes are not recommended to be walled into walls or placed in boxes due to the high risk of possible leaks. In this case, you can turn on imagination to creatively decorate such designs.
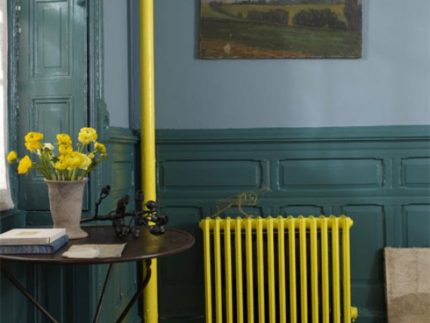
The easiest way is painting heating appliances and pipes to the color of the surrounding walls, which allows the design to merge with the background and not be evident. To do this follows choose paint non-toxic, heat-resistant, resistant to mechanical stress. Acrylic and alkyd enamels, as well as water dispersion coatings are well suited.
Pipes can be decorated with ropes or ropes or added to make beautifully made artificial branches and / or flowers alive (it is important that they can tolerate high temperatures). It should be noted, however, that such a finish reduces the heat transfer of the system.
You can also decorate the pipes with split along the bamboo, which is attached to the pipe and decorated with additional elements depending on the imagination of the owners.
Horizontal pipes laid under the ceiling can be masked by hanging curtains slightly higher than usual.
Conclusions and useful video on the topic
The following videos demonstrate the manufacturing process of the most commonly used ducts for masking heating systems: plastic and drywall.
Video # 1. Instruction on masking pipes behind plastic panels:
Video # 2. Compact box made of waterproof plasterboard:
To hide the heating pipes, it is important to choose the most effective way of masking. It will allow not only to remove engineering communications from the eyes, but also to decorate the apartment. Having invested in taste, imagination, creativity, you can choose a unique finish for decorating pipes, even without special skills in the repair and construction work.
Please write comments in the block below. Tell us about how the pipes of the heating system were hidden in your own city apartment or country house. It is possible that your valuable recommendations will be useful to site visitors.

 Polypropylene pipes for heating: types, selection criteria, marking
  Pipes for heating boilers: which pipes are better for tying the boiler + installation tips
  Which pipes are better to choose for heating: a comparative review
  Temperature sensors for heating: purpose, types, installation instructions
  Thermostat for heating boiler: operating principle, types, connection diagrams
  Types of heating systems for a private house: a comparative overview + the pros and cons of each type
  How much does it cost to connect gas to a private house: the price of organizing gas supply
  The best washing machines with dryer: model rating and customer tips
  What is the color temperature of light and the nuances of choosing the temperature of the lamps to suit your needs
  Replacement of a geyser in an apartment: replacement paperwork + basic norms and requirements
Yes, indeed often, if the interior is not in the loft style, then the pipes are knocked out of the general style of the interior. Rarely able to openly embellish a room. It’s good that now a lot of ideas have been invented in order to hide the entire set of communications. Drywall pads look very nice. But the design of plastic panels reminds me of the interior of hospitals for some reason.
Interesting ideas, but we have all the pipes put to the floor. Of course, in the future, if we change the heating pipes, we’ll just start new ones, but above the floor. Then you might think how it would be better to hide them. The batteries are hidden with the help of a box with a grill, so neither pipes nor batteries are visible. The bath is a little different. They set up a box where the entire system for adjusting the supply and return is hidden, in order to get to it, just open the door.
I don’t understand what year this article is? Why such a game is written at the very beginning. I didn’t even read. Are plastic pipes dangerous because of fittings? And the fact that a pipe made of cross-linked polyethylene can be 1 km long is easy and you do not need any fittings? What pipe could it be?
What exactly did the material seem wrong to you? Yes, cross-linked polyethylene pipes are a good and modern material, but how do you make a cross or a tee without fittings?
If you carefully read the article, and not diagonally, then the emphasis is on the fact that the pipes are hiding behind decorative boxes. Actually this is what the title of the article says. What does a 1 km long pipe without fittings have to do with it, explain? We are talking about the pipes of the heating system of a house or apartment. Where you can’t do without adapters and fittings.
Although no, excuse me, you can mount a heating system without adapters and fittings: we drill walls where necessary and connect directly. Have you seen this somewhere? I can share with you an example of “work” when “masters” save on fittings and adapters.
If the pipes are located behind the box, then the leakage site will be difficult to eliminate, and it just forms in the places of poor connection of adapters or fittings.