Installation of heating from polypropylene pipes: how to make a heating system from polypropylene
Polypropylene pipes are increasingly becoming a successful replacement for steel and cast iron counterparts from those previously used in plumbing. Many private houses under construction are now equipped with heating systems, hot water and hot water, mounted on the basis of polypropylene.
In addition, the installation of heating from polypropylene pipes is easy to carry out independently. In any case, to build a plastic system is much easier than a metal one.
The content of the article:
Polypropylene based heating
If you decide to make a heating system or some other of polypropylene pipes, the master, in addition to plastic sleeves, will need additional equipment.
In particular, the following material, equipment, tools will be required:
- pipe scissors or pipe cutter;
- soldering plumbing machine;
- foil stripper;
- sealing tape (ftoroplastovaya);
- sharp knife;
- degreasing agents (e.g. Tangit wipes);
- the necessary assortment of fittings;
- tape measure and marker;
- fasteners, screws and dowels.
You should pay attention to the main material - PP pipes, from which it is supposed to create a heating system. Because the heating system from polypropylene pipes can be assembled on the basis of a material of a different class.

The exact choice of assembly depends on the intended operating conditions.
Classification and design parameters
Existing GOST standards (ISO10508) establish a classification of polypropylene hoses, on the basis of which this material can be used under certain operating conditions.

Long polypropylene products are divided into 4 classes (1,2, 4,5) according to typical fields of application and according to the values of working pressure (4,6,8,10 ATI):
- Class 1 (hot water systems up to 60 °);
- class 2 (hot water systems up to 70 ° C);
- class 4 (floor heating and radiator systems up to 70 ° C);
- class 5 (radiator systems up to 90 ° C).
For example, polypropylene pipes are required to make a low-temperature heating system. Then the designation on the outer surface of the pipes can determine the suitable material.
For this case, sleeves with the designation - Class 4/10 are quite suitable, which corresponds to the boundary temperature parameter of 70 ° C and the permissible boundary of the working pressure - 10 ATI.
The industry, as a rule, produces universal products. The manufactured products are supported by an extensive classification. In the documentation for such material labeling of PP pipes indicated by the standard listing of permissible parameters (Class 1/10, 2/10, 4/10, 5/8 bar).

Thus, hoping to make the heating in the house of polypropylene with your own hands, the main material is usually chosen by the master in direct proportion:
- from the planned operational parameters;
- from methods of heating the coolant;
- from the applied regulatory system.
It is also advisable to calculate the life of the future heating system using the parameters:
- upper values Trab and Prab;
- pipe wall thickness;
- outside diameter;
- safety factor;
- the duration of the heating season.
On average, the service life of polypropylene should be at least 40 years.
Steps of assembling a system of PP pipes
Consider how to do polypropylene pipe taking into account norms and rules of installation. The start of network production should be preceded by a thorough inspection of all the details of the kit of the future system. Components (pipes, fittings) must be in good condition - clean, without damage.
Only parts from one manufacturer are recommended. The ambient temperature of the work site is at least + 5 ° C.

Interconnecting polypropylene parts of the system is allowed by one of three types of welding:
- Polyfuse.
- Electrofusion.
- Butt.
For the assembly of heating and plumbing systems, not only polypropylene pipes and fittings for welding. They also produce special threaded fittings necessary for the installation of shut-off and control valves with metal housings.
On polypropylene pipes themselves, threading is not performed either in the factory or at home. They are connected only by hot, rarely cold welding.
Features of installation work
All components used in the installation, in cases of fitting them to size, pipe cutter or scissors specially designed for this purpose.
Work with this tool is accompanied by an even clean cut, which is an important point for making a quality connection.

If it is required to perform the “plastic-metal” transition, it is necessary to use exclusively fitting transitions on the hot water and heating pipelines equipped with a pressed-in brass (nickel-plated) sleeve with a thread (internal or external).Tightening of such connections is performed using tape keys, if there is no profile for a standard key.
Traditionally, a polypropylene heating pipeline, including DIY, is assembled by the alloy method polyfusion welding machine. A working set of devices of devices of this kind contains a group of nozzles made for different diameters of a plastic pipe.
It is necessary to select suitable nozzles, install them on the heating plate and fasten with screws.

The current regulator of the polyfusion welding apparatus is set working temperatureas a rule, 250-270 ° C. It is necessary to wait until the device is fully warmed up. The achievement of the operating mode is indicated by a control LED.
Some devices include a contact thermometer, which determines the heating temperature with an accuracy of one degree.
Polypropylene Welding Procedure
Step-by-step, all actions unfold usually as follows:
- Measure and cut the required piece of sleeve.
- Using a sharp knife, chamfer the working end face at an angle of 30-40 °.
- Measure the portion of the sleeve inside the fitting and mark the border with a marker.
- Also leave axial marks on the parts in order to prevent rotational displacement.
- Using a trimmer, remove the plastic (top) and aluminum (middle) layers on the pipe section of the joint.
- Degrease the working (welded) surfaces with a special tool.
- Proceed to the procedure for heating parts.
The first to put on the fitting is the fitting, given the thicker wall size of this part compared to the pipe. The fitting should fit tightly onto the nozzle body of the welding machine. If free play is observed (play, hanging), the fitting must be rejected.

Then, inside the other nozzle, the treated end of the polypropylene pipe is inserted. The landing density here should also meet the criterion of uniform contact around the entire circumference. Both parts are kept on the heating plate for the time specified in the table:
| Part Diametermm | Heating timesec |
| 16 | 5 |
| 20 | 5 |
| 25 | 7 |
| 32 | 8 |
| 40 | 12 |
| 50 | 18 |
| Part Diametermm | Commit timesec |
| 16 | 6 |
| 20 | 6 |
| 25 | 10 |
| 32 | 10 |
| 40 | 20 |
| 50 | 20 |
After the control seconds, the parts are removed from the nozzles and connected by a smooth uniform entry of the pipe into the fitting (excluding axial displacement).
The entry of the pipe into the cavity of the fitting is performed up to the marker mark. However, the connection is not completely done. An internal clearance of about 1 mm must be left.

After connection of PP pipes by soldering the place for joining the parts should remain motionless (fixed) for at least 20 seconds. During this period of time, the molten plastic hardens and a strong, sealed connection is formed.
To achieve full strength, the welded unit must be kept without load for at least 1 hour. By such a technique, the entire heating system is assembled, producing short sections with their subsequent integration into nodes and trunk lines.
Accounting for linear expansion (compression)
Fluctuations in external and internal temperatures inevitably lead to linear expansion or contraction of polypropylene. These features should be considered in the process. installation of PP pipelines. If the characteristic linear changes in the pipelines of the heating system are not adequately compensated, this condition results in a reduction in the service life of the entire assembly.
Compensation for linear expansion for polypropylene products is achieved due to the flexibility properties of the material itself. It is only necessary to correctly lay the trunk lines. Proper installation is ensuring the freedom of movement of the pipeline within the linear expansion.
How to ensure such installation? Very simple. In the installation kit, it is necessary to include special compensators, standard mounting clamps, consisting of fixed and movable elements.

Linear expansion can also be compensated by prestressing the pipeline. This approach shortens the extension length. In this case, the direction of prestressing is directly opposite to linear expansion.
Features of trunk installation
Laying polypropylene lines at gravity heating device performed in accordance with the standards (GOST 21.602-79; GOST 21.602-2003), which determine the minimum slope of the line towards the lowest point at the level of 0.5%. At the same time, at the lower point, the placement of a drainage unit with a drainage tap is required.
Pipelines must be divided into sections with the possibility of cutting off these sections using shut-off valves, for example, in case of an accident. Before installing the valves on the site, control valves and shut-off valves must be checked for operability and the quality of closing / opening.

When mounting risers, particular attention should be paid to fixed supports and the construction of a correct linear expansion compensation scheme.
The required riser compensation parameter can be provided in two ways:
- Movable supports.
- Compensation loop.
For the heating device variant within the framework of ordinary household real estate, as a rule, only the first method is used. Fixed supports are placed on a riser in the area under and above the tee or in the places of the pipe coupling. This mount eliminates the subsidence of the riser.
The heating system lines must be insulated, including fittings and valves. The exception is pipe sections laid directly in the living room, which in essence are a continuation of heating radiators. It is convenient to use polyurethane foam insulating pipes as insulation.
Conclusions and useful video on the topic
On the example of a heating radiator strapping, the process of processing and soldering polypropylene products using special tools is shown.
The appearance of pipes made on the basis of polypropylene, and their application in practice, can significantly reduce the complexity of mounting heating systems on the device, including with your own hands. This modern material opens up more opportunities for owners of private houses, where heating systems are powered by internal sources - gas, electric, wood boilers.
Tell us about your own experience gained during the assembly of the pipeline from polypropylene pipes. Share useful technological nuances not covered in the article with site visitors. Please write comments in the block below, ask questions, publish photos on the topic of the article.

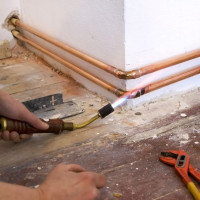 Installation of copper heating pipes: features of the technology of work
 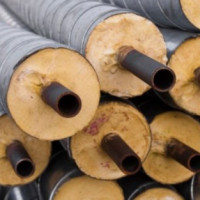 Insulation for heating pipes: overview of types + application examples
 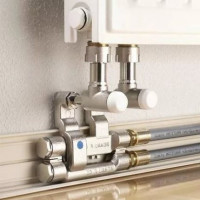 Which pipes are better to choose for heating: a comparative review
 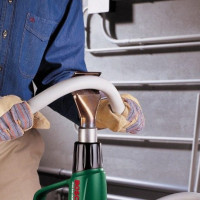 Polypropylene pipes for heating: types, selection criteria, marking
  How to make a chimney in a private house with your own hands: design options and their implementation
  Pipes for heating boilers: which pipes are better for tying the boiler + installation tips
  How much does it cost to connect gas to a private house: the price of organizing gas supply
  The best washing machines with dryer: model rating and customer tips
  What is the color temperature of light and the nuances of choosing the temperature of the lamps to suit your needs
  Replacement of a geyser in an apartment: replacement paperwork + basic norms and requirements
I would like to independently mount a similar system of polypropylene pipes at home, to be completely sure of the quality of the connections and protect myself from the hack-work of the performers. But this moment is embarrassing: how much will it cost to buy the necessary equipment for pipe welding? I consider a significant drawback of a polypropylene pipe the impossibility of bending it, unlike a metal-plastic one, it does not bend at all.
At first I scored too, and then I soldered everything in my house - and nothing flowed! Soldering iron is cheap - 2-3 thousand. There all the equipment is there - read the instructions and you will succeed! Good luck
About degreasing pipes before soldering the first time I hear. Well, how many extra gestures you need to do, and the soldering iron will burn. In my opinion, no one does, it was 20 years ago, when the plastic was adhesive.
And linear expansion on polypropylene can be minimized with expansion joints. This, of course, slightly increases the cost of installation, but there will be no curved pipes.
And what are compensators, can we give more details?