Tile shower cubicle: step-by-step construction instructions
Water procedures are a mandatory daily ritual of a person. But what about the owners of small-sized apartments, where the size of the bathroom does not allow you to place all the desired plumbing? A compact shower stall is a modern alternative to a traditional bathtub. A variety of materials for its arrangement allows you to turn it into a stylish shower. Do you agree?
It does not require much space, saves water and time allotted for hygiene procedures. And most importantly - such a design is quite affordable to perform yourself, according to your own design and measurements. Let's take a closer look at how a shower cabin is made of tiles in three versions - with a ready-made or home-made tray, as well as without it.
We will talk about how to independently build a shower from a tile, what materials and tools will be required for this. The article also contains expert advice and the main nuances that are worth paying attention to during construction. And the videos placed in the material clearly demonstrate the arrangement of the tray from the tiles for the shower.
The content of the article:
Pros and Cons of Tile Shower
Although today in plumbing stores you can choose the atmosphere for any interior style, home-made showers do not lose popularity. The main reasons are the volumetric dimensions and the impressive cost of truly high-quality factory products.
Budget options are most often made of inexpensive plastic and with cheap components, which soon manifest themselves in all their glory in the form of frequent breakdowns. Some of them can be eliminated with your own hands, and to repair individual elements of the shower cabin you have to turn to the masters.
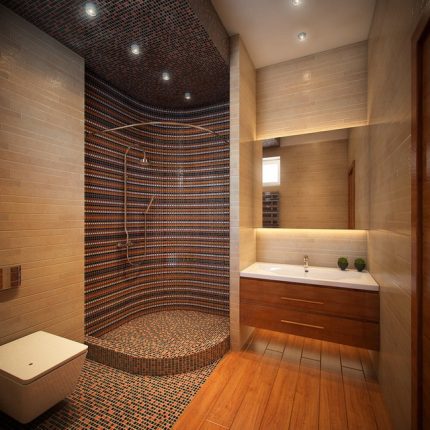
Additionally, many booths are equipped with all kinds of electronics - from the radio to the steam generator, lighting effects and the Sharko shower, the need for which is very doubtful, but they significantly increase the cost of plumbing.
In addition, factory products are manufactured according to the standard size range, which does not always fit into small-sized rooms in country houses or apartments of old buildings, where every centimeter counts.
Therefore, a home-made tile shower has several advantages:
- Reliability and simplicity - the design with ceramic cladding is much stronger than the plastic walls of standard shower cabins, so it will last a long time.
- The ability to create an original design - In addition to the form for the booth itself, you can also experiment with its design, because the range of mosaics, tiles and porcelain tiles is very diverse.
- Safety and environmental friendliness - ceramics do not conduct electricity and do not emit unpleasant odors (unlike some types of plastic).
- Easy care - it’s easy to care for the tile, it does not turn yellow, is undemanding to detergents and is easily cleaned of limescale after hard water and soapy streaks.
There are not so many shortcomings in the tiled booth (of course, if its installation is carried out in accordance with all the rules and in compliance with the bias). Basically, poor sound insulation is noted, which is solved by laying an additional layer under the screed or installing a finished pallet.
It also seems to many that taking a shower while standing on a cold tile is not very comfortable. But in fact, ceramics quickly heat up under a warm stream, and even if desired, a “warm floor” system and an additional heat-insulating layer can be installed under such a cladding.
Homemade cab options
If you decide to independently begin to design a shower zone in the bathroom, first decide on the installation location of the future booth and its design.
Depending on the height of the ceiling, the entrance to the sewer, the size of the free area and your building skills, three options are possible: with a purchased pallet, floor drain or home-made pedestal.
Option # 1 - a shower with a finished pan
If there is enough space in the bathroom, and the main goal of arranging a home-made cabin is a non-standard design, it is quite possible to ease your task and buy a ready-made pallet.
Moreover, in the plumbing shop you can choose the option for any design and budget - it can be either a familiar snow-white pedestal made of acrylic, or a product made of beautiful artificial stone or reliable cast iron.
In addition to the pallet itself, for installation you will need:
- Flexible drain hose.
- Corrugation and siphon.
- Foam concrete.
- Tile adhesive.
- Silicone sealant with a gun.
- Tape measure, level and marking pencil.
- Saw, wooden / rubber mallet.
- Tray and trowel.
The installation of the pallet is carried out on a specially erected foundation, under which communications are hidden. First you need to make a markup: lay the pallet in the place chosen for installation and circle the contours with a pencil.
Then, cut out four supports from foam concrete that will support the base of the future cabin, and check evenness with a level (if necessary, the blocks are easily cut).
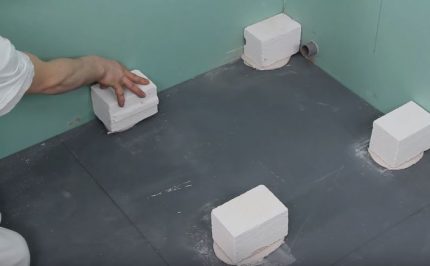
Now you need to attach the drain. To do this, it is necessary to return the pallet to the supports and outline the location of the siphon on the floor through the drain hole. Remove the pallet again and attach siphon to the drain pipe so that it matches the marking.
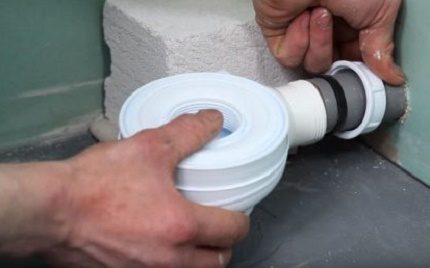
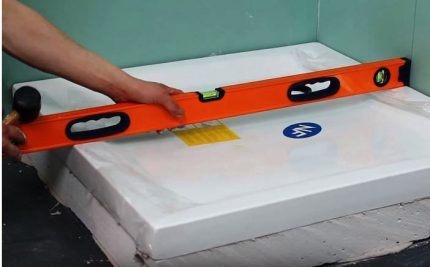
Then the foundation is erected from the blocks of foam concrete cut to the height of the supports and mounted on tile adhesive. When the base is prepared, its upper surface is coated with the same tile glue, a pallet is installed on top and adjusted with a wooden or rubber hammer according to the level.
At the final stage, it is necessary to ensure the integrity of the structure. To do this, wipe the edges of the pallet with a clean cloth, degrease and walk through the joints with silicone sealant. It remains to install the siphon in the pallet and to cover the foam concrete foundation with tiles.
Do you have an acrylic, cast-iron or marble pallet? On our website there is step-by-step article for the installation of pallets of various materials. We recommend that you familiarize yourself with them.
Option # 2 - registration of a cabin with a ladder
A spectacular solution that looks attractive in photographs of modern interiors is a single-level cabin without podiums and drops.
Such a shower enclosure is ideal for small bathrooms, especially if it is equipped with transparent glass doors, and the walls and floor are decorated with the same materials or in a related color scheme with basic finishes. As a result, the design is airy and stylish.
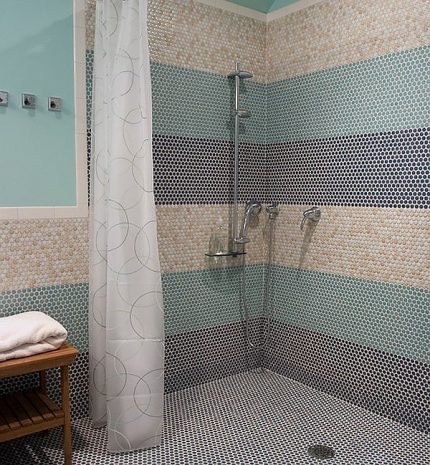
To do this, you need to equip the corner not with a pallet, but drain ladder. But to plan such a construction is best at the repair stage, because you will have to raise the floor by at least 15 cm to hide communications under the concrete layer.
The second option is to drill a hole in the screed for drainage and a groove for supplying to the sewer pipe. But this is in case the thickness of the “pie” on the floor allows masking communications, because it is impossible to hollow slabs.
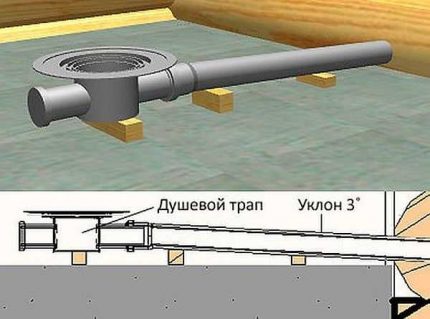
Important recommendations for arranging a drain ladder:
- First you need to do the markup for the future booth, determine the place for the ladder bowl, where water will flow from the shower.
- Then, to the place of shower drain, you need to bring a pipe entering the sewer. Here it is desirable to provide a slope of 3% (although for a linear ladder it is possible 1-2%) and a permissible angle of rotation at the entrance to the sewer within 30-45 °. Subject to these conditions, it will be possible to clean a clogged pipe with an ordinary plumbing cable.
- After measurements, the ladder is installed on the supports of the required height and attached to the pipe.
- When all communications are installed and connected, concrete screeding can be performed. But here it is important to make a bevel of 4-5 cm per meter of length in the direction of the drain bowl, so that the water does not stagnate on the floor, but goes into the drain.
At the final stage, you need to make water inlet and close the booth with glass or plastic doors, which can be bought together with fasteners in a plumbing store or made independently.
In the economy version, for example, when organizing a shower in a country house, you can get by with curtains made of polyethylene or waterproof fabric.
Option # 3 - a shower room with a homemade tray
Instead of a factory podium, you can make a solid base for a booth on a brick or concrete foundation, which will only be faced with ceramic tiles or mosaics.
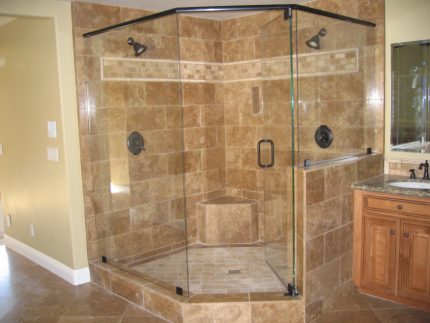
But such a capital decision can be very difficult to put into practice, because in addition to the pedestal itself, high-quality waterproofing will be needed, and the plumbing should be considered in detail.
Therefore, we consider in more detail the main stages of such construction, so that it is easier to assess the front of the upcoming work and our own forces.
Making a booth from scratch: step-by-step instructions
To begin with, determine the shape of the future booth and make markings for it on the floor. The easiest way is to make a square or rectangular shower in a corner or a niche, but if desired, you can erect a trapezoidal or semicircular design.
But although a lot depends on the layout and the availability of free space in the bathroom, keep in mind that the minimum dimensions of a comfortable cabin are 90 * 90 cm.
Step # 1 - selecting materials and tools
To equip the booth, you will need the usual set of tools, which will probably be found in the stocks of the home master: level, pencil and tape measure, trowel for mortar and glue, trowels for grouting, a roller and a brush.
To mix the solutions, it would be nice to stock up with a construction mixer, otherwise you will have to prepare the mixture manually.
From the materials you need to prepare:
- Moisture-resistant single brick (you can use silicate, but with the obligatory treatment with hydrophobic agents).
- Reinforcement mesh with cells 10 * 10 cm.
- Mix for a coupler M-200.
- Waterproofing mastics or rolled materials.
- Insulation.
- Tile or mosaic with crosses for layout.
- Tile adhesive, grout and acrylic sealant.
It is also necessary to purchase plumbing parts in advance for drainage arrangements - pipes, gangway or siphon with all necessary connections.
Step # 2 - bring the pipes and build the foundation
So, the place is chosen, you can begin construction. First you need to remove the old coating from the floor and walls.
If the floor is fairly flat, you can immediately process it waterproofing material, but if there are significant differences, it is worthwhile to first carry out a rough screed (for heat and noise insulation, you can put glass wool, expanded polystyrene or mineral fiber).
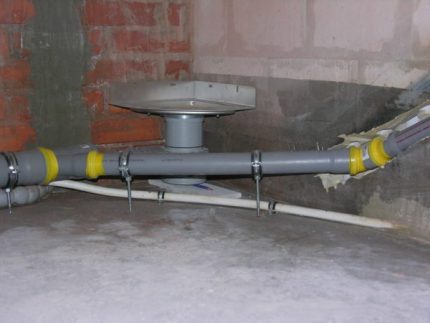
The issue of connecting to the sewerage and water supply should be treated very carefully. All joints must be sealed and sealed. If you have never done such a job, we recommend that you review the detailed training on connecting the shower to communications.
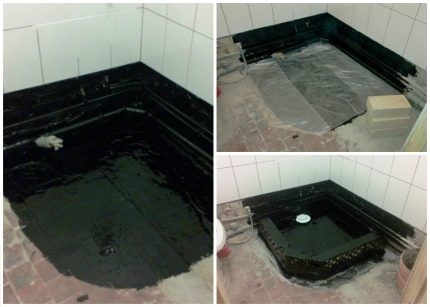
After drying, insulation is applied to the surface of the floor and wall, for example, bitumen mastic or liquid rubber. You can use roll materials, but the ideal option is polymerizable impregnation (water glass), which are used to isolate pools.
When solidified, they form a water-tight coating that will reliably protect against leaks.
Pipes should also be machined, leaving only valves and outlets open.
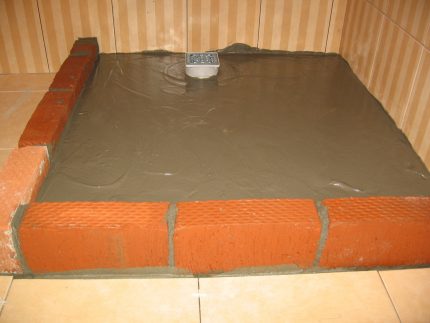
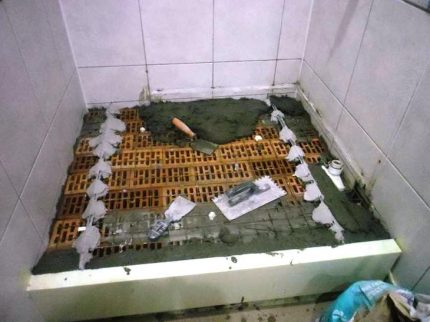
For the foundation, you can take a moisture-resistant red brick, which is laid on tile adhesive for masonry around the perimeter of the future booth, forming the sides. Then a ladder with a water trap or a standard siphon is installed and attached to the sewer pipe.
After that, the floor is laid with brick or poured with a self-leveling mixture (3-5 cm thick) using a reinforcing mesh.
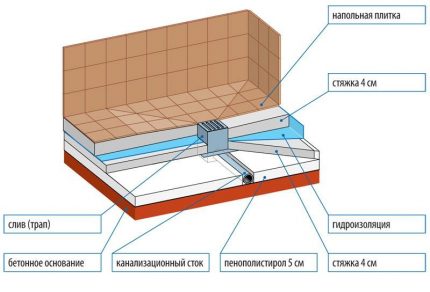
It remains to thoroughly wipe all joints and cracks with a solution of sand and cement, dry and coat again with waterproofing without affecting the siphon.
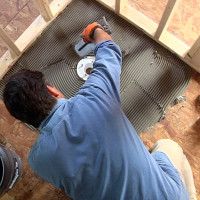
We have another article on our site in which we examined in more detail the process of independent making a pallet of tilesproviding material with step-by-step photos.
Step # 3 - assemble the frame and lay the tiles
If you want to arrange a full booth, and not a shower corner, you need to build partitions. Depending on the location, on one or two sides the cabin is already adjacent to the room wall.
The missing partitions can be made of moisture-proof plywood or drywall, followed by facing with the same tiles or mosaics. To do this, you need to build a frame from a metal profile, sheathe it with gypsum board, smooth the joints with putty and prime the surface.
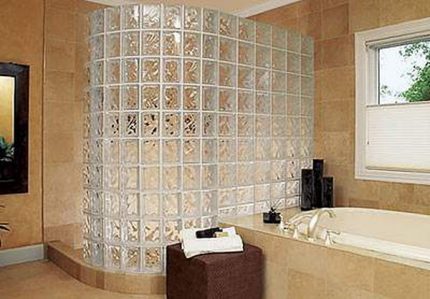
In order for the finish to fit nicely, it is important to smooth the surface of the frame, especially if you want to clad it with a mosaic that is fastidious to the quality of the base.
To do this, you can use plaster, followed by treatment with moisture-resistant impregnation or gypsum mixture.
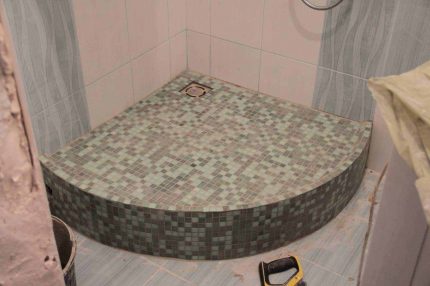
After leveling, attach the cladding to the tile adhesive and treat the joints with a moisture-proof grout. When the solution hardens, treat the joints of the tiles with the walls of the shower with sealant.
The better the laying will be done and the less the tile spacings, the longer the decorative coating will last in humid conditions.
Step # 4 - install the doors for the cabin
So that during hygiene procedures water is not sprayed throughout the bathroom, it is advisable to protect the shower from all sides. The easiest option is to arrange plastic screen or waterproof curtains.
But such a solution is more suitable for a shower in the country, but a room in an apartment is unlikely to decorate. Therefore, you can buy ready-made sliding, folding or swing doors or make them yourself from drywall or plywood.
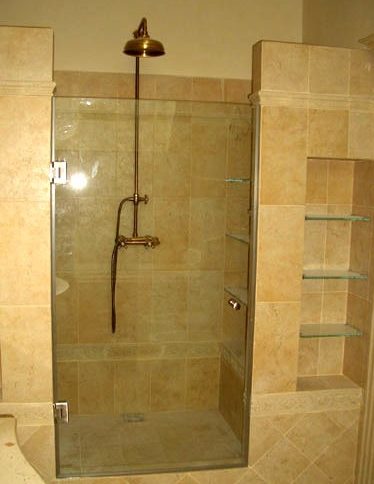
But still, the best option (both in design and moisture resistance level) for arranging partitions of a makeshift cabin is sliding polycarbonate or glass doors with a thickness of at least 6 mm.
You can cut and process the ends of the workpieces in a glass workshop, and install using ready-made canopies that are attached to both the ceiling and walls.
Building and Design Tips
To create your own unique design, you can combine various materials, not forgetting the practicality and safety of the future shower. For example, for the floor, it is desirable to choose a small embossed tile or mosaic - on a rough surface with frequent seams there is less chance of slipping.
As a finishing material for the pallet, you can use multi-colored pebbles or other decor, filling the finish layer with transparent sealant.
A few important nuances:
- To prevent the water in the pipes from building up, an important rule must be observed: the entrance to the sewer must always be below the floor level. The height of the pallet with a mounted siphon or drain ladder depends on this.
- Before installing the drainage system, pay attention to the capacity of the ladder: the larger it is, the faster the water will leave the pan. In some cases, for example, for a booth with a “rain shower” function, a standard ladder may not cope with the flow of water.
- It is best to lay a whole tile or mosaic sheets on a pallet. To do this, at the stage of marking the booth, you can make a dry layout. If you can not do without undercuts, install end caps on the saw cut.
Creating the design of your future booth, think about comfortable trifles.
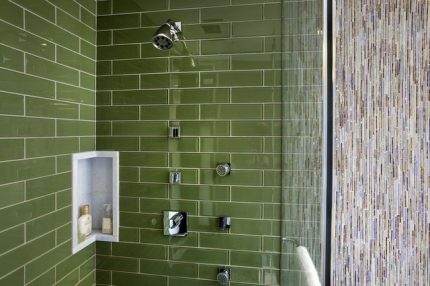
At the construction stage, it is easy to provide various shelves or niches to accommodate all kinds of shampoos, gels and other hygiene items, or to build a small chair, tiled.
Conclusions and useful video on the topic
For a more complete picture of the various nuances and stages of the work on arranging homemade booths, we suggest studying several videos with the advice of masters.
How to mount a linear drain for a shower enclosure:
How to make a booth with a tile tray and underfloor heating:
The initial stage of the construction of the pallet - calculation of height, rough screed:
Installation of a ladder and floor insulation in a shower booth:
How to make a floor screed for a pallet:
The construction of a home-made shower cabin with tile or mosaic facing allows you to realize the most creative design ideas. And if you perform all the work efficiently, not forgetting the slopes and waterproofing of the surfaces, such a shower will last much longer than plastic booths.
But if you are not confident in your construction skills, you can always connect professional builders or plumbers to the work.
Do you like tile showers and want to build one for yourself? If you have any questions or questions after reading our instructions, ask them in the box below.
Or do you want to supplement our material with practical recommendations for laying tiles, connecting to a water supply / sewage system? Maybe you just completed the construction of a shower stall? Write your comments and tips, add photos of your own made booth - your experience will inspire many newcomers to this business.

 DIY shower cabin: the order of construction and connection to communications
  Shower cabin with sauna: how to choose the right one + review of the best manufacturers
  Tile shower tray: detailed construction instructions
  Bath or shower - which is better? Comparative review
 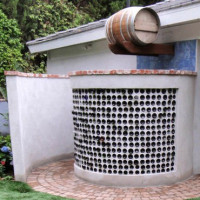 Do-it-yourself summer shower: step-by-step construction instructions
 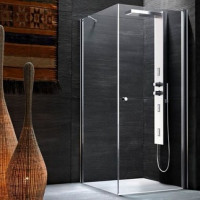 The device of a shower cabin without a pallet: detailed assembly instructions
  How much does it cost to connect gas to a private house: the price of organizing gas supply
  The best washing machines with dryer: model rating and customer tips
  What is the color temperature of light and the nuances of choosing the temperature of the lamps to suit your needs
  Replacement of a geyser in an apartment: replacement paperwork + basic norms and requirements
I made a shower cabin with a drain ladder in my apartment. The bathroom is rectangular, you had to choose between a bath and a washing machine, I chose a top-loading washing machine and a shower. I made a drain ladder myself, since there are skills, and there’s nothing complicated. All the same, he laid the sewer pipes on a new one, threw out the old cast iron, put the plastic ones on. He hung a curtain in the shower room, tiled the walls. It turned out not expensive, but beautiful and eternal, as they say seriously and for a long time. For small bathrooms, ideal. If anyone will do it, pay attention to the bias so that the water goes into the drain, rather than standing.
It seems to me that doing a shower without a side is not at all practical. I have a shower with a large tray, it clogs up often, although the mesh costs an extra.And then if water clogs over, the water will go through the top, because it will have nowhere to go. Interestingly, but there are no smells from the sewer in this situation?
Hello. If you choose a high-quality drain ladder with a siphon and a filtering grate as a water-tight mechanism, there will be no problems with blockages and odors. And besides, if the bias is observed, there are no problems either.