DIY shower cabin: the order of construction and connection to communications
A self-made shower stall will not only make your stay more comfortable, but will also save you money. Home-made boxing will save on the cost of attracting third-party and not always conscientious workers. Equally important is the moral satisfaction received from the results of one's labor. Is it true?
We will tell you how to build a shower cabin in a private house with your own hands, help in choosing the optimal plumbing device. We will show you how to develop a project and bring the idea of building a hygienic homemade product to life.
In the article we presented, the steps describe the process of building and arranging the soul. The technology for installing the cabin and its connection to the sewage system largely depends on the selected pallet modification.
The content of the article:
Design features of showers
Before proceeding directly to the description of the assembly process, we briefly consider the main types of showers available on the market, the criteria for their selection.
Variety of models: which is better to choose
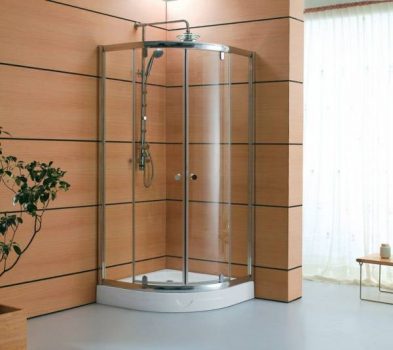
The shower enclosure is a simple construction made of a tray and curtains. Instead of the walls that are characteristic of a full-fledged shower, the walls of the room are used. There is no ceiling at the shower enclosure. Its main advantages are low cost and compactness.
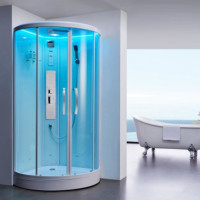
More sophisticated models have a roof and walls.Expensive multifunctional units have rich technical equipment: a Turkish bath or a sharko shower, a flavored steam mode, various types of hydromassage, additional functions, and various backlights.
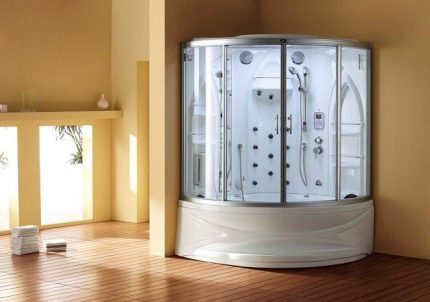
Management of such cabins is carried out by a complex electronic system. Before buying an expensive cabin equipped with a hydromassage function, you first need to find out the level of water pressure in the pipes.
Combined showers are a kind of compromise for those who like to take a bath with a hydromassage and have a full-fledged shower cabin at home. Combined models are distinguished by an original and stylish design - in the market they are often positioned as home spa centers.
Can choose a cabin model any shape that is most suitable for the size and layout of your bathroom: round, square, oval, polygonal, etc.
For a small bathroom, a corner cabin is best suited, which does not take up much space. Corner booths are very popular among owners of apartments of a typical layout, so manufacturers produce a large number of models in a variety of price categories.
Particular attention should be paid. the size of the shower, especially if there is an arrangement of a combined or compact bathroom.
Pallet as a necessary element of a shower cabin
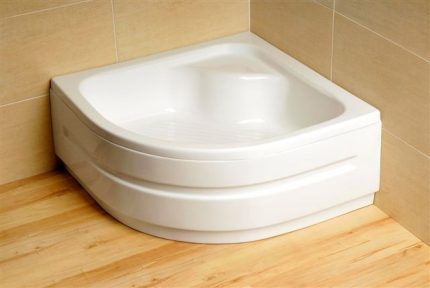
One of the main parts of any shower cabin is the tray. Its main purpose is to collect and remove dirty water through a drain system. Features of the installation of the pallet directly depend on its shape - angular, rectangular, round, oval.
Depending on the height of the sides, there are two types of pallets:
- flat;
- deep, reminiscent of a bath.
Flat models. Due to the low side height of such products, comfort when using a cabin is significantly increased, since there is no need to step over a high obstacle. However, such pallets require availability efficient drainage system water, because they can not accommodate a large amount of liquid.
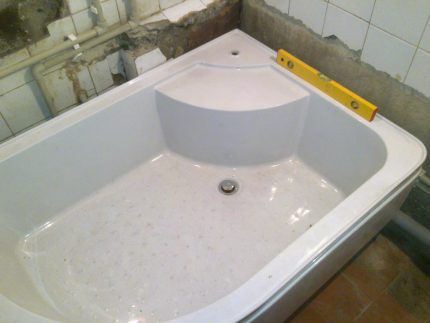
Bath tray. Unlike the previous model, this sump is deep enough that you don’t have to worry about the speed of water drainage. Some models include their use as a small bath.
When buying a shower, first of all, you need to pay attention not to the number of functions and appearance. An interesting solution is shower cabin with sauna.
It is to the pallet of the product that increased demands are made. A high-quality pallet must withstand heavy loads, and with the maximum allowable weight of the user, do not crack, bend or deform.
Shower trays are made from different materials.
Most popular models:
- earthenware;
- made of artificial stone;
- enameled;
- acrylic.
Faience. Everyone knows the material used in the manufacture of toilets. The earthenware tray is completely hygienic, easy to clean and can withstand heavy weight.
Fake diamond - reliable and durable material, beautiful and hygienic, but expensive.
Enameled Pallets for shower stalls are cheap and durable. Of the shortcomings, it should be noted only the fragility of the enamel. However, the enamel coating can be easily restored or replaced with acrylic. An additional minus is the rumble of falling water on the metal surface of the pallet.
Acrylic Pallets are most popular.The acrylic surface does not absorb dirt at all, instantly warms up, does not darken over time.
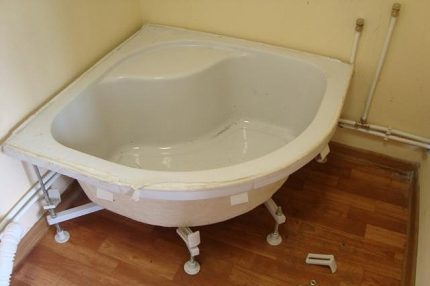
The disadvantage of acrylic pallets is the inconvenience in installation, since the installation of a special frame is required. As such, an aluminum construction with adjusting screws is used, with which you can choose the desired pallet height.
A comparative overview of different types of shower trays is presented in this article.
What are the curtains?
The second most important element is the curtains of the cabin, which can be swinging and sliding. Swing doors require more space. They are single-leaf and bivalve.
As for the sliding shutters, they have from two to six leaves, which are held by a rubber magnetic tape. The curtains move on casters hidden inside the shower enclosure frame. Quality curtains should open and close almost silently.
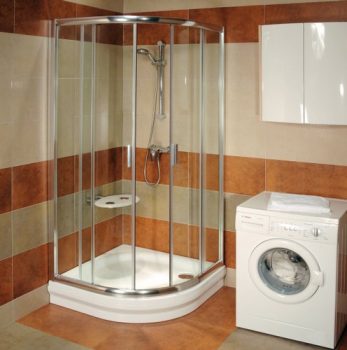
Shower curtains are made of polystyrene or high-quality tempered glass. Polystyrene products are quite cheap and light in weight, however, they quickly lose transparency, they remain stained.
Glass curtains are expensive high-quality products.
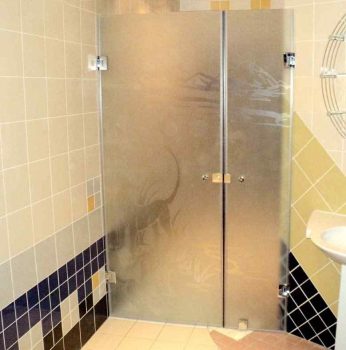
Water and dirt are very easily washed off the surface of the glass - the material does not absorb anything and does not fade over the years. You can also buy a booth with curtains made of classic transparent, tinted, colored and roughened glass.
Shower project development
With the seeming technical complexity, the independent construction of a shower cabin, in fact, is quite a feasible procedure for a simple layman, especially for a working host.
As the construction of any capital construction begins with the development of the project, so before starting work on equipping the shower in a private house with your own hands, you need to think about it.
It is advisable to indicate the main plans and schemes on paper, for example:
- plan of placement of a shower cabin in the room allocated for this;
- schemes for connecting to power supply networks, water supply and sewerage;
- procedure for equipping a shower room with a ventilation system.
The preparation of the room for the shower and the direct installation of the cabin in it is carried out in several stages.
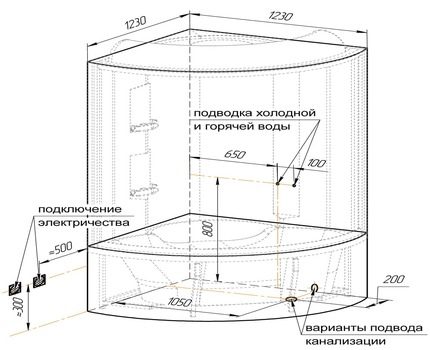
It is necessary to calculate and plot not only the dimensions of the cab itself, but also all the distances to the points of connection to the utility networks, which will avoid miscalculations and save materials
Installation and connection of the finished acrylic booth
How to assemble a shower cabin according to all the rules without critical errors that will affect the functionality of the design? This is quite possible and not even very difficult if you strictly follow the instructions and follow the installation rules of this plumbing product.
It is difficult to assemble a shower cabin from scratch if you have to work in a limited space, therefore, all manipulations must be carried out slowly, in several stages, with additional assembly and adjustment of the finished structure.
This approach allows you to do with only one pair of hands, while professionals almost always work together to save time.
The home master, who decided to independently assemble and connect the shower tray, has to perform a number of standard actions:
Preparing for quality assembly
A complete set of accessories is required. Before buying, you should carefully check the availability of all parts and their quality. If defects, damage and size mismatch are found, it is necessary to require the replacement of the part or the refusal to purchase the selected model.
Also, for the assembly and installation of a shower cabin with your own hands, you need a prepared place.
Set of tools:
- a drill, and preferably a cordless screwdriver;
- drill bits for metal (6 and 3 mm), bits for self-tapping screws;
- construction level (to adjust the pallet relative to the floor);
- curly and flat screwdrivers;
- adjustable wrench or set of wrenches of the required sizes;
- fum tape or tow;
- sealant for sealing joints.
If the kit does not have hoses for connecting hot and cold water, you should also worry about them in advance.
Cabin installation: work procedure
At the preparatory stage of work, a working platform is chosen, where, in fact, the cabin will be assembled. It should be noted that many models are large, so it is recommended to assemble individual units in another room adjacent to the bathroom.
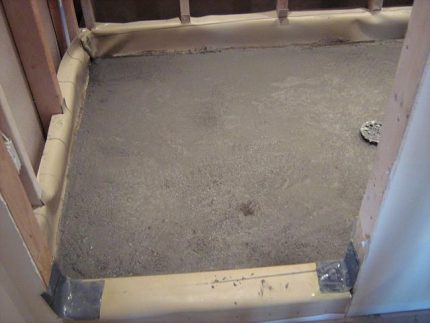
All tools should be located so that they can be easily reached during work. You can assemble the booth yourself, but it is still highly recommended that you do it together, since at certain stages of assembly, an exact matching of some parts is required.
The walls and floor adjacent to the booth should be flat, without any differences. Start with drain installations. For pallets made of acrylic, the joint is treated with a transparent sealant.
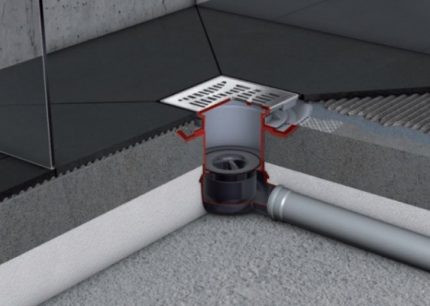
The next step is to install the structure from the steel profile to the bottom. On this frame, studs for legs will be installed a little later.
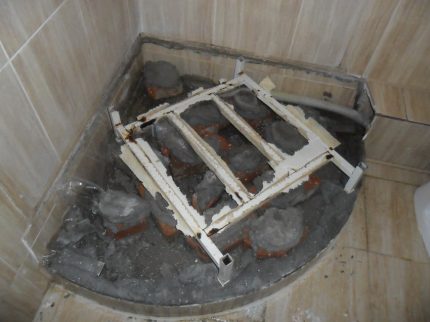
Next is the installation of the studs. We thread them through the holes provided for this in the frame, twist in the grooves of the pallet as tightly as possible.
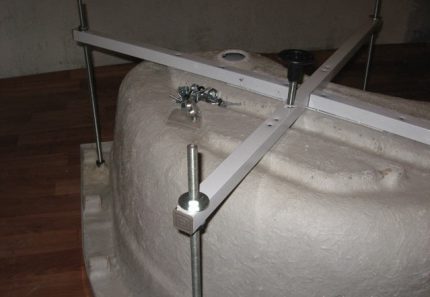
The short part of the frame has a special rigidly welded nut, which is needed for mounting the central leg. After the leg is screwed in, the nut is installed, after it the counter washer, then another nut.
We install all the other legs on the studs, after which the pallet can be moved to the installation site and set it evenly using the level. For deep bath pallets, a more or less even horizontal will suffice, but small pallets must be set strictly according to the instructions, adhering to the specified inclination angles.
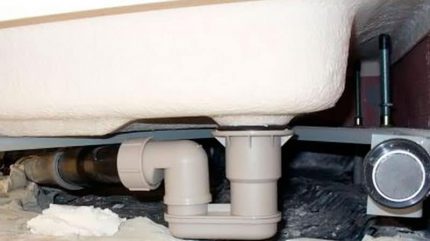
When connecting a ready-made shower tray to the sewer:
- connect a shower trap to the drain hole;
- dock the corrugated pipe with a siphon;
- connect the second end of the corrugation with the hole of the sewer drain and fix it;
- treat all joints with waterproof sealant.
All connections are threaded or soldered. A siphon is necessarily used to drain sewage, since it creates a water lock that prevents odors from entering the shower room.
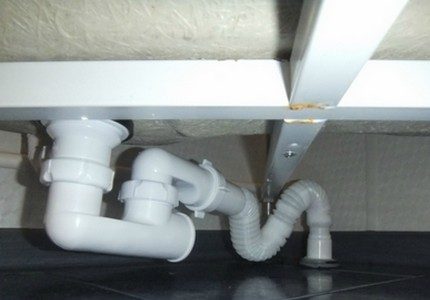
Pay attention to the gap between the bottom of the product and the floor - it should be enough for laying and possible repair of communications.
Now you can start assembling the walls, curtains and installing all the rest of the equipment, in particular - to assembling the frame. To prevent corrosion, frames are most often made of aluminum. Each side of the frame, depending on the type of cab, is assembled separately.
It is recommended that all joints from the outside be treated with an acrylic-based sealant. For internal joints, it is better to use a colorless sanitary sealant. Almost all fasteners in low-cost models are made using metal screws.
For greater strength and durability of the joints, it is recommended to replace the self-tapping screws with M5 bolts, nuts and washers. All fasteners do not need to be clamped immediately to the stop - this is done only after installation.
The fixture is finally fixed after all the elements of the shower cabin are checked for functionality. After that, you can seal all the seams, joints and proceed with the assembly of frame profiles.
Features of installation of different purchased models
Each type of design has its own characteristics, which should be taken into account during installation.
The nuances of installing open booths
Since the design of open-type cabs is quite simple and consists of one aluminum frame, assembly usually does not cause much difficulty. Having assembled the aluminum frame, they immediately begin to mount it on a pallet.
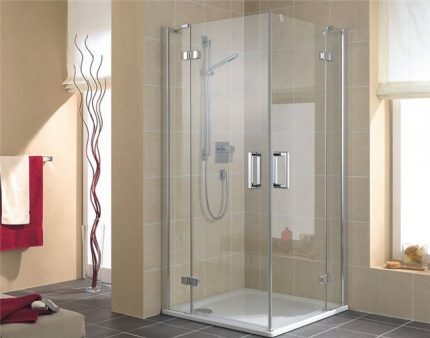
The end face of the aluminum frame is attached to the wing of the transition profile with fasteners or special latches. All seams at the joints are treated with sealant. As soon as the frame is securely attached to the wall, deaf transparent elements are mounted.
The kit must include special mounting clips that are needed to fix the deaf glass in the frame of the shower cabin.
The glass is fixed by pressing it tightly to the frame and fixing with clips, but not too tight so that it does not crack. In open cabin models, sliding doors are most often provided. There are special rollers on the door frame. They are installed in the lower and upper guide grooves.
Installation specifics glass on the booth depends on the type of door construction. In order for the flaps to fit snugly together, a magnetic plastic overlay is installed on their outer ends.
Assembly of enclosed structures
This option is almost identical to the method described above, but with some slight differences.
The walls of the shower cubicle are assembled separately and attached to the pallet in an already finished, assembled form. First of all, the rear walls of the cab are mounted, in which the nozzles for hydromassage are located, and only after that the front part is installed.
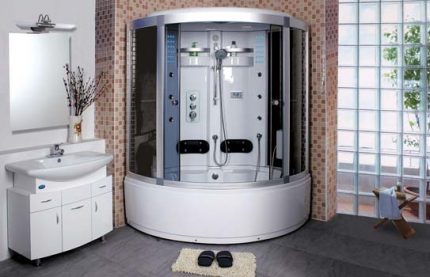
During the installation, they adhere to safety regulations and connect the flexible hoses of the cabin with the hot and cold water supply system as efficiently as possible.
In closed models, the deaf parts of the front panel are installed differently. Most often, additional parts from an aluminum profile are used for this.
For installation, the sheet is applied to the edge of the frame, the location of the fastening of the reinforcing profile, which simultaneously plays the role of a stiffener for the entire structure, is noted.
Then, with a drill or screwdriver, holes are made for bolts or self-tapping screws, the profile is pressed tightly to the glass and fixed to the frame. All seams and joints are sealed, the elements of the shower stall are checked for functionality, and then a decorative panel (apron) is installed on the pallet.
Remember that you need to focus on the instructions and the assembly scheme for the shower.
The specifics of installing a corner cabin
Corner - the most common options for showers, as they take up little space and are inexpensive.
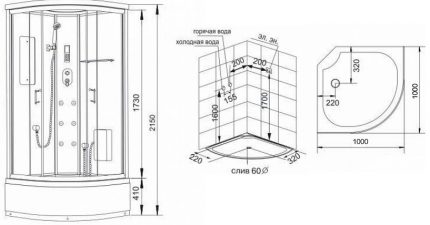
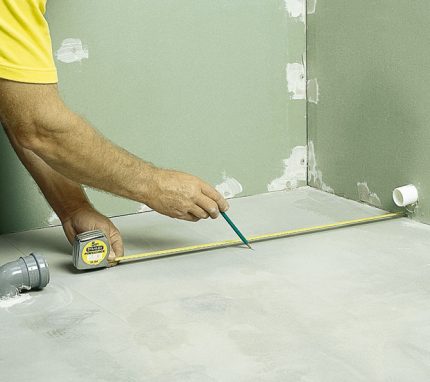
Before starting installation, be sure to ensure that the distance between the walls at different heights is the same. The frame of the corner cabin is very rigid, and all the irregularities of the wall after installation will be visible under the frame, in addition, water will enter the room through the cracks.
If you try to tighten the frame to the wall, it can become deformed, after which it will be impossible to install doors and deaf parts of the cabin.
Technology mounting reinforced models of metal requires a special approach and the creation of a reliable foundation.
Furnishing a booth with a homemade pallet
If you do not take into account all the nuances of the construction of homemade pallets, depending on the chosen version of the cab design, then on the example of a pallet made of concrete or brick, as the most popular materials, we will consider step-by-step instructions.
Stage # 1 - preparatory work
The very first step is preparation. It will look like this:
- Thoroughly clean the shower floor and adjacent walls.
- Waterproof the base of the pallet.
- Arrange a primary cement screed, if it was not.
- Primer and process the base of the future cabhighly adhesive waterproofing composition, for example, bitumen mastic.
- Install a shower drain in a chosen place, strictly according to level, and, in accordance with the instructions, connect it to the sewer.
- Mount the formwork.
- Pour with concrete or lay out of the brick the inside of the shower tray and sides.
After all the preparatory work has been completed, calculations have been made, all the necessary components have been selected and purchased, you can begin the basic work on its construction.
Stage # 2 - water supply
With the right selection of all materials and the availability of the necessary tools, connecting a shower to the water supply and sewage networks will not be difficult. As a rule, in a private house, hot water is supplied to the shower from a gas or electric boiler. For this, tees or fittings with a threaded connection are used.
The main nuances of water supply:
- The distance between the pipes of hot and cold water, to exclude their temperature influence on each other, should be at least 10-15 cm.
- The diameter of the pipes is selected depending on the pressure of the water, optimal is 27-30 mm.
Flexible hoses are used to supply water directly to the shower panel or faucet. All connections must be made using gaskets andFUMtape.
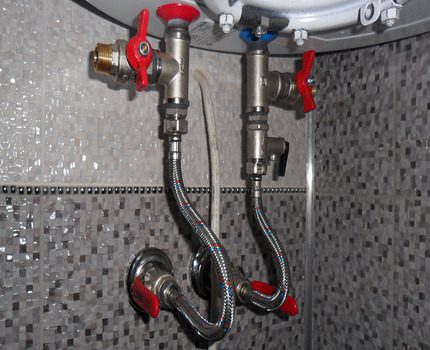
Step-by-step instructions for connecting to a water supply:
- shut off the water supply on the main pipelines;
- insert gaskets into the flexible connections on the side of the hot and cold water pipes;
- Connect the hoses to the piping without much effort.
Shut-off valves must be installed on all connections to plumbing fixtures.
Stage # 3 - providing waterproofing
A very important point in the device of the pallet is the primary waterproofing. It is carried out before the screed is installed, by covering with a special film or roofing material the joints of the floor with the walls, with the establishment of waterproofing material on them.
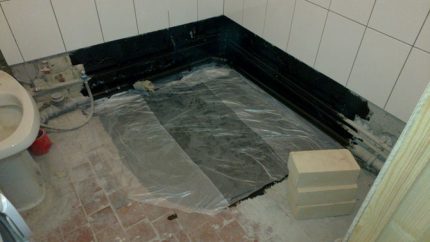
To plan further work, it is necessary to take into account that the complete drying of the concrete layer from which the base of the pallet is built, especially if this layer is thick enough, takes place in at least a week.
After the cement has dried, finishing waterproofing is performed before the start of the facing work. The surfaces and joints of the pallet are coated with water-repellent mastic, and a special waterproofing tape is laid around the entire perimeter.
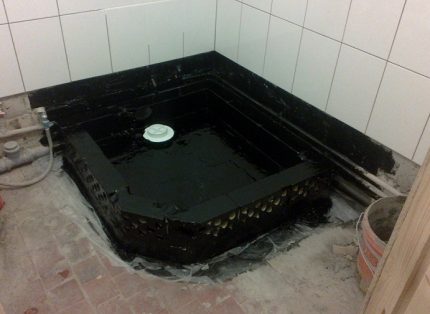
Stage # 4 - pallet construction
As an alternative to the classic version of the booth with a finished tray, you can build a shower completely with your own hands, starting with the device of its foundation.
For this purpose, you can use masonry made of bricks, concrete blocks or cement screed. Water drainage in such pallets is carried out using shower drains, the installation features of which will be discussed below.
Cement-lime compounds are not suitable for use. Concrete is prepared from a mixture of cement and pure sand, or ready-made mixtures are used, but, necessarily, labeled as waterproof.
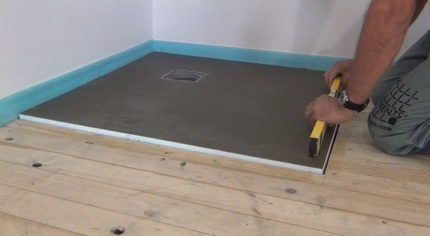
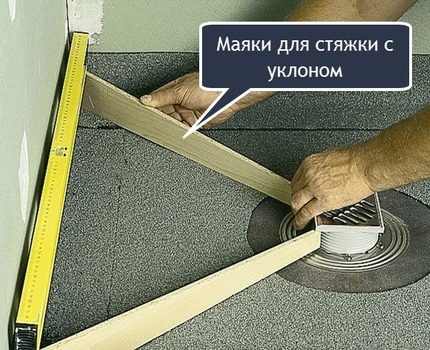
When a pallet is installed, a drain is completely constructed from concrete, and then, already with the help of formwork, the bulk floor rises to the level of the ladder.
Not only the slope must be sustained to the ladder, but also a reserve for the thickness of the facing tile must be provided. The grate of the ladder should be a few millimeters below the floor.
Stage # 5 - frame construction and decoration
The most common and optimal choice of place for the construction of a shower cabin is in the corner of the room. With this arrangement, not only space is saved, but also there is no need to install two walls that replace the walls of the room itself.
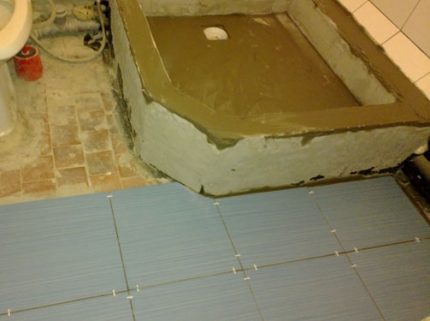
The arranged construction of the pallet and walls are revetted. The choice of the method of finishing the shower cabin should be approached with particular responsibility, since this room is with a high degree of humidity and is subject to constant exposure to water and steam.
Tile Features
As a rule, for facing walls and other elements of the shower box, ceramic tiles are used that harmoniously fit into the overall design of the shower cabin and the room itself.
Choosing an option shower tiles, it is necessary to take into account the fragility of this material under strong mechanical stresses. If it is necessary to fasten shelves and other objects using the wall plugs to the walls of the bathroom, the holes in the tile or at its joints should be drilled very carefully.
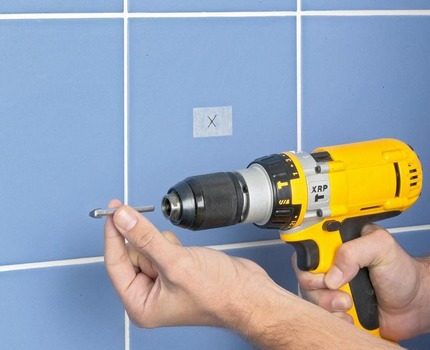
At the same time, the tile has many undeniable advantages over other materials and is a leader in use in premises of this type.
The advantages of tiles include:
- tightness;
- a significant service life, which, with the right laying technology, is 20 - 25 years;
- simplicity in leaving;
- relatively affordable price;
- resistance to temperature influences;
- the possibility of facing not only walls, but also the tray, sides and floor in the shower room.
We should not forget that the wet tile is quite slippery, therefore, in order not to get injured, it is advisable to use a rubber mat on the floor in the shower cabin, which can be easily selected both in size and color.
A comb spatula is used to apply tile adhesive. It is recommended to start laying tiles from the floor. Depending on the version of the tile laid on the floor, the walls are lined. Proceed to lay the tiles on the walls from the central corner, towards the edges.
Since the size of the shower cabin is not too large, you can pre-plan the option of laying tiles on the surface of the floor or wall and make markings.The purpose of the marking is to ensure that at the corners there is no need to cut the tile, part of which will be less than half of the whole plate.
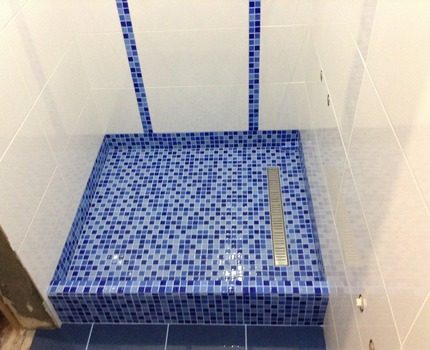
Paneling Rules
Use plastic orsiding - More budget version of the walls of the cabin. If you have the necessary skills in installing panels of these materials, high-quality tightness in the room will be achieved and the attractive appearance of the shower room will be preserved for a long time.
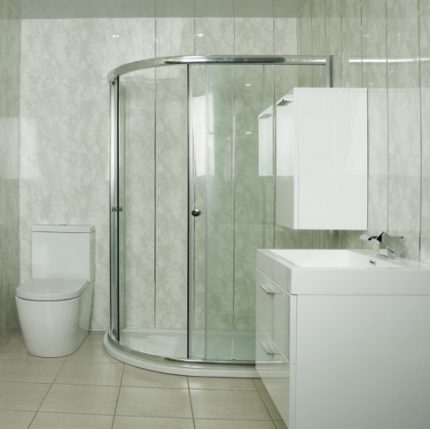
For mounting the panels on the surface to be trimmed, a vertical or horizontal crate with a pitch of 50-60 cm is attached. Plastic panels andsiding You can also close the ceiling. The material does not require much care.
Latex paint
The presence of modern finishing materials does not push into the background the old proven method - painting the walls. This is the simplest and least expensive, both in time and financially, option for finishing showers.
The use of latex paint does not at all imply that the waterproofing qualities and aesthetics of the room will be brought at the expense of cost advantage.
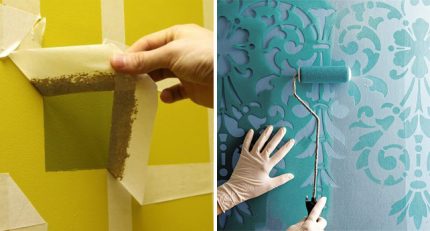
The main guarantee of the absence of the need for a quick re-repair of the shower room after its painting is a thorough surface preparation.
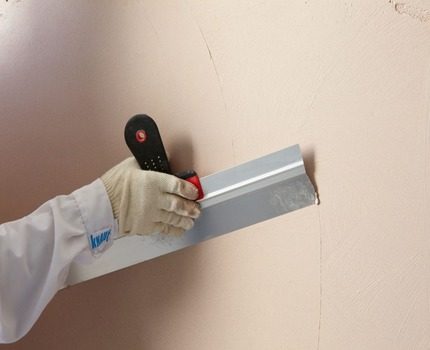
In addition to the materials used for decorating showers, there are a number of other, relatively expensive and technically difficult to work with. For example, marble, granite or decorative stone. The choice remains with the owner of the house.
Stage # 6 - cabin fencing device
Cabin fencing, as a rule, is made after connecting the pallet to the sewer.
The design of a home-made shower can have several options:
- angular square or rectangular;
- in the form of faces;
- with a semicircular connection of 2 walls.
The methods that are used when installing the walls of the cab with a finished pallet and a self-constructed pallet are almost the same.
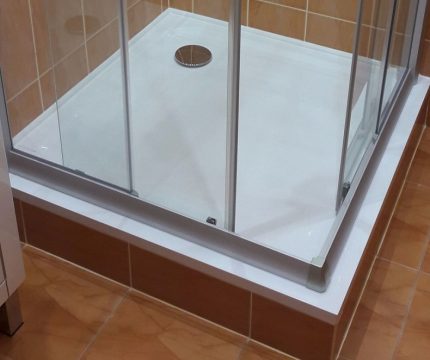
Regardless of the type of cab selected, the doors to it are installed swinging or sliding type.
The front of the cab can be equipped with additional side walls, usually made of the same material as the sash. These walls are mounted using a vertical profile. Special gaskets are attached to the wings, which are recommended to be treated with silicone.
Installation of swing doors
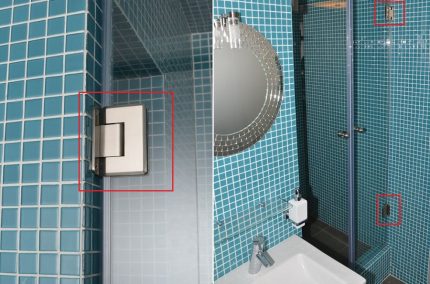
The process of hanging swing doors in a self-made shower cabin is not very difficult. For this, commercially available furniture hinges are used. At the joints are installed sealing elements.
Installing Sliding Sashes
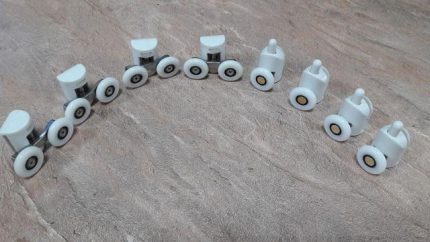
For sliding sliding doors, frames or niches are mounted in the base and upper part of the cab along which they will move on casters. Such a door is hung on the profile and mounted on casters.
Stage # 7 - connecting a makeshift pallet
At the first stage of the device of a makeshift pallet, a drain system is mounted, in which not familiarhydroboxes, and shower drains. There are two types of ladders: slotted and square-shaped.
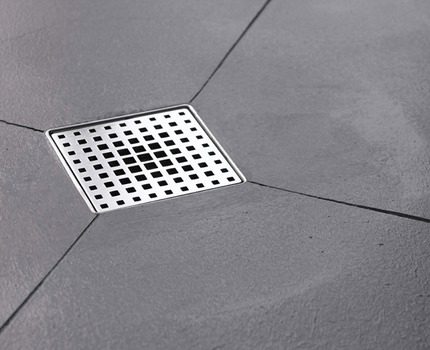
When selecting a ladder, in order to exclude the effect of a “pool of dirty water” in the pallet, it is necessary to compare its throughput rate with the performance of shower heads. A drainage capacity of 30 to 48 l / min is considered good.
The place to install the slit ladder is chosen near the wall of the cabin. The throughput of this design will be higher. It is necessary to create a slope to the ladder of any kind at a rate of at least 3 mm / m. All water discharge pipes are mounted on the floor.
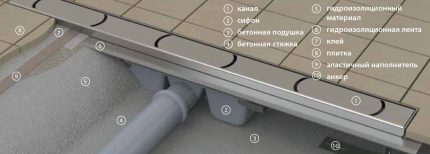
Another way to drain for a makeshift pallet is through a drainage channel, which can be located across the entire width of the shower, which will ensure uniform discharge of water into the sewer. Installation and connection of drains and drainage systems to the sewage system is carried out using the equipment included in their kit.
With the technology of constructing a shower without a pallet next articlefor step-by-step installation instructions.
Conclusions and useful video on the topic
You can learn more about the assembly of shower stalls by watching the following videos.
Video # 1. How to build a shower tray from concrete with your own hands will be discussed in the following video:
Video # 2. Another option for the independent arrangement of a shower tray:
Video # 3. Available and fast about all stages of assembly of an acrylic shower tray:
If all the recommendations and instructions are followed, then a do-it-yourself shower cabin will not bring a single drop of disappointment. It will not only equip life and create additional comfort, but also harmoniously fit into the interior of any home, give a modern and aesthetic appearance to the home.
Want to talk about how to build a shower cabin with your own hands? Does your arsenal have technological subtleties that are worth sharing with site visitors? Please write comments in the block below, post photos with the device process, ask questions.

 Tile shower cubicle: step-by-step construction instructions
  Shower cabin with sauna: how to choose the right one + review of the best manufacturers
  Bath or shower - which is better? Comparative review
  Repair of a shower cabin: how to repair popular damage to a shower cabin with your own hands
  Wooden showers for summer cottages: DIY summer shower construction
  Glass for a shower cabin: how to choose and install with your own hands
  How much does it cost to connect gas to a private house: the price of organizing gas supply
  The best washing machines with dryer: model rating and customer tips
  What is the color temperature of light and the nuances of choosing the temperature of the lamps to suit your needs
  Replacement of a geyser in an apartment: replacement paperwork + basic norms and requirements
Almost completely made a shower cabin with his own hands in the house. The only thing is that I am not a plumber, and a specialist to develop and install a connection to the water supply with sewage. Materials purchased himself after the preparation of the project. I made tiles on the floor, but I do not recommend it to others. It is slippery, I had to buy a special mat, which must be washed and dried at times.
I myself will not undertake to lay pipes.I hired people for this, I did the rest myself. I did not bother with the tiles, it is difficult, expensive and not very convenient. He managed with panels, they are easier to put yourself, and more profitable for money.
He himself installed the plumbing, designed it all with his own hands. It turned out much cheaper than if I hired, because now the work costs as much as the materials.
A few additions, based on experience: 1) If you want, you can find an expensive European booth with metal parts, but then you will not run around the shops and look for videos or something else? 2) Do not trust silicone, even the most expensive, often check the condition of the missed joints. 3) Even taking into account point 2 when installing in an apartment, it is advisable to make a multi-layer waterproofing of the floor, you will have a chance not to get to know the neighbors from below.
Yes, Dmitry, we had this situation, several times flooded our neighbors from below. Very unpleasant memories, our neighbors are scandalous. There was no good waterproofing, and the pan was shallow and leaking. I had to dismantle the whole shower and establish a new, deep pan. Now the order. And it’s even better now, the wife uses this tray as a small bath, she likes it.
They put a European shower. In the kit were all the necessary details for installation of pretty good quality. Sealant bought additionally
German manufacturer, I don’t remember the name now. They installed themselves with godfather, in one day they did everything. Basically, in this article, there are all the necessary tips for installing a shower. But it is better to call the plumbing, only normal.