How to update an old cast-iron bath: a review of restoration and repair work
Cast-iron bathtubs seem “eternal” to many. In a sense, this is indeed so. These products are durable, not susceptible to corrosion and can be used for more than a dozen years. The “weak link” is only enamel, which even with proper care will thin out over time.
Zealous owners, understanding that only their appearance has deteriorated, are looking for ways to update an old cast-iron bath. Consider a few of them.
The content of the article:
Should I restore the old bath?
We usually send our old product to the landfill without regret. However, the cast-iron bathtub, which has lost its attractive appearance, may well be operated on. But replacing it may seem irrational.
The heavy weight of the equipment makes it very difficult to dismantle and remove it from the apartment, especially if it is located above the first floor. In addition, if a tile has been laid around the bathtub or made ceramic screen, all this will have to be taken apart.
The owner understands that the simple removal of the device is not enough; repairs will be required. Big or small - it all depends on the degree of impending destruction. In addition, the cost of buying new equipment, its transportation and installation.
Thus, serious financial losses cannot be avoided. You must understand that all this is very troublesome and will require loss of time.
Perhaps it’s worth saving your nerves and money, taking up the restoration of the old bath. There are three fundamentally different methods for restoring plumbing equipment: installation of an acrylic liner, cold enameling, and a method of filling or “filling bath”. Each of them has advantages and disadvantages. Let us consider in more detail all restoration methods.
Installing an acrylic liner
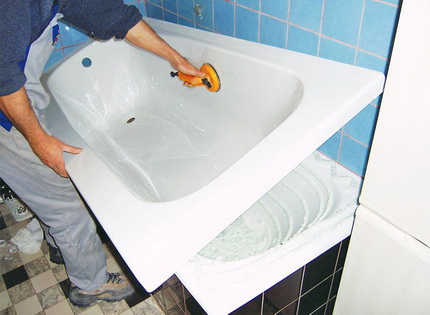
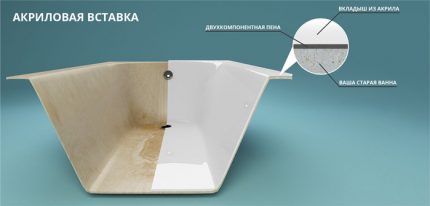
This method involves mounting an acrylic liner in a cast iron bath. As a result, the owner receives a virtually new acrylic bowl, the frame for which is the old cast-iron equipment. The liner is tightly inserted into the bath and is fixed with a special adhesive mass. After this, a new strapping is installed and the device can be operated.
There are many advantages to this method:
- The bathtub with an insert successfully combines the positive properties of cast-iron and acrylic equipment.
- Acrylic has a low thermal conductivity, as a result of which warm water cools for a very long time.
- The liner material is sufficiently resistant to mechanical damage, minor scratches that appear are easily removed by polishing.
- Acrylic is easy to clean, does not absorb rust and dirt, does not darken. For cleaning, special means or soap solutions are used.
- The service life of the liner is about 15 years.
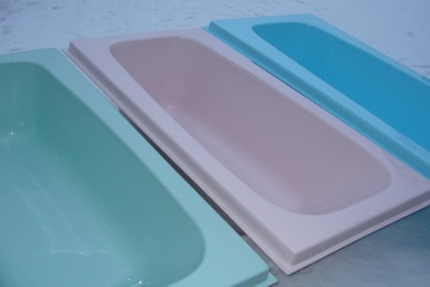
The disadvantages of this method include a small assortment of industrial liners. There are only four types of them: for bowls 170 and 150 cm long, ellipsoid and rectangular.
In addition, in some cases, for example, if the sides of the bathtub are laid with ceramic tiles, additional work may be necessary.
How to choose an acrylic liner?
Products are manufactured by stamping and molding a heated polymer mass. This is a high-tech and quite complex process. Even small deviations from the technology or the use of insufficiently high-quality raw materials does not for the better affect the operational characteristics of the liner.
Therefore, when choosing a product, special attention should be paid to several points.
The first is the color of acrylic. High quality material will have unnatural bright white and shiny. Plastic made from recycled materials has a grayish tone. Over time, it may turn yellow.
The liner thickness should be at least 4-5 mm. To correctly determine it, you need to look under the rim on the edge of the bowl. Here, the plastic layer remains unchanged, while in other places it can be slightly deformed.
It is also important to evaluate the flexibility and strength of the bowl. Another important point is the selection of the product exactly in size.Best of all, a professional meter, who can be invited to your home, will cope with this task.
Alternatively, you can take a picture of the casting mark of your bathtub and send it to the manufacturer of inserts, which, based on this information, will be able to select the product as accurately as possible.
Preparing the bowl for the upgrade
The question of how to correctly restore an old cast-iron bath should begin with clarifying the methods of preparing it for restoration. It is necessary to start by removing contaminants that prevent adhesion from the surface.
To do this, thoroughly wash the bowl from the remnants of a soap solution, remove lime deposits. After that with a large emery cloth, carefully clean the entire surface of the container. Specialists recommend paying special attention to the edges of technological holes. Here it is advisable to remove all the enamel at a distance of 3.5-5 cm from the edges.
Traces of rust in these areas should not remain. Around the perimeter of the bath you need to fill the distillation rail. This is necessary so that the sides of the liner get tight and do not bend when using equipment. The thickness of the slats is selected individually.
It must be measured with the liner installed for fitting. On average, the height of the element is about 20 mm.
Perhaps some manipulations will have to be done with an acrylic liner. If ceramic tiles are let on the sides of the cast-iron bathtub, it must be disassembled. But it can be done differently. The acrylic liner should be trimmed. Even if the trimmed edge is not aesthetically pleasing enough, it will be covered with a drainage baseboard. But the labor costs for installation will be incomparably lower.
Typically, the liner is cut with a small gap, about 0.3-0.5 cm from the wall. This is necessary so that the side bent when using the bath does not emit unpleasant scraping sounds. To determine the size of the undercut, you need to find out how much the edge of the liner is longer than the side of the bath.
Trimming is carried out by an amount equal to the size of the side walled into the tile plus half the difference between the width of the liner and the bath.
It is necessary to take into account the curvature of the walls, which can significantly affect the size of the cutout. Therefore, the craftsmen recommend taking measurements especially carefully and cutting with a large allowance, with which you can adjust the liner to the desired size. To do this, you will need to periodically put the part in place, and level the allowance with any abrasive tool.
The next stage is the implementation of technological holes in the liner. It must be put in place and scratched with an awl, that is, mark the location of the drain and overflow on the bowl. They must exactly match the holes in the cast iron bowl.
It remains to determine the diameters of future holes using a compass and drill them using a crown of the desired size. Cut edges are carefully processed with abrasive materials.
Insert and seal the liner
Before mounting the acrylic product, the bath bowl must be covered with an adhesive mass. In this quality, it is recommended to use special mastic, but you can take ordinary mounting foam.
The latter will not only fix the liner in place, but will also become an additional insulation for the walls and bottom. When using foam, you need to remember that during the polymerization process it expands.
This can lead to unwanted swelling on the surface of the liner. If you use mastics, this certainly will not happen. In addition to these materials, silicone can also be used to seal overflow and drain.
You need to understand that this elastomer is a good sealant, but not the best glue. Therefore, in the case of its use, a sufficiently large layer of silicone must be applied.
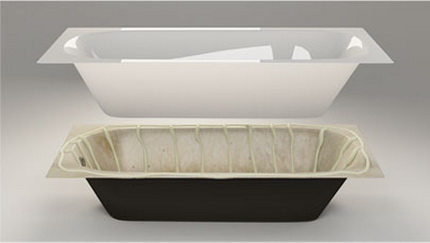
So much so that it forms a circle with a diameter of at least 15 cm around the holes. Otherwise, when dynamic loads appear, the material will detach, water will leak under the liner, which will lead to the destruction of the foam and the formation of a focus of bacterial infection.
Two-component mastics and elastic high-strength adhesives such as AT-Metal or SikaBond are among the best compositions for gluing the liner.
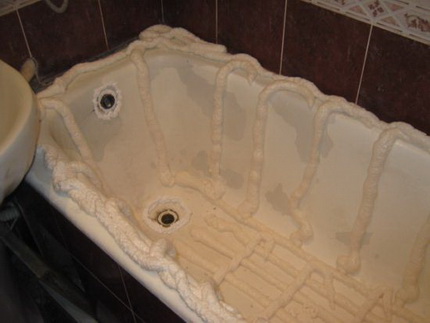
We consider in detail the option with mounting foam. We start by applying sealant. It is applied with a wide ring around the technological holes, and departing from them by 15-20 cm. Immediately after this, foam is activated. The composition is laid on the bowl in strips from a distance of not more than 25 cm.
First, the foam is laid on the bottom, then on the walls. At the end of the work, the foam should lie with a layer at least 2.5 cm high.
There should not be any differences in height and noticeable depressions. On average, it takes a kilogram cylinder of foam. Masters advise taking two containers of 750 g each, this amount of material is definitely enough for the entire bath. At the same time, it will be possible to obtain the optimal density of the insert and the space under the sides of the product will be well sealed. Immediately after the foam is applied to the cast-iron bath, an insert is installed in it.
It must be properly pressed. To do this, fabric is laid on the bottom of the bowl, on top of which a person sits, who, with his weight, presses the plastic structure to the metal. Press the sides and walls with an effort, and then remove the excess foam that protrudes. The siphon should be placed in the bath as soon as possible. It should be noted that the length of the tightening screw taken from the old equipment will not be enough.
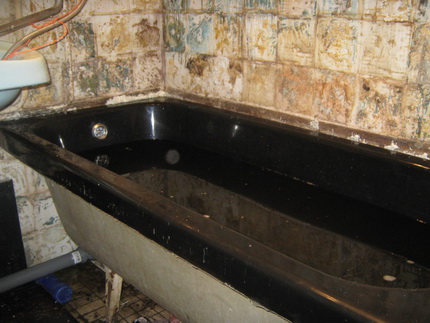
Therefore, you will have to purchase a new, longer fixture. Then, a drain is installed in its place and immediately after that cold water is drawn into the bathtub to the edges. So the equipment should stand for at least 24 hours. It should be noted that the sides of the liner can slightly raise, so after 40-45 minutes. after the water has been drawn into the bath, they must be gently pressed down with a flat rail.
If you settled on this type of restoration, we recommend reading the article, where we talked in detail about how to properly install acrylic liner.
Cold bath enamel
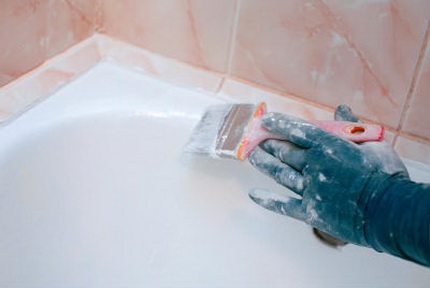
Another way to restore a cast-iron bathtub is cold enameling. This is a fairly simple process, which consists in applying a special composition to the bowl, which, after hardening, turns into an enamel coating.
The main advantage of the method is its cheapness compared to other restoration methods. In addition, you can cover the bowl with such enamel an unlimited number of times.
The disadvantages include prolonged drying of the composition. For complete drying, it will take about 4 days. In addition, cold-applied enamel is less durable than the one that covers the bowls in the factory.
Its service life is a maximum of five years, after which the restoration procedure will have to be repeated. Compared to acrylic, such enamel retains heat worse, so the water in the bath will cool faster.

How to choose the right enamel?
The properties and durability of the future enamel coating directly depend on the quality of the composition.
Experts recommend choosing the following points when choosing:
- Enamel coating method. On sale you can find solutions designed for application by roller, brush or spray. The latter option is especially good because it involves uniform application.
- Hardener hue. The composition for cold enameling is a two, rarely three component component. One of the components is hardener. If it is dark yellow, brown or dark red on the finished coating, an undesirable shade may appear.
- Enamel tone. If desired, the enamel composition can be painted in any color. For this, special tinting pastes are intended, which can be sold complete with enamel or separately. Masters advise you to choose the shade of the coating directly in the room where the equipment is installed.
- Complete set of restoration set. The fuller it is, the better. Together with enamel, tinting pastes and special products for preparing the bathtub for restoration can be sold.
Practice shows that for applying with a roller or brush, thick enough two-component compositions, such as Epoxin 51C and Epoxin 51, are best suited. They fill small base defects fairly well.
For work with a spray gun, the Finnish Reaflex 50 or Rust-Oleum Specialty is well suited. Whitest NEWTON spray proved to be quite good. Read a detailed review of bath reducing agents Further.
Preparing the bowl for enameling
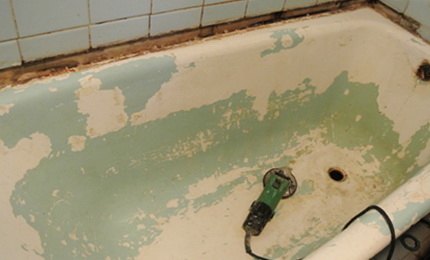
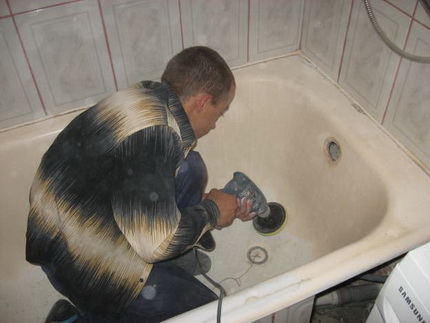
Begin by removing the top glossy enamel layer. For this, the surface will have to be thoroughly treated with an abrasive to remove about 30-50 microns of gloss. For work, you can take sandpaper, abrasive powders or grinder with a grinding wheel. Especially quickly you can get the result using the flap wheel in combination with abrasive paste. The latter can be prepared independently.
To do this, take the laundry soap grated and mix it with abrasive powder for sandblasting in a ratio of 1: 3. Those who know how to restore cast-iron bathtubs, masters recommend taking frayed nickel slags, a fraction of no higher than 0.16-0.18 mm.
The components mix well and fill with water. The paste is aged for about a day. The result is a viscous mass resembling a fairly hard plasticine.
They treat the entire bowl with it and immediately pass through the petal circle. This is done one or two more times until the base becomes rough and dull. Important note: do not completely remove the enamel. If the surface has become noticeably darker, the treatment stops.
After this, the bowl should be thoroughly washed, the overflow and siphon dismantled, the unprocessed areas cleaned and the siphon temporarily put in place.
The next step is degreasing the surface, but chemical etching is best. It makes the coating structure porous, eliminates deep limestone deposits and rust spots. As a result, the new coating lays much better and its service life is significantly extended.
If there are rusty stains on the surface, start by removing them. They are lubricated with special rust solvents, for example Tsinkar or FAS.
Upon completion of the reaction, the stain will blur and turn pale. At this point, it must be washed off with water. It is important to do this before the solution dries, otherwise the rust will remain in the pores of the coating. Etching is carried out in three stages.
First, a 3.5% hydrochloric acid solution is applied to the surface. This operation is performed several times with an interval of 6-7 minutes. After that, the composition is thoroughly washed off and applied bleach, diluted with water to slurry.
The solution is left on the base for 20 minutes, and then washed off. When working with acid and lime, a respirator should be worn; their fumes are toxic. The surface of the bowl is dried with a hairdryer. Then degrease to remove all residual reagents and organics.To do this, a lint-free cloth is impregnated with trichlorethylene, Kalosh gasoline or acetone. The bowl is carefully processed and then dried.
Apply enamel to the bath
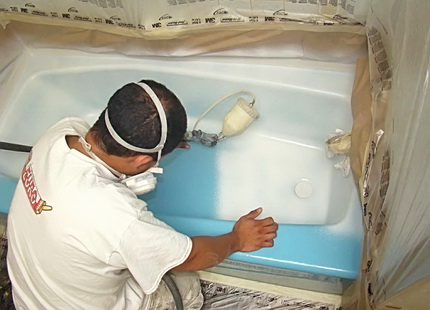
Immediately before painting, wet cleaning should be carried out in the bathroom. This will get rid of dust, which can settle on the surface of dry enamel. In this case, unpleasant rough spots will appear on the glossy layer, which is extremely undesirable. After that, the door to the bathroom should be kept constantly closed or curtained with polyethylene.
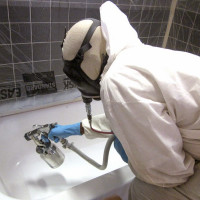
After that, if necessary, the composition for work is prepared. In this case, all manufacturer's instructions should be strictly observed. The finished solution is applied to the surface of the bowl. The easiest way to do this is if you work with a spray gun. Paint is sprayed from a distance of about 30 cm. Cross short strokes are performed. The solution should moisten the surface slightly.
A lot of paint does not need to be applied. The bowl is covered with several layers of the composition. This must be done evenly. The second layer is applied to the first after 15-20 minutes, all subsequent ones are applied at intervals of 30 minutes. After finishing work, the bowl should dry completely. To do this, the door to the bathroom is tightly closed and enter it only after a day. Brush staining is slightly different.
When staining the bath, brush hairs may remain on its surface. They must be removed with a thin needle.
The brush is dipped into the solution, after which it performs several vertical strips. They are rubbed with horizontal strokes. This technique of applying paint allows you to minimize the number of drips. When they appear, you should take a thin brush and carefully pull them up. Some brushes leave hairs on the painted surface. You need to make sure that this is not so.
If nevertheless the hairs remain, they are removed with a needle. The entire surface of the bowl is thoroughly stained. The enamel layer should be even, without any color and stains. After this, you can begin to apply the second layer of the composition. It can be applied “wet” without waiting for the first coat to dry.
The quality of the application is also controlled, if necessary, streaks are stretched. Then the bath is left to dry completely.
Liquid Acrylic Restoration
Not so long ago there was another way to repair a cast-iron bath with your own hands. It consists in applying a layer of liquid acrylic to the bowl. It is also called glass. The peculiarity of this method is that the coating is poured on the sides, and not applied with a roller or brush. A sufficiently thick solution flows down and fills all the bumps and cracks in the base.
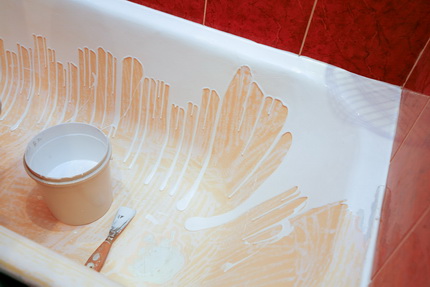
A bath reconstructed in this way obtains the attractive properties characteristic of equipment with an acrylic liner. It also retains heat well, is durable, impact resistant and easy to maintain. The filling bath compares favorably with equipment restored by cold enameling with a perfectly even surface, since acrylic is laid in a thicker layer.
The bulk method can be used for bowls of any shape, which cannot be said about acrylic liners, the range of which is limited to several models. The life of the products after restoration is about 15 years.
A significant drawback of liquid acrylic is the long drying period, it takes from 1 to 4 days. In addition, nothing should get onto the acrylic surface during the drying process. Even a dropped drop of water will leave an indelible mark.
How to choose bulk acrylic for a bath can be found in this stuff.
Instructions for applying liquid acrylic
Preparatory work in this case will be similar to preparing the bathtub for cold enameling. At the end, the binding is necessarily removed and a container is placed under the drain hole into which excess acrylic will drain. The composition is prepared for work strictly according to the instructions.
If it is assumed that the bath will not be white, but colored, tinting paste is added to the glass and mixed well.
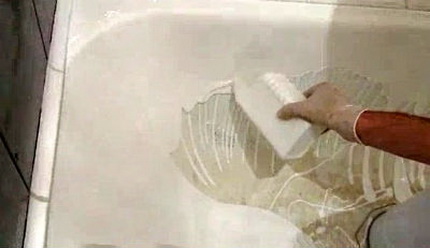
The finished mixture is poured into a small container and set to work. Acrylic is poured into a thin strip on the side of the bathtub and pushed with a spatula under the edge of the tile. The composition is poured in a moderate stream so that the thickness of the bulk layer is about 4-6 mm. Stakril should drain approximately to the middle of the bowl. The stream of solution is slowly moved along the sides of the bath until the circle closes.
Masters recommend that you do not take long breaks and work quickly enough. After the first round is completed, acrylic is poured from the middle of the bowl. Moving in a spiral, gradually cover the entire surface of the bath.
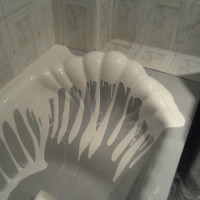
Excess composition drains into the drain hole. Emerging influxes can not be touched. When dried, they will straighten out on their own. At the end of the work, the bath is left until the coating completely dries. Detailed instructions for liquid acrylic restoration can be found in this article.
Conclusions and useful video on the topic
The videos below discuss in detail different ways to restore a cast-iron bathtub.
How to install the acrylic liner:
Restoration of the bath by the filling method:
Cold enamel bowl:
Having lost its attractive appearance, a cast-iron bathtub can be brought back to life. This will cost much less than dismantling old equipment and installing new ones. You need to choose one of three methods of restoration and, strictly following the instructions, carry out all the work. The updated bath will please with whiteness and will last long enough, and when it becomes unusable again, the procedure can be repeated.
Have questions about the topic of the article? Or maybe you yourself have restored a cast-iron bath? Please tell our readers what method of restoration you have chosen, are you satisfied with the result? Leave your comments, upload photos, share experiences in the block below.

 How and how to paint a cast-iron bath: an overview of the best restoration methods
  How to wash a cast-iron bath without damaging enamel: a review of folk recipes and the best purchased products
 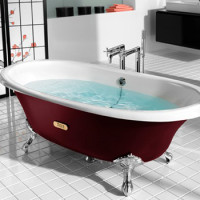 How to choose a cast-iron bathtub: valuable tips for choosing plumbing fixtures from cast iron
  Restoration of bathtubs with liquid acrylic: how to properly cover the old bathtub with new enamel
  How and which bath is best to choose: an overview of options and recommendations for choosing
  How to choose a steel bath: what to look at when choosing + manufacturers overview
  How much does it cost to connect gas to a private house: the price of organizing gas supply
  The best washing machines with dryer: model rating and customer tips
  What is the color temperature of light and the nuances of choosing the temperature of the lamps to suit your needs
  Replacement of a geyser in an apartment: replacement paperwork + basic norms and requirements
The easiest way to update an old cast-iron bath for me was a cold enamel. Acrylic liner did not find the right size. I did not apply liquid acrylic because of fears that I would not be able to get a beautiful uniform coating. Restored with a spray gun and enamel Reaflex 50. Everything turned out fine and quickly. Only the preparation process itself is very time-consuming, while the old enamel was torn off, degreased, glued with a film everything that does not need to be painted, it got wet. And she dried for a long time. It’s good that it was summer, and there is a summer shower. But the bath is like new.
In the grandmother’s old apartment, the bathtub fell into disrepair, but we still did not know about the existence of acrylic liners. Or maybe they weren’t then, so they cleaned them as best they could with the help of sandpaper and chemicals. Processed, degreased and painted with ordinary enamel. After some time, an acrylic liner was installed. Grandma is very happy, the water is now cooling slowly.